Installation Best Practices for All Types of Wood in Building
Master installation best practices for all types of wood. Expert specs for moisture acclimation, framing shrinkage, flooring fasteners, and decking.

The Physics of Wood: Why Installation Fails
Wood is an anisotropic material, meaning its physical properties change depending on the direction of the grain. When installing all types of wood—from structural softwood framing to tropical hardwood decking—failure almost always traces back to ignoring hygroscopic movement. Wood absorbs and releases moisture to reach Equilibrium Moisture Content (EMC) with its environment. According to the USDA Forest Products Laboratory, tangential shrinkage (parallel to the growth rings) is typically twice as great as radial shrinkage (perpendicular to the rings), while longitudinal shrinkage (along the grain) is negligible. Mastering installation requires engineering for this differential movement.
Universal Acclimation & Moisture Protocols
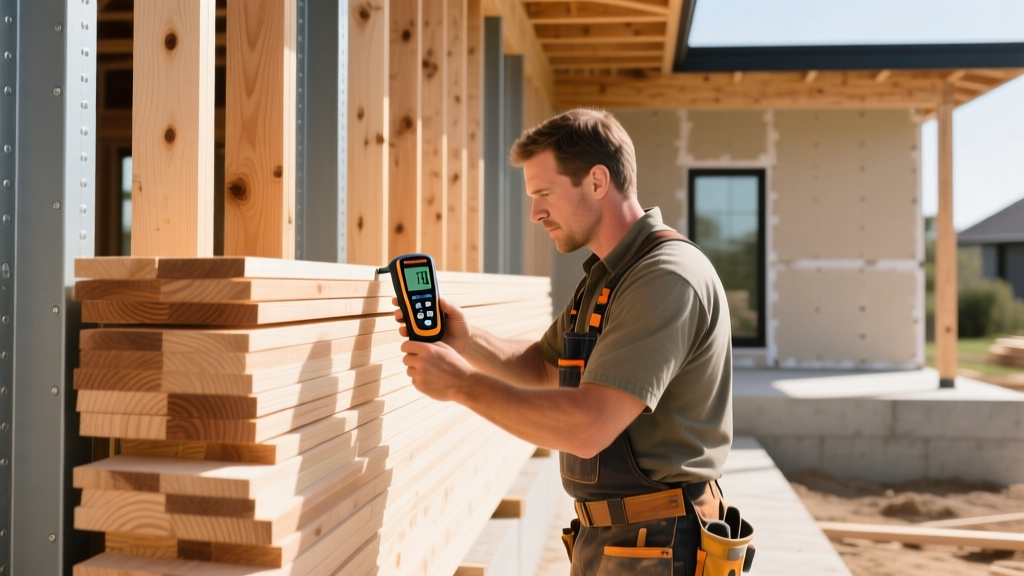
Before any fastener is driven or adhesive is troweled, strict moisture parameters must be met. Use a pin-type moisture meter (such as the Wagner Orion 910 or Delmhorst J-2000) to verify readings.
- Interior Flooring (Solid Hardwood): Target MC of 6% to 9%. The wood subfloor must be within 2% MC of the flooring. For concrete subfloors, perform an ASTM F2170 Relative Humidity test; RH must not exceed 75% for most urethane adhesives.
- Interior Engineered Wood: Target MC of 6% to 9%. Concrete subfloor RH must not exceed 85% (check specific adhesive manufacturer limits, such as Mapei or Bona).
- Structural Framing Lumber: Kiln-dried (KD) lumber is typically milled at 19% MC but will equilibrate to 8%-14% in a framed, enclosed structure. Install with the understanding that a 2x10 joist will shrink approximately 1/4-inch across its width.
- Exterior Decking: Target MC of 12% to 15%. Air-dried tropical hardwoods (like Ipe or Cumaru) should be installed at their delivered MC, with gap spacing calculated based on local seasonal humidity swings.
Solid & Engineered Wood Flooring Installation
The National Wood Flooring Association (NWFA) mandates specific subfloor tolerances: 3/16-inch over a 10-foot radius for solid wood, and 1/8-inch over a 6-foot radius for engineered wood. Subfloor prep is non-negotiable.
Fastening Solid 3/4-Inch Hardwood
Blind-nail or staple the flooring at a 45-degree angle through the tongue. Use 15-gauge or 16-gauge cleats/staples measuring 1.5 to 2 inches in length. Fasteners must be placed every 8 to 10 inches along the board, and no closer than 3 inches from the board ends. For the first and last rows where pneumatic nailers cannot reach, face-nail using 15-gauge finish nails, pre-drilling to prevent splitting, and set the heads below the surface.
Glue-Down Engineered Wood over Concrete
When installing engineered wood over below-grade or on-grade concrete, a vapor retarder is critical. If the concrete RH exceeds the adhesive's limit, apply a liquid-applied moisture barrier (like Bona RedOut or Mapei Primer PU) before troweling the adhesive. Use a 3/16-inch V-notch trowel for urethane adhesives, maintaining 100% adhesive coverage on the back of the board to prevent hollow spots and telegraphing.
Structural Softwood Framing: Managing Shrinkage
Framing lumber—primarily Spruce-Pine-Fir (SPF), Douglas Fir, and Southern Yellow Pine (SYP)—dictates the structural skeleton of a building. The primary installation challenge is managing cross-grain shrinkage as the lumber dries from its initial 19% MC down to interior equilibrium.
| Lumber Species | Tangential Shrinkage (Green to Oven-Dry) | Best Fastener Type | Critical Installation Note |
|---|---|---|---|
| SPF (Spruce-Pine-Fir) | 7.0% - 7.5% | Smooth shank common nails | Prone to twisting; install blocking immediately to maintain plumb walls. |
| Douglas Fir-Larch | 7.6% - 8.0% | Ring shank nails or structural screws | High density; pre-drill near ends to prevent splitting during nailing. |
| Southern Yellow Pine | 7.5% - 8.5% | Hot-dipped galvanized (if treated) | High shrinkage rate; use slotted holes in hurricane ties for vertical movement. |
Exterior Decking & Tropical Hardwoods
Installing exterior decking, particularly high-density tropical hardwoods like Ipe (Janka hardness 3,680 lbf) and Cumaru (3,540 lbf), requires specialized tooling and techniques. Standard steel bits will dull after a few holes; use carbide-tipped drill bits and saw blades.
Hidden Fastener Systems vs. Face Screwing
For grooved decking boards, hidden fastener systems (such as Tiger Claw or Eb-Ty) provide a clean aesthetic and allow for lateral movement. When installing, maintain a 1/8-inch to 3/16-inch gap between boards. If the wood is installed at a higher MC (e.g., 14%), reduce the gap to 1/16-inch to allow for future shrinkage without the gaps becoming excessively wide in winter.
End-Grain Sealing
Tropical hardwoods lose moisture through the end grain up to 50 times faster than through the face grain. Unsealed cuts will check and split within weeks. Apply a wax-based end sealer (like Anchorseal) to every cut end within 24 hours of making the cut. This is a mandatory step for warranty compliance on most premium decking brands.
Fastener Corrosion and Wood Tannins
The chemical composition of wood directly impacts fastener longevity. Woods high in tannins and acids (like Cedar, Redwood, and Oak) will corrode standard steel and even electroplated zinc fasteners, leaving black streaks on the wood face and compromising structural integrity.
- Cedar & Redwood: Use hot-dipped galvanized (G185 coating) or 304-grade stainless steel. Never use aluminum fasteners, as the acidic extractives will cause rapid galvanic corrosion.
- Tropical Hardwoods (Ipe, Teak): Use 305 or 316 marine-grade stainless steel. The high density of the wood creates immense withdrawal resistance, and the natural oils can degrade lesser metal coatings.
- Pressure-Treated Lumber (ACQ, Copper Azole): The copper in modern preservatives is highly corrosive to plain steel and aluminum. The American Wood Council (AWC) strictly requires hot-dipped galvanized (ASTM A153, Class D) or stainless steel fasteners for all treated lumber connections.
Frequently Asked Questions
Can I install solid hardwood flooring over a radiant heat system?
It is highly discouraged. Solid hardwood is prone to severe cupping and gapping when subjected to the rapid, localized temperature changes of radiant heat. If wood flooring is required over radiant heat, use quarter-sawn engineered wood, which is dimensionally stable, and ensure the surface temperature of the floor never exceeds 80°F (27°C).
How do I prevent squeaks in a wood-framed subfloor?
Squeaks are caused by friction between the subfloor panel and the joist. Apply a continuous 1/4-inch bead of polyurethane construction adhesive (like Loctite PL Premium) along the top of every joist before laying the subfloor panels. Fasten the panels using ring-shank nails or structural screws (like Simpson Strong-Drive WSV) rather than smooth-shank nails, which back out over time as the joists shrink.
What is the maximum allowable moisture content for installing interior trim?
Interior trim and millwork should be installed at an MC of 6% to 8%. If installed at higher moisture levels (e.g., 12%), the trim will shrink as the home's HVAC system dries the air in winter, resulting in open miter joints and visible caulk lines at the coping.
Written by
David NakamuraDavid Nakamura is a licensed architect (AIA) and construction technology writer focused on sustainable building methods, mass timber engineering, and high-performance building envelopes. He holds a Master of Architecture from the University of Washington and is a certified Passive House Consultant (CPHC). David spent eight years at the Seattle firm Mithun, where he led the design of three LEED Platinum projects, before founding his own practice specializing in net-zero residential design. He serves on the editorial advisory board of GreenBuilder Magazine and has authored peer-reviewed papers on cross-laminated timber (CLT) connections for the Journal of Structural Engineering. In his spare time, David teaches woodworking at Pratt Fine Arts Center and kayaks the Puget Sound.
More from David Nakamura
View all
Construction Cost
Labor Cost to Build a Deck Per Sq Ft: 2026 Installation Guide
Discover the exact labor cost to build a deck per sq ft in 2026. This installation guide breaks down contractor rates, complexity factors, and hidden fees.
Aug 4, 2026

Construction Cost
How Much Does It Cost to Build a 3 Bedroom House? Financing Guide
Learn exactly how much it costs to build a 3 bedroom house and explore 2026 financing options, construction loan types, and budget frameworks for your build.
Aug 4, 2026

Construction Cost
Cost to Build a Tennis Court: 2026 Guide
How much does it cost to build a tennis court in 2026? Breakdowns for asphalt, concrete, and synthetic surfaces plus fencing and lighting.
Jul 30, 2026