Installation Best Practices for Different Types of Maple Wood
Master installation best practices for different types of maple wood. Learn specific fastening, acclimation, and finishing techniques for hard, soft, and figured maples.

Maple is a cornerstone of North American construction, cabinetry, and flooring, prized for its pale hue, fine texture, and exceptional durability. However, treating all maples identically during installation is a primary cause of project failure. The term 'maple' encompasses a wide botanical and mechanical spectrum, ranging from the ultra-dense Sugar Maple to the much softer Silver Maple. Understanding the specific mechanical properties, moisture dynamics, and finishing quirks of the different types of maple wood is non-negotiable for professional installers and advanced DIYers.
The Maple Spectrum: Hard vs. Soft vs. Figured
Before driving a single fastener, you must correctly identify the specific maple species you are installing. The commercial lumber market broadly categorizes maple into 'Hard Maple' and 'Soft Maple,' but the reality is more nuanced. Hard maple primarily refers to Sugar Maple (Acer saccharum), while soft maple is an umbrella term that includes Red Maple, Silver Maple, and Bigleaf Maple. Figured maples (Birdseye, Curly, Quilted) are typically genetic variations of Hard Maple.
| Maple Type | Janka Hardness (lbf) | Specific Gravity | Primary Installation Applications |
|---|---|---|---|
| Hard Maple (Sugar) | 1,450 | 0.63 | Heavy-traffic flooring, bowling alleys, workbench tops |
| Soft Maple (Red) | 950 | 0.54 | Painted cabinetry, interior millwork, furniture |
| Silver Maple | 700 | 0.44 | Non-structural interior trim, lightweight furniture |
| Figured Maple (Curly/Birdseye) | 1,450+ | 0.63+ | High-end veneers, custom accent walls, instrument building |
According to The Wood Database, Hard Maple's Janka rating of 1,450 lbf makes it roughly 25% harder than Red Oak. This extreme density dictates entirely different fastening and machining protocols compared to Soft Maple, which machines more like Cherry or Walnut.
Acclimation and Moisture Management Protocols
Maple is notoriously reactive to environmental humidity shifts. Hard Maple has a tangential shrinkage rate of 9.9% and a radial shrinkage rate of 4.8%. This T/R ratio of 2.1 means it is relatively stable compared to species like Hickory, but its high density means that when it does move, it exerts tremendous force, capable of buckling floorboards or splitting cabinet joints.
Step-by-Step Acclimation Framework
- Climate Control First: Ensure the building's HVAC system has been running for at least 5 days prior to delivery. Interior relative humidity (RH) should be stabilized between 35% and 55%.
- Stack and Sticker: Break the factory bundles. 'Sticker' the boards by placing 1/2-inch thick wooden spacers between every other layer to allow 360-degree air circulation.
- Measure Accurately: Use a pinless moisture meter (such as the Wagner Meters Orion 910) calibrated to maple's specific gravity (0.63 for hard, 0.54 for soft). Target an equilibrium moisture content (EMC) of 6% to 8% for most North American climate-controlled interiors.
- Timeframe: Expect 7 to 14 days of acclimation for 3/4-inch solid maple. Engineered maple plies may require only 3 to 5 days.
Fastening and Machining: Overcoming Maple's Density
The high silica content and dense cellular structure of Hard Maple cause rapid tool wear and make mechanical fastening highly prone to splitting and burn marks.
Pre-Drilling and Fastener Selection
When face-nailing or screwing into Hard Maple, pre-drilling is mandatory if you are within 1 inch of a board end or working with stock thicker than 3/4 inch. For 15-gauge finish nails, pre-drill with a 3/32-inch bit. For structural screws, use a stepped drill bit that matches the screw's root diameter.
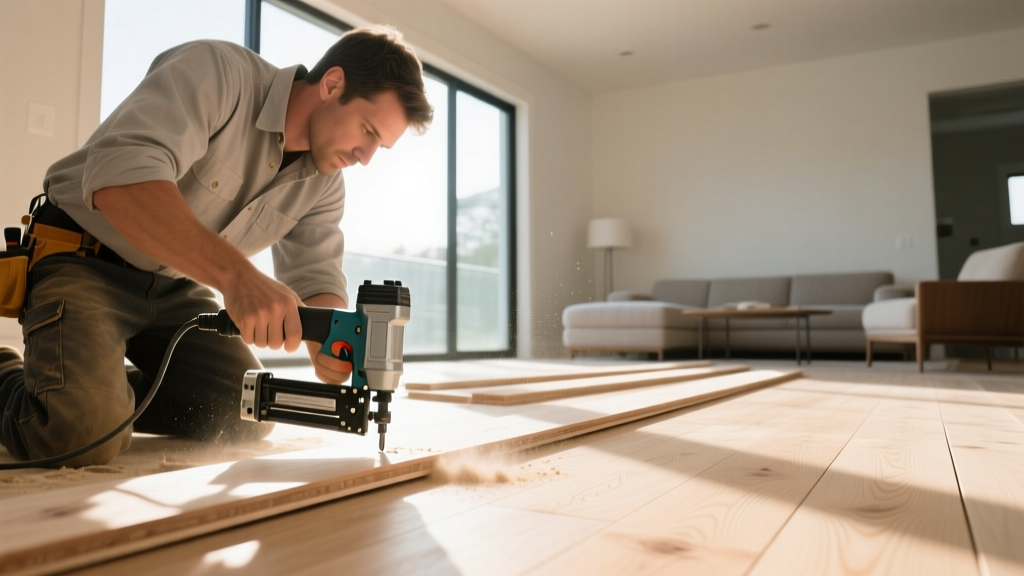
For maple flooring installation, blind-nailing through the tongue requires precise pneumatic pressure. Set your flooring nailer compressor between 90 and 110 PSI. If the pressure is too low, the cleat will not seat fully below the surface; attempting to punch a protruding 16-gauge cleat into Hard Maple will crush the surrounding fibers, leaving a permanent, un-sandable depression.
Preventing Tear-Out and Burn Marks
Maple burns easily when routed or cross-cut due to friction. To prevent scorch marks during trim installation or custom milling:
- Saw Blades: Use an 80-tooth or 90-tooth Alternate Top Bevel (ATB) carbide blade. Ensure the blade is perfectly clean; pitch buildup on the teeth generates immense heat, instantly burning maple.
- Router Bits: Use carbide-tipped bits with a shear-cut angle. Maintain a steady, continuous feed rate. Stopping the router mid-pass on maple will leave a permanent black burn mark that requires aggressive sanding to remove.
- Figured Maple Tear-Out: Birdseye and Curly maple have wild, interlocking grain that tears out severely when planed. Always use a helical cutterhead or take passes of no more than 1/64-inch depth, and consider dampening the surface slightly with water before the final pass to soften the fibers.
The Finishing Challenge: Preventing Blotchiness
The most infamous characteristic of the different types of maple wood is their finishing behavior. Maple has a tight, closed grain with dense latewood and porous earlywood patches. When liquid penetrating stains are applied, the stain absorbs unevenly, resulting in severe, ugly blotching.
'Never apply a standard liquid oil stain directly to raw Hard Maple unless you specifically want a mottled, rustic appearance. For a uniform color, you must alter the wood's surface tension or use a topical colorant.' — Professional Finishing Standards
The Professional Staining Protocol
If your design requires colored maple, follow this exact sequence to guarantee uniform absorption:
- Sand to 150 Grit: Do not sand maple past 150 grit before staining. Sanding to 220 or higher burnishes the dense surface, closing the microscopic pores entirely and preventing any stain penetration.
- Apply a Washcoat or Conditioner: Apply a pre-stain wood conditioner, or better yet, spray a 'washcoat' of 1-lb cut dewaxed shellac (such as Zinsser Bulls Eye SealCoat diluted 50/50 with denatured alcohol). This partially seals the ultra-porous earlywood patches while leaving the dense latewood open.
- Use Gel Stains: Gel stains (like General Finishes Gel Stain) sit on top of the wood fibers rather than penetrating deeply. They rely on urethane resins to bind the pigment to the surface, entirely bypassing maple's uneven absorption rates.
Clear Coat Best Practices
For natural, unstained maple, the goal is to preserve its bright, creamy white color. Traditional oil-based polyurethanes contain ambering oils that will turn maple yellow or orange over time. Always specify a high-quality, water-based two-component polyurethane (such as Bona Traffic HD or Basic Coatings StreetShoe). These commercial-grade waterborne finishes cure clear, provide exceptional abrasion resistance for flooring, and will not alter the wood's natural pale aesthetic.
Troubleshooting Common Maple Installation Failures
Even with meticulous planning, field conditions can introduce variables that compromise the installation. Use this diagnostic matrix to identify and resolve common maple-specific failures.
| Symptom | Root Cause | Corrective Action |
|---|---|---|
| Black halos around fasteners | Iron in standard steel nails reacting with trace tannins and moisture in the wood. | Switch to stainless steel or polymer-coated fasteners. Sand out existing stains using oxalic acid wood bleach. |
| End-grain splitting during nailing | Driving fasteners too close to the board end without blunting the nail tip. | Keep fasteners at least 3/4 inch from board ends. Blunt the tip of the nail with a hammer before driving to punch through fibers rather than wedge them apart. |
| Flooring 'cupping' at the edges | Moisture imbalance; the bottom of the board is absorbing more moisture than the top face. | Identify and eliminate the moisture source (e.g., crawl space humidity, concrete slab vapor emission). Do not sand the floor flat until moisture readings stabilize across the board's thickness. |
| Glue joint failure in cabinetry | Using standard PVA wood glue on highly figured or oily maple variants without surface prep. | Wipe joints with denatured alcohol prior to gluing to remove surface oils. Use a Type I waterproof PVA (like Titebond III) or a two-part epoxy for high-stress structural joints. |
Mastering the installation of the different types of maple wood requires abandoning a one-size-fits-all mentality. By respecting the specific density, moisture dynamics, and finishing limitations of your exact maple variant, you ensure a structurally sound and visually flawless result that will endure for decades.
Written by
Marcus ChenMarcus Chen is a licensed structural engineer (PE) and building materials analyst with over 12 years of experience across residential, commercial, and industrial construction. He holds a Master of Science in Civil Engineering from UC Berkeley and spent six years at Thornton Tomasetti before transitioning to independent consulting and technical writing. Marcus specializes in material selection for seismic-prone regions, concrete reinforcement strategies, and lifecycle cost analysis. His work has been cited by the American Concrete Institute (ACI) and the Structural Engineers Association of California (SEAOC). When he is not on a job site or at his desk, you will find him hiking the Sierra Nevada or restoring a 1920s craftsman bungalow in Oakland, CA.
More from Marcus Chen
View all
Construction Cost
How Much Did the Eiffel Tower Cost to Build?
How much did the Eiffel Tower cost to build in 1889? We adjust for inflation and compare its budget to modern skyscraper construction.
Aug 4, 2026

Fire Resistance
What Is a Fire Resistant Material? Testing & Certification Guide
Discover what is a fire resistant material through ASTM and UL testing. Learn how fire ratings, certifications, and assemblies work in construction.
Aug 4, 2026

Construction Cost
How Much Did the Burj Khalifa Cost to Build?
How much did the Burj Khalifa cost to build? We break down the $1.5B project and extract 5 money-saving strategies for your next build.
Jul 30, 2026