Sealing Different Types of Joints Wood: Moisture and Decay Defense
Learn how moisture traps in different types of joints wood structures accelerate decay, and discover specific preservation treatments to extend lifespan.

The Physics of Joinery Decay in Timber Structures
When analyzing the different types of joints wood structures rely on, it becomes evident that joinery represents the most critical vulnerability in any timber assembly. While the side grain of a properly milled timber sheds water effectively, the geometric cuts required to create interlocking joints expose the highly porous end-grain. End-grain absorbs moisture up to 50 times faster than side-grain due to capillary action through the xylem vessels. Once moisture penetrates these joint interfaces, it creates a microclimate ideal for wood-decaying fungi, which require a moisture content above 20% to colonize.
Effective preservation requires moving beyond surface-level coatings. Modern timber framing and structural carpentry demand a targeted approach to chemical retention, end-grain encapsulation, and physical moisture management tailored to the specific geometry of the joint.
Capillary Wicking and Concealed Moisture Traps
In a mortise and tenon joint, the interior walls of the mortise pocket are entirely end-grain or quarter-sawn surfaces that are shielded from UV light and airflow. If untreated, ambient humidity condenses in these pockets during seasonal temperature shifts. According to USDA Forest Products Laboratory wood preservation guidelines, concealed joints that lack adequate chemical diffusion will begin to show internal brown rot degradation within 5 to 7 years in high-humidity climates, long before the exterior timber shows any signs of distress.
Preservation Challenges by Joint Geometry
Not all joinery presents the same decay risk. The table below breaks down the specific vulnerabilities of common structural joints and the required preservative strategies.
| Joint Type | Primary Moisture Risk | Failure Mode | Recommended Preservative Strategy |
|---|---|---|---|
| Mortise and Tenon | Water pooling in the bottom of the mortise pocket. | Internal softening of the tenon base; peg shear failure. | Pre-assembly borate diffusion treatment; epoxy sealing of mortise walls. |
| Dovetail (Tension) | Horizontal top surfaces trap standing water and debris. | Top-down checking and fungal colonization along the interlocking shoulders. | Sloped shoulder cuts; brush-on Copper Azole (CA-C) on horizontal planes. |
| Scarf Joint | Capillary wicking along the long-grain glue line or mechanical seam. | Delamination and moisture ingress behind the joint face. | Continuous bead of elastomeric polyurethane sealant; borate rod insertion. |
| Lap Joint (Half-Lap) | Large face-to-face contact area traps moisture if tolerances are loose. | Warping, differential shrinkage, and fastener corrosion. | Vapor-permeable water repellent; hot-dipped galvanized fasteners only. |
| Butt Joint (Doweled) | Drilled holes expose deep, untreated end-grain to the elements. | Radial checking around dowels; localized rot at the fastener interface. | Injectable copper naphthenate into dowel holes prior to assembly. |
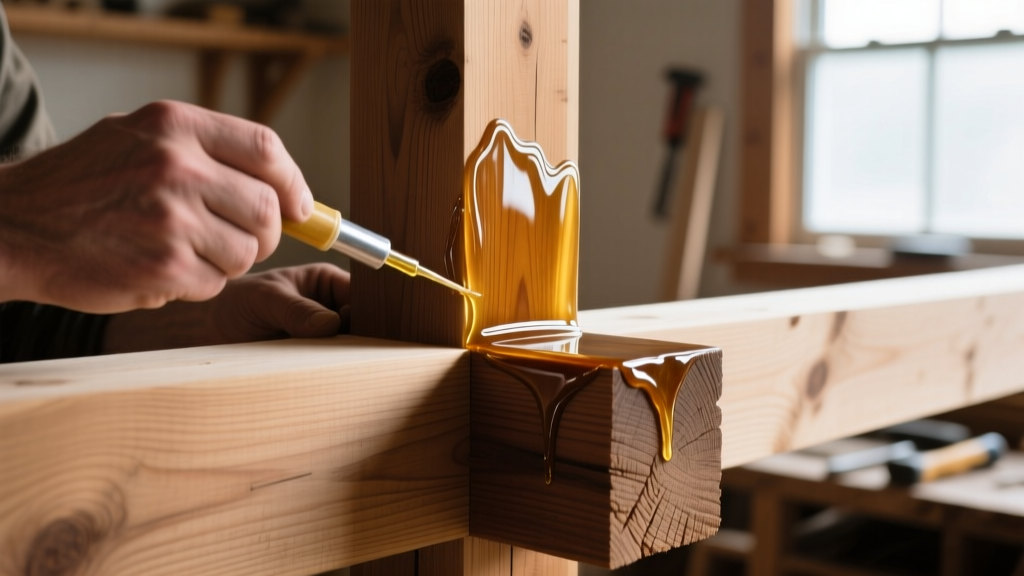
Advanced Chemical Protocols for Structural Joinery
Selecting the correct chemical preservative depends on whether the joint is interior, exterior, ground-contact, or concealed. The American Wood Protection Association (AWPA) standards dictate specific retention levels for these scenarios, but field application requires specialized techniques for joinery.
Borate Diffusion for Concealed Joinery
Disodium Octaborate Tetrahydrate (DOT) is the gold standard for treating interior or protected structural joints. Borates are water-soluble, meaning they can diffuse deeply into wood with high moisture content. For timber frame mortise pockets, applying a 40% DOT glycol solution 48 hours before assembly allows the chemical to migrate up to 1.5 inches into the end-grain. Once the timber dries below 20% moisture content, the borate crystallizes, rendering the joint toxic to termites and decay fungi while remaining completely safe for human contact.
Epoxy Encapsulation for Exposed End-Grain
For exterior joints where moisture exposure is inevitable, chemical preservatives alone are insufficient. Clear Penetrating Epoxy Sealer (CPES) is a low-viscosity, solvent-thinned epoxy that wicks deeply into end-grain capillaries before curing. Applying two coats of CPES to the tenon cheeks and the interior mortise walls creates an impermeable physical barrier. Unlike standard film-forming varnishes that peel and trap moisture behind the film, CPES consolidates the wood fibers at a cellular level, stabilizing the joint against differential shrinkage and swelling.
If you are utilizing Alkaline Copper Quaternary (ACQ) or Copper Azole (CA-C) preservatives on exterior joints, you must strictly avoid standard zinc-plated or aluminum fasteners. The high alkalinity and copper content in these preservatives will cause rapid galvanic corrosion of standard metals, leading to catastrophic joint failure. Always specify Type 304 or Type 316 stainless steel dowels, plates, and structural screws for chemically treated timber joinery.
Design Modifications to Enhance Joint Longevity
Chemical treatments must be paired with intelligent physical design. The EPA regulations on wood preservatives emphasize that reducing moisture accumulation through design is the first line of defense, reducing the reliance on heavy chemical applications.
Drip Kerfs and Sloped Shoulders
Any horizontal surface in an exterior wood joint will accumulate water. When cutting dovetail or scarf joints for exterior timber framing, always incorporate a 5-degree slope on horizontal shoulders to encourage immediate water runoff. Additionally, cutting a 1/4-inch deep drip kerf on the underside of any overhanging joint member breaks the surface tension of water, forcing it to drip off rather than wicking backward into the joint interface via capillary action.
Tolerance and Ventilation Gaps
A common mistake in timber framing is cutting joints too tightly. While a friction-fit joint is structurally satisfying, it leaves no room for seasonal wood movement or moisture evacuation. Leaving a deliberate 1/16-inch ventilation gap at the base of a mortise pocket allows trapped condensation to evaporate. This gap should be sealed on the exterior face with a breathable, elastomeric sealant that prevents liquid water ingress while allowing water vapor to escape from the joint interior.
Maintenance and Inspection Frameworks
Even the most rigorously treated wood joints require systematic inspection. Implement the following bi-annual maintenance protocol to ensure joint integrity:
- Moisture Meter Profiling: Use a pin-type moisture meter with deep-insulation probes to test the moisture content directly inside mortise pockets and scarf seams. Readings consistently above 18% indicate a failed seal or active leak.
- Percussion Testing: Tap the timber immediately adjacent to the joint with a brass-headed mallet. A dull, hollow thud indicates internal void formation or early-stage brown rot, necessitating immediate borate rod insertion.
- Sealant Adhesion Check: Inspect all elastomeric sealant beads at joint interfaces. UV degradation causes micro-cracking after 3 to 5 years. Peel back any failing sealant, clean the substrate with denatured alcohol, and reapply a high-performance polyurethane sealant.
- Fastener Torque Verification: Differential shrinkage in lap and butt joints can cause structural bolts to loosen. Re-torque all mechanical fasteners to the manufacturer's specified foot-pounds every 24 months to maintain joint clamping force and prevent moisture infiltration through the bolt holes.
By understanding the unique fluid dynamics and structural geometry of different types of joints wood assemblies utilize, builders can transition from reactive repairs to proactive, multi-decade preservation strategies. Combining cellular-level epoxy encapsulation, targeted borate diffusion, and intelligent water-shedding geometries ensures that the joinery remains the strongest link in the structure, rather than its point of failure.
Written by
Sarah WhitfieldSarah Whitfield is a chartered quantity surveyor (MRICS) and construction cost analyst with 15 years of experience in material pricing, procurement strategy, and project budgeting. She earned her degree in Construction Management from the University of Reading (UK) and has worked on projects ranging from $2M custom homes to $180M mixed-use developments across North America and Europe. Sarah currently leads cost estimating for BuildMat Insight, maintaining a proprietary database of 4,000+ material price points updated quarterly. She is a frequent contributor to RSMeans cost data panels and has presented at the International Cost Engineering Council (ICEC) congress. Based in Denver, CO, Sarah is an avid trail runner and volunteer mentor for Women in Construction.
More from Sarah Whitfield
View all
Wood & Lumber
What Are the Different Types of Wood? A Builder's Guide
Compare structural softwoods, finish hardwoods, and engineered lumber. Analyze Janka ratings, MOE values, and 2026 pricing for construction.
Aug 4, 2026

Walls & Panels
Steel Framing vs Wood Framing: Corrosion and Moisture Defense
Compare steel framing vs wood framing for moisture resistance. Learn about galvanized coatings, condensation risks, and corrosion protection strategies.
Jul 21, 2026

Stone & Masonry
How to Cut Stone Veneer: Wet Saw vs Grinder Comparison
Compare the best tools for cutting stone veneer. We review wet saws, angle grinders, and chop saws to help you achieve clean, chip-free cuts.
Jul 21, 2026