What Type of Wood Are Baseball Bats Made From? Wood Species & Finishing
Discover what type of wood baseball bats are made from, comparing maple, ash, and birch, plus expert best practices for installing finishes and grips.

The Core Question: What Type of Wood Are Baseball Bats Made From?
When custom bat makers, coaches, and players ask what type of wood are baseball bats made from, the answer requires looking past basic species names into the structural grading, moisture equilibrium, and surface installation practices that dictate a bat's performance. Unlike construction lumber graded for static load-bearing, baseball bat billets are graded for dynamic impact resistance, flex modulus, and cellular density.
Professional and high-level amateur bats are almost exclusively turned from three hardwood species, each offering a distinct energy transfer profile upon ball contact. The selection of the wood species directly dictates how the bat maker must install the protective finish and handle grip, as the cellular structure of each wood reacts differently to coatings and friction.
Wood Species Comparison Matrix
| Wood Species | Janka Hardness (lbf) | Flex Profile | Finish Installation Requirement | Best Player Profile |
|---|---|---|---|---|
| Rock Maple (Acer saccharum) | 1,450 | Stiff / Low Flex | Requires pore-sealing primer before polyurethane | Power hitters seeking maximum energy transfer |
| Northern White Ash (Fraxinus americana) | 1,320 | High Flex / Forgiving | Absorbs penetrating oils well; minimal sealing needed | Contact hitters preferring feedback and flex |
| Yellow Birch (Betula alleghaniensis) | 1,260 | Balanced / Medium Flex | Requires moisture-barrier finish to prevent flaking | Transitioning players moving from ash to maple |
Data sourced from The Wood Database and USDA Forest Products Laboratory mechanical testing standards.
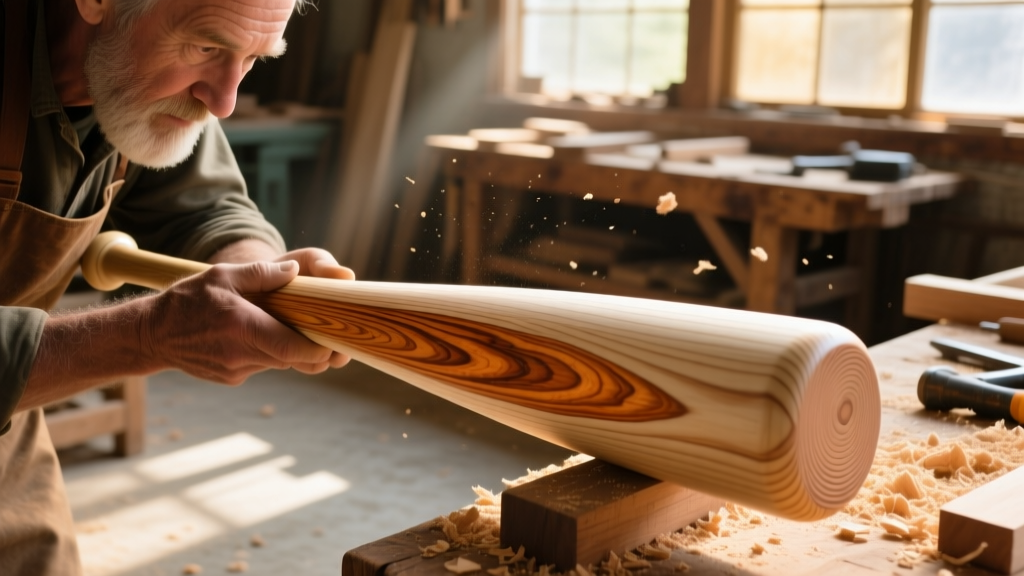
Billet Preparation and Moisture Installation
Before any finish or grip can be installed, the wood billet must achieve the correct Equilibrium Moisture Content (EMC). According to the USDA Forest Products Laboratory Wood Handbook, hardwoods intended for high-impact sporting goods must be kiln-dried to an EMC between 6% and 8%.
If a bat maker installs a polyurethane finish over a billet with an EMC above 10%, the trapped moisture will attempt to off-gas, resulting in microscopic blistering and catastrophic finish peeling during high-velocity impacts. Billets should be acclimated in a climate-controlled turning room (maintained at 70°F and 35% relative humidity) for a minimum of 14 days prior to CNC turning and finish installation.
For maple and birch bats, Major League Baseball mandates an 'ink dot test' to verify the slope of grain. A drop of ink is placed on the handle; the capillary action draws the ink along the wood's vascular rays. The grain slope must not deviate more than 3 degrees from the bat's longitudinal axis. Bats failing this test are prone to shear failure (shattering into sharp projectiles) and are barred from professional installation and use.
Surface Preparation and Bone Rubbing
Historically, ash bats were left raw or lightly oiled. Modern maple and birch bats require a compressed surface to prevent denting. Before installing the liquid finish, custom bat makers perform a 'bone rubbing' technique to compress the outer wood fibers.
- Sand to 320-Grit: Progressively sand the turned bat using aluminum oxide paper (120, 220, then 320 grit). Do not exceed 320 grit, as overly polished wood prevents finish adhesion.
- Burnish the Barrel: Using a hardened steel rod or a polished, dense beef femur bone, apply 40-50 lbs of lateral pressure while the bat spins on the lathe at 400 RPM.
- Close the Pores: This friction-generated heat and pressure crushes the open pores of the maple or birch, increasing surface density by up to 12% and creating a glass-like substrate for the finish installation.
- Tack Cloth Wipe: Remove all micro-dust using a lint-free tack cloth dampened with mineral spirits. Allow 10 minutes for flash-off.
Installing the Finish: Polyurethane vs. Penetrating Oils
The choice of finish installation depends entirely on the wood species selected. Ash, with its open, porous grain structure, benefits from penetrating finishes. Maple and birch, which feature closed, tight grain patterns, require surface-building film finishes.
Installing a Water-Based Polyurethane Film (For Maple & Birch)
Water-based polyurethanes (such as Varathane Crystal Clear or specialized bat-dipping solutions) are the industry standard for maple. They cure hard, resist ball scuffing, and do not yellow over time.
- Application Method: Dip-coating is vastly superior to spraying for baseball bats. Suspended by the knob, the bat is slowly lowered into a PVC tube filled with the polyurethane solution at a rate of 1 inch per second.
- Withdrawal Rate: Pull the bat out at 0.5 inches per second to ensure an even mil-thickness without drips.
- Curing Environment: Hang in a dust-free booth at 75°F. Water-based polys require 4 hours to tack-free, but full cross-linking (curing) takes 7 days. Installing a grip or taking hacks in a cage before day 7 will result in immediate finish delamination.
Installing Penetrating Oil (For Ash)
Northern White Ash has large, open vascular pores. Installing a film finish on ash often leads to flaking because the wood flexes significantly upon impact, cracking the rigid surface film. Instead, install a polymerized linseed oil or tung oil blend.
- Flood Coat: Apply a heavy coat of boiled linseed oil, allowing the open ash pores to wick the oil deep into the cellular structure for 20 minutes.
- Wipe and Burnish: Wipe off excess with a clean cotton rag, then use a wool cloth to vigorously burnish the surface, generating friction heat to accelerate polymerization.
- Recoat: Repeat this installation process three times, allowing 24 hours of oxidation between coats.
Grip and Handle Installation Best Practices
The handle installation phase is where player ergonomics and vibration dampening are finalized. The two primary grip installations are traditional pine tar and modern synthetic polymer wraps.
Pine Tar Application
Pine tar provides a tacky, customizable feel that reacts to ambient humidity. For optimal installation, use a high-grade rosin-pine tar blend (e.g., Manny Mota Grip Stick or Tiger Stick).
Pro Tip: Never apply pine tar directly over a high-gloss polyurethane finish. The handle area must be sanded down to bare wood (150-grit) before pine tar installation, otherwise the tar will slide off upon contact with a batter's gloves.
Synthetic Polymer Grip Installation (e.g., Lizard Skins DSP)
Synthetic grips offer consistent thickness (typically 1.1mm or 1.8mm) and superior shock absorption. Proper installation prevents edge-lifting during repeated swings.
- Handle Prep: Sand the handle to bare wood and wipe with isopropyl alcohol to remove all oils and dust.
- Anchor Point: Remove the backing tape and anchor the start of the grip at the base of the knob, stretching the polymer slightly (about 5% tension) to activate the pressure-sensitive adhesive.
- Overlap Ratio: Wrap upward at a consistent 45-degree angle. Maintain a strict 1/8-inch overlap on each revolution. Overlapping more than 1/4-inch creates thick ridges that cause blisters; overlapping less risks the grip unspooling during a swing.
- Heat Activation: Once wrapped to the desired length (usually 11 to 14 inches from the knob), cut the material at a sharp taper. Apply a heat gun on a low setting (150°F) for 10 seconds while pressing the tapered end down. This melts the adhesive into the wood pores, permanently locking the termination point.
Troubleshooting Common Finish and Grip Failures
| Symptom | Root Cause | Corrective Action |
|---|---|---|
| Polyurethane finish flaking off in sheets | Billet EMC was too high (>10%) during finish installation, or handle was not sanded to bare wood before gripping. | Strip finish completely. Re-kiln dry billet to 6-8% MC. Re-sand and re-dip. |
| Maple bat denting deeply on foul balls | Surface was not bone-rubbed prior to finish installation; wood pores remained uncompressed. | Unfortunately, denting is permanent. Future billets must undergo steel-rod burnishing at 400 RPM. |
| Synthetic grip unspooling at the top edge | Insufficient overlap ratio or failure to use heat activation on the termination taper. | Cut off grip. Clean handle with alcohol. Re-wrap with 1/8-inch overlap and apply heat gun to the final taper. |
| Pine tar becoming excessively slippery in high humidity | Using pure pine tar without a rosin cutting agent. | Scrape off excess tar. Install a rosin-infused tar blend, or apply a light dusting of powdered rosin over the existing layer. |
Understanding what type of wood are baseball bats made from is only the first step in the manufacturing lifecycle. The true performance of a baseball bat is unlocked in the workshop, where precise moisture management, cellular compression, and meticulous finish and grip installation transform a raw piece of timber into a high-performance kinetic tool.
Written by
Sarah WhitfieldSarah Whitfield is a chartered quantity surveyor (MRICS) and construction cost analyst with 15 years of experience in material pricing, procurement strategy, and project budgeting. She earned her degree in Construction Management from the University of Reading (UK) and has worked on projects ranging from $2M custom homes to $180M mixed-use developments across North America and Europe. Sarah currently leads cost estimating for BuildMat Insight, maintaining a proprietary database of 4,000+ material price points updated quarterly. She is a frequent contributor to RSMeans cost data panels and has presented at the International Cost Engineering Council (ICEC) congress. Based in Denver, CO, Sarah is an avid trail runner and volunteer mentor for Women in Construction.
More from Sarah Whitfield
View all
Wood & Lumber
What Are the Different Types of Wood? A Builder's Guide
Compare structural softwoods, finish hardwoods, and engineered lumber. Analyze Janka ratings, MOE values, and 2026 pricing for construction.
Aug 4, 2026

Walls & Panels
Steel Framing vs Wood Framing: Corrosion and Moisture Defense
Compare steel framing vs wood framing for moisture resistance. Learn about galvanized coatings, condensation risks, and corrosion protection strategies.
Jul 21, 2026

Stone & Masonry
How to Cut Stone Veneer: Wet Saw vs Grinder Comparison
Compare the best tools for cutting stone veneer. We review wet saws, angle grinders, and chop saws to help you achieve clean, chip-free cuts.
Jul 21, 2026