Types of Sanders for Wood: 2026 Comparison & Buyer Guide
Compare the top types of sanders for wood in 2026. Expert analysis of random orbital, belt, and detail sanders with model specs, pricing, and grit guides.

The Physics of Wood Sanding: Matching the Tool to the Task
Selecting the correct sander is not about finding a single 'best' tool; it is about matching the machine's kinematics to the specific phase of wood preparation. Mill marks from a planer require aggressive linear cutting, while preparing a surface for a high-build polyurethane finish demands microscopic, multi-directional scratching. Using a belt sander for final finish prep will leave unidirectional gouges that amplify under stain, while using a detail sander for stock removal will take hours and overheat the abrasive.
This 2026 comparison framework evaluates the primary types of sanders for wood based on material removal rates (MRR), finish quality, dust extraction efficiency, and real-world pricing for professional and advanced DIY tiers.
Quick Decision Matrix
- Heavy Stock Removal & Floor Leveling: Belt Sander or Drum Sander
- General Flattening & Finish Prep: Random Orbital Sander (5mm stroke)
- Ultra-Fine Finish & Polishing: Random Orbital Sander (3mm stroke)
- Corners, Profiles & Intricate Millwork: Detail / Mouse Sander
Random Orbital Sanders (ROS): The All-Rounder
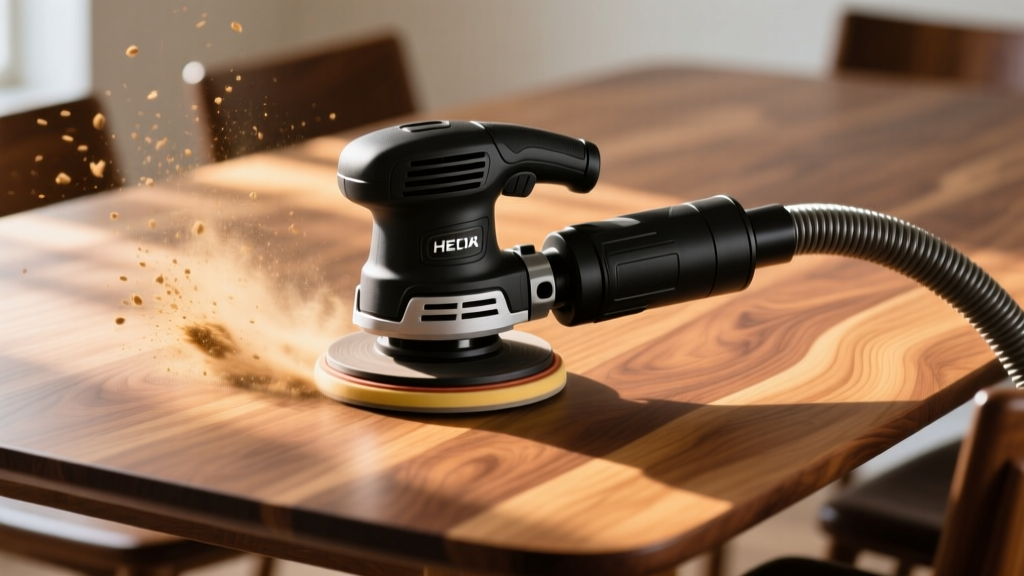
The random orbital sander is the undisputed workhorse of the modern woodshop. It combines the spinning action of a disc sander with an oscillating 'orbit', ensuring that no single abrasive grain follows the same path twice. This eliminates the unidirectional swirl marks associated with standard disc sanders.
Stroke Diameter: The 3mm vs. 5mm Distinction
Most generic buying guides ignore stroke diameter, but it dictates the tool's primary function. A 5mm (3/16-inch) orbit provides a wider swing, increasing the material removal rate but leaving slightly larger micro-scratches. A 3mm (1/8-inch) orbit moves less aggressively, making it ideal for sanding between coats of finish or polishing raw wood up to 400-grit.
| Model | Orbit / Pad Size | Price (2026 Est.) | Best Application |
|---|---|---|---|
| Festool ETS EC 150/3 | 3mm / 150mm | $670 | Ultra-fine finishing, between-coat prep |
| DeWalt DWE6421K | 3/32' / 5-inch | $129 | General DIY, rapid finish prep |
| Makita BO6040 | 5.5mm / 6-inch | $349 | Aggressive stock removal, large panels |
Failure Mode: 'Pigtailing' and Swirl Marks
The most common failure when using an ROS is 'pigtailing'—deep, circular scratches caused by sawdust trapped between the abrasive and the wood, or by pressing down too hard. Never apply downward pressure. The weight of the tool (typically 2.5 to 3.5 lbs) provides the exact optimal force. Let the abrasive do the cutting, and rely on a HEPA dust extractor to pull debris through the pad holes immediately.
Belt Sanders: The Heavy Lifter
When you need to remove 1/8-inch of material from a glued-up tabletop or level a severely cupped hardwood floor, belt sanders are mandatory. They utilize a continuous loop of abrasive driven by two drums, providing unidirectional, highly aggressive cutting.
Sizing and Tracking
Belt sanders are categorized by belt dimensions. The 3x21-inch model is the standard for cabinetry and furniture, offering a balance of maneuverability and power. The 4x24-inch model provides a larger platen surface for flattening wide slabs but is heavy and prone to gouging if tilted.
Expert Insight: The platen (the flat plate behind the belt) is critical. Standard steel platens generate immense friction heat, which can scorch resinous woods like pine or cherry. Upgrading to a cork-faced or graphite-covered platen reduces friction, extends belt life, and yields a flatter surface.
Top Contender: Makita 9903 (3x21)
Priced around $319, the Makita 9903 remains a benchmark in 2026. Its variable speed dial (690 to 1,440 ft/min) allows operators to dial back the speed when sanding delicate veneers or using high-grit ceramic belts, preventing burn-through. Its auto-tracking system keeps the belt centered without constant manual adjustment, a frequent failure point in cheaper models.
Detail and Mouse Sanders: The Corner Specialist
Random orbital and belt sanders cannot reach into acute corners, tight rabbets, or complex routed profiles. Detail sanders utilize a vibrating triangular pad (often called a 'mouse' sander) or an oscillating spindle to address these dead zones.
Triangular Pad vs. Oscillating Spindle
For flat corners and edge profiling, a triangular detail sander like the Festool DX 93 E ($450) or the budget-friendly Black+Decker Mouse ($35) is appropriate. However, for contoured moldings, crown molding, or spindle work, a vibrating pad will flatten the profile. For curved profiles, you must use an oscillating spindle sander (like the Ridgid EB4424, $199), which features a rotating drum that sleeves with various abrasive grits to match the curve's radius.
Abrasive Selection and Grit Progression
The tool is only half the equation; the abrasive dictates the actual cut. In North America, abrasives are graded by either the CAMI (Coated Abrasive Manufacturers Institute) or FEPA (Federation of European Producers of Abrasives, denoted by a 'P' prefix) standards. FEPA grits are more tightly graded, meaning a P120 will have fewer oversized outlier particles than a CAMI 120, resulting in a more consistent scratch pattern.
The Golden Rule of Grit Progression
Never skip more than one grit step. Skipping from 80-grit directly to 150-grit forces the 150-grit abrasive to work overtime removing the deep valleys left by the 80-grit, leading to premature clogging and an uneven surface.
| Phase | Grit Sequence (FEPA) | Abrasive Type | Target Surface |
|---|---|---|---|
| Heavy Flattening | P40 -> P60 -> P80 | Ceramic or Zirconia | Uneven glue-ups, rough sawn lumber |
| General Prep | P100 -> P120 -> P150 | Aluminum Oxide (Open Coat) | Furniture parts, cabinetry pre-finish |
| Hardwood Polish | P180 -> P220 -> P320 | Stearated Silicon Carbide | Raw hardwoods, sealer coat scuffing |
| High-Build Finish | P400 -> P600 -> P1000 | Wet/Dry Silicon Carbide | Between polyurethane/lacquer coats |
Anti-Clogging (Stearated) Coatings: When sanding raw softwoods or sanding between coats of water-based polyurethane, the dust becomes gummy and instantly clogs standard abrasives. Always use 'stearated' or 'no-fill' abrasives (like 3M Cubitron II or Festool Granat) for these tasks. The dry lubricant coating sheds dust and prevents pigtailing.
Dust Extraction: The Hidden Variable
Sanding wood generates particulate matter that is both a health hazard and a finish-killer. According to the Occupational Safety and Health Administration (OSHA), wood dust is a known respiratory sensitizer and carcinogen, with strict Permissible Exposure Limits (PEL) enforced on commercial job sites. Furthermore, the National Institute for Occupational Safety and Health (NIOSH) emphasizes that microscopic dust particles embed themselves in wood pores, causing adhesion failures in stains and topcoats.
HEPA Filtration is Non-Negotiable
Standard shop vacuums exhaust fine dust back into the air. For interior woodwork, you must pair your sander with a HEPA-certified dust extractor (e.g., Festool CT SYS or Bosch VAC090S). The extractor must provide a minimum of 100 CFM (Cubic Feet per Minute) at the tool shroud to capture dust before it becomes airborne.
Final Purchasing Framework
Your investment should align with your project volume and finish requirements:
- The Weekend DIYer: Purchase a 5-inch random orbital sander (DeWalt or Ryobi, ~$60-$100) and rely on shop-vac integration. It will handle 90% of household furniture and trim projects adequately.
- The Custom Cabinet Maker: Invest in a dual-sander ecosystem. A 6-inch ROS (Makita BO6040) for rapid stock removal, paired with a 3mm stroke 5-inch ROS (Festool ETS 150/3) for final finish prep. Pair both with a HEPA extractor to protect your lungs and your finish quality.
- The Flooring Professional: Skip handheld tools entirely for large spaces. Rent or purchase a commercial drum sander (like a Clarke American) for the main field, and a heavy-duty edge sander for the perimeter.
Understanding the kinematics of your sander and the grading of your abrasives transforms sanding from a tedious, dusty chore into a precise, predictable science. Match the stroke to the scratch, progress your grits logically, and extract the dust at the source.
Written by
David NakamuraDavid Nakamura is a licensed architect (AIA) and construction technology writer focused on sustainable building methods, mass timber engineering, and high-performance building envelopes. He holds a Master of Architecture from the University of Washington and is a certified Passive House Consultant (CPHC). David spent eight years at the Seattle firm Mithun, where he led the design of three LEED Platinum projects, before founding his own practice specializing in net-zero residential design. He serves on the editorial advisory board of GreenBuilder Magazine and has authored peer-reviewed papers on cross-laminated timber (CLT) connections for the Journal of Structural Engineering. In his spare time, David teaches woodworking at Pratt Fine Arts Center and kayaks the Puget Sound.
More from David Nakamura
View all
Construction Cost
Labor Cost to Build a Deck Per Sq Ft: 2026 Installation Guide
Discover the exact labor cost to build a deck per sq ft in 2026. This installation guide breaks down contractor rates, complexity factors, and hidden fees.
Aug 4, 2026

Construction Cost
How Much Does It Cost to Build a 3 Bedroom House? Financing Guide
Learn exactly how much it costs to build a 3 bedroom house and explore 2026 financing options, construction loan types, and budget frameworks for your build.
Aug 4, 2026

Construction Cost
Cost to Build a Tennis Court: 2026 Guide
How much does it cost to build a tennis court in 2026? Breakdowns for asphalt, concrete, and synthetic surfaces plus fencing and lighting.
Jul 30, 2026