Types of Stain for Wood: Installation and Application Best Practices
Master the installation of various types of stain for wood. Learn prep steps, opacity selection, and application techniques for lasting finishes.

Selecting the correct finish for exterior and interior timber requires more than just choosing a color. The longevity, structural protection, and aesthetic performance of the wood depend entirely on matching the stain's chemical formulation and opacity to the specific wood species, its age, and its exposure profile. According to the USDA Forest Products Laboratory Wood Handbook, improper finish selection and poor surface preparation account for over 80% of premature coating failures in exterior wood applications. This guide details the installation best practices for the primary types of stain for wood, ensuring maximum penetration, adhesion, and UV resistance.
The Chemistry of Wood Stains: Oil vs. Water-Based Formulations
Before addressing opacity, installers must understand the carrier chemistry. The vehicle (solvent) dictates how the stain interacts with the wood's cellular structure.
Oil-Based Penetrating Stains
Oil-based stains utilize alkyd resins and natural oils (linseed, tung, or paraffin) suspended in mineral spirits or VOC-compliant solvents. Because the molecules are smaller and lipophilic, they penetrate deeply into the wood's xylem and phloem rather than sitting on the surface.
- Best for: Horizontal surfaces (deck floors), dense hardwoods (Ipe, Mahogany), and highly porous softwoods (Cedar, Redwood).
- Advantage: They do not form a surface film, meaning they will never peel, flake, or blister. Re-coating requires only a light cleaning, not sanding.
- Limitation: Longer drying times (24-72 hours) and higher VOC content, which restricts their use in states with strict architectural coating regulations (e.g., California, New York).
Water-Based Acrylic Stains
Modern water-based stains use 100% acrylic resins. While early generations struggled with penetration, contemporary formulations utilize nano-polymers that allow deep cellular absorption while providing superior UV and mildew resistance.
- Best for: Vertical surfaces (siding, fences), pressure-treated pine, and regions with strict VOC limits.
- Advantage: Rapid drying (1-4 hours), excellent color retention, and resistance to mold/mildew due to the absence of organic oils that feed fungal growth.
- Limitation: Can form a micro-film on the surface. If applied too thickly or over damp wood, they are prone to peeling.
Opacity Matrix: Matching Stain Type to Wood Condition
The University of Minnesota Extension emphasizes that opacity should be dictated by the wood's age, condition, and the desired maintenance cycle. Use the following matrix to specify the correct product type for your project.
| Stain Opacity | Pigment Load | Ideal Wood Condition | UV Protection & Lifespan | Re-Coat Protocol |
|---|---|---|---|---|
| Transparent / Clear | None to Minimal | New, premium-grade Cedar or Redwood. | Low UV protection. 1-2 years. Shows natural grain fully. | Clean and re-apply. No sanding required. |
| Semi-Transparent | Low (10-20%) | New to 5-year-old wood. Good condition, minimal graying. | Moderate UV protection. 2-4 years. Grain visible, color altered. | Clean, brighten, and re-apply. Wet-on-wet application. |
| Semi-Solid | Medium (30-50%) | Older wood (5-10 years), slight surface checking, mismatched boards. | High UV protection. 3-5 years. Hides some grain, shows texture. | Power wash, light sand if peeling, re-apply. |
| Solid Color | High (60%+) | Heavily weathered wood, severe UV damage, mismatched repairs. | Maximum UV protection. 5-8 years. Hides grain completely, shows texture. | Must scrape and sand failing areas before re-coating. |
Pre-Installation Surface Preparation (The 80/20 Rule)
Surface preparation dictates 80% of the stain's performance. Applying high-end stain over poorly prepared wood guarantees failure.
1. Moisture Content Verification
Wood is hygroscopic. If the internal moisture content (MC) is too high, the stain will be rejected by the wood fibers, leading to blotchy absorption and eventual peeling. Use a pinless moisture meter to test the wood. Target MC: Below 15% for exterior softwoods, and below 12% for interior hardwoods. If the wood reads 18% or higher, delay the project.
2. Mill Glaze and Weathering
New pressure-treated lumber and planed cedar often suffer from "mill glaze"—a burnished surface caused by the heat of planer blades melting the wood's natural resins, sealing the pores.
- Solution for New Wood: Allow the wood to weather naturally for 3 to 6 months, or use a specialized mill-glaze remover (an acidic etch) followed by a thorough neutralization rinse.
- Mechanical Prep: If sanding is required to open the grain, never exceed 80-grit for exterior decking. Finer grits (120+) polish the wood and close the cellular pathways, preventing deep stain penetration.
3. Cleaning and Tannin Removal
Do not use chlorine bleach (sodium hypochlorite) to clean wood prior to staining. Chlorine bleach destroys the lignin (the structural polymer holding wood fibers together) and leaves salt residues that interfere with stain adhesion. Instead, use an oxygenated cleaner containing sodium percarbonate. This effectively removes gray oxidized wood fibers, dirt, and mildew without damaging the lignin structure. For tannin-heavy woods like Cedar and Redwood, follow the cleaning with an oxalic acid wood brightener to neutralize black tannin stains and restore the wood's pH balance.
Step-by-Step Application Best Practices
Proper application technique ensures uniform pigment distribution and prevents lap marks.
- Check Environmental Constraints: Apply stain only when the ambient and surface temperatures are between 50°F (10°C) and 90°F (32°C). Avoid applying in direct, hot sunlight, which causes the carrier to flash-off (evaporate) before the resin can penetrate the wood. Wood surface temperature matters more than air temperature.
- Mix Thoroughly: Pigments are heavy and settle at the bottom of the can. Use a drill with a paint-mixing paddle to agitate the stain for a full 3 minutes before and periodically during application. Do not thin the stain; this breaks the resin-to-solvent ratio and compromises the warranty.
- Tool Selection:
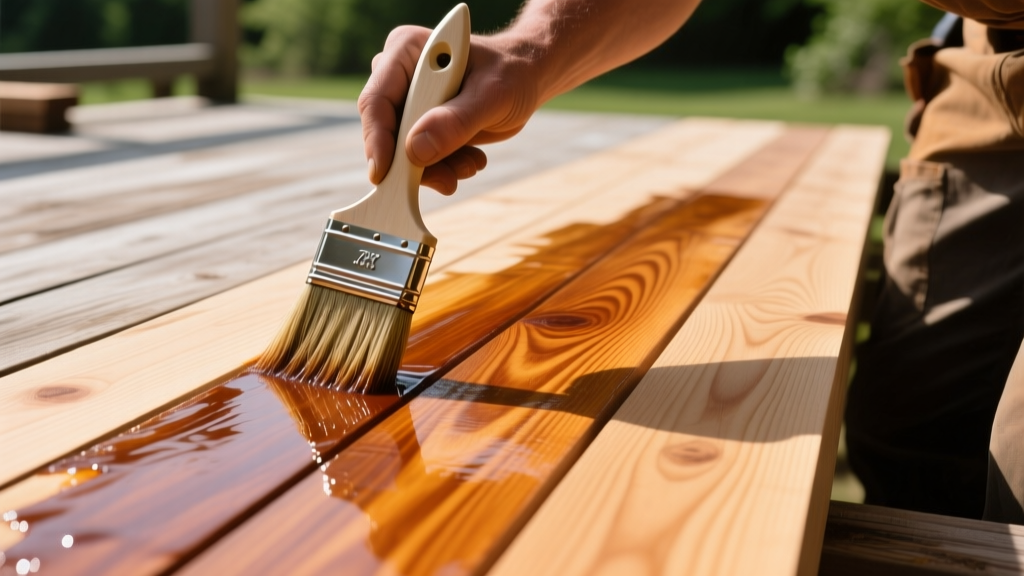
- Natural Bristle Brushes: Mandatory for oil-based stains. The natural fibers hold and release the oil evenly.
- Nylon/Polyester Brushes: Required for water-based stains, as natural bristles absorb water and become limp.
- Pump Sprayers: Excellent for rapid application on vertical siding and fences, but must be back-brushed immediately to work the stain into the pores and ensure uniform coverage.
- The "Wet-on-Wet" Technique: When applying semi-transparent penetrating stains, always work on 2 to 3 boards at a time, running the full length of the boards to avoid end-joints and lap marks. Apply the second coat while the first coat is still tacky (wet-on-wet). This allows the second coat to chemically cross-link with the first, ensuring deep saturation without creating a surface film.
- Wipe Excess: Penetrating stains have a saturation threshold. Once the wood's cells are full, excess stain will pool on the surface and dry into a sticky, glossy film. Wipe away all unabsorbed stain with clean, lint-free rags within 15-30 minutes of application. Warning: Oily rags can spontaneously combust. Submerge them in water in a metal bucket immediately after use.
Common Installation Failures and Troubleshooting
Even experienced contractors encounter finish anomalies. Identifying the root cause is critical for remediation.
| Failure Symptom | Root Cause | Remediation Strategy |
|---|---|---|
| Blotchy / Uneven Color | Applying over damp wood, failing to back-brush sprayed stain, or varying wood porosity (sapwood vs. heartwood). | Allow wood to dry fully. Use a pre-stain wood conditioner on highly porous end-grains to regulate absorption. |
| Peeling / Flaking | Using a film-forming solid stain on a horizontal surface, or applying over wood with >15% moisture content. | Strip the failing film using a chemical deck stripper. Sand back to bare wood. Switch to a penetrating semi-transparent oil. |
| Dark Black Spots | Tannin bleed reacting with moisture and iron (often from steel fasteners or well water used in cleaning). | Apply an oxalic acid wood brightener to dissolve the tannin-iron complex. Rinse thoroughly. |
| Premature Mildew Growth | Using an oil-based stain in a heavily shaded, damp environment where the linseed oil acts as a food source for fungi. | Strip the oil. Switch to a water-based acrylic stain formulated with synthetic mildewcides (e.g., zinc pyrithione). |
Project Cost and Coverage Estimates
Budgeting accurately requires understanding that coverage rates vary wildly based on wood porosity and the opacity of the stain chosen. The data below reflects 2026 market averages for professional-grade architectural coatings.
| Product Category | Avg. Cost per Gallon | Coverage (Smooth Wood) | Coverage (Rough/Ribbed) | Professional Labor Cost (per sq. ft.) |
|---|---|---|---|---|
| Transparent Penetrating Oil | $45 - $65 | 250 - 350 sq. ft. | 150 - 200 sq. ft. | $1.50 - $2.50 |
| Semi-Transparent Oil/Acrylic | $55 - $80 | 200 - 300 sq. ft. | 125 - 175 sq. ft. | $2.00 - $3.50 |
| Semi-Solid / Solid Acrylic | $65 - $95 | 150 - 250 sq. ft. | 100 - 150 sq. ft. | $2.50 - $4.50 |
By adhering to strict moisture thresholds, utilizing the correct chemical formulations for the specific exposure profile, and employing wet-on-wet application techniques, contractors and homeowners can maximize the service life of the finish. Properly installed penetrating stains protect the structural integrity of the timber while drastically reducing the long-term maintenance costs associated with film-forming coating failures.
Written by
Marcus ChenMarcus Chen is a licensed structural engineer (PE) and building materials analyst with over 12 years of experience across residential, commercial, and industrial construction. He holds a Master of Science in Civil Engineering from UC Berkeley and spent six years at Thornton Tomasetti before transitioning to independent consulting and technical writing. Marcus specializes in material selection for seismic-prone regions, concrete reinforcement strategies, and lifecycle cost analysis. His work has been cited by the American Concrete Institute (ACI) and the Structural Engineers Association of California (SEAOC). When he is not on a job site or at his desk, you will find him hiking the Sierra Nevada or restoring a 1920s craftsman bungalow in Oakland, CA.
More from Marcus Chen
View all
Construction Cost
How Much Did the Eiffel Tower Cost to Build?
How much did the Eiffel Tower cost to build in 1889? We adjust for inflation and compare its budget to modern skyscraper construction.
Aug 4, 2026

Fire Resistance
What Is a Fire Resistant Material? Testing & Certification Guide
Discover what is a fire resistant material through ASTM and UL testing. Learn how fire ratings, certifications, and assemblies work in construction.
Aug 4, 2026

Construction Cost
How Much Did the Burj Khalifa Cost to Build?
How much did the Burj Khalifa cost to build? We break down the $1.5B project and extract 5 money-saving strategies for your next build.
Jul 30, 2026