Concrete vs Brick Installation: Hardscape Guide
Compare poured concrete and brick paver installation. Learn site prep, base requirements, labor costs, and execution steps for durable hardscapes.

Core Installation Engineering Differences
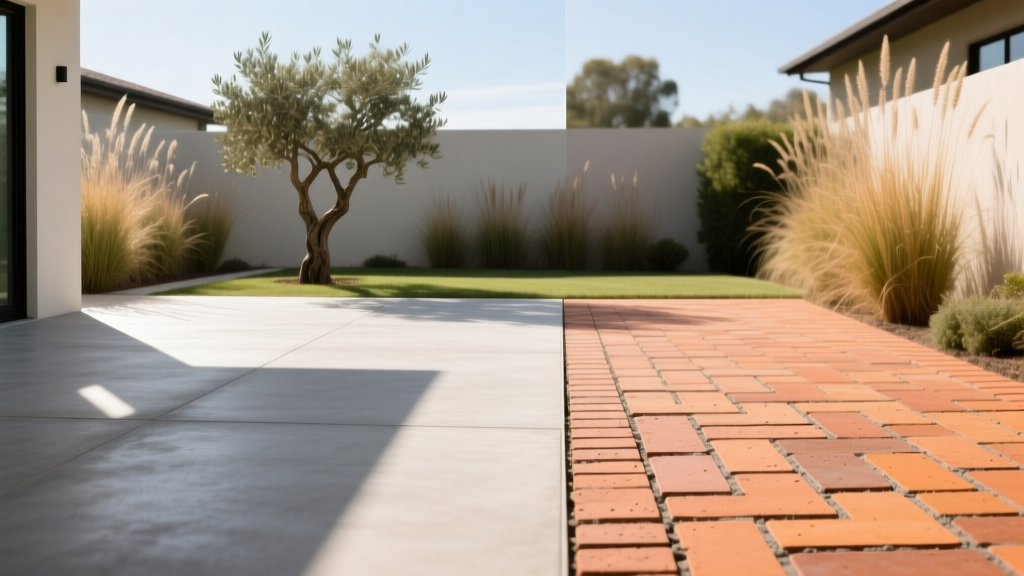
Selecting between poured concrete and brick pavers for hardscape projects dictates the entire site preparation, base engineering, and labor execution. While both materials yield durable exterior flatwork, their installation mechanics rely on fundamentally different structural principles. Poured concrete functions as a rigid, monolithic slab that bridges minor subgrade inconsistencies, whereas brick pavers act as a flexible, interlocking matrix that distributes loads through granular base layers.
| Installation Parameter | Poured Concrete Flatwork | Brick Paver Hardscape |
|---|---|---|
| Structural Behavior | Rigid / Monolithic | Flexible / Interlocking |
| Typical Excavation Depth | 8 to 10 inches | 9 to 12 inches |
| Base Material Requirement | 4-6 inches compacted aggregate (CAB) | 4-8 inches angular aggregate (ASTM D2940) |
| Bedding Layer | None (poured directly on base/vapor barrier) | 1 inch coarse sand (ASTM C33) |
| Jointing Mechanism | Saw-cut or tooled control joints | Polymeric sand or permeable jointing aggregate |
| Curing / Setting Time | 24-48 hours (foot traffic), 28 days (full cure) | Immediate (traffic-ready upon compaction) |
Poured Concrete Flatwork Execution
Executing a durable concrete patio or driveway requires strict adherence to mix design, formwork tolerances, and jointing schedules. The most common installation failure—plastic shrinkage cracking—occurs when surface moisture evaporates faster than bleed water rises, a risk mitigated by precise timing and curing protocols.
1. Subgrade and Formwork Preparation
Excavate the site to a depth of 8 to 10 inches below the finished grade. Compact the native soil using a vibratory roller to achieve a minimum 90% Standard Proctor density. Install a 4 to 6-inch layer of Compactible Aggregate Base (CAB) and compact it in 2-inch lifts. For interior slabs or moisture-sensitive areas, lay a 10-mil polyethylene vapor retarder directly over the base. Set wooden or metal forms ensuring a minimum slope of 1/8 inch per foot for drainage, securing them with steel stakes driven every 3 feet.
2. Pouring and Finishing Sequence
Order a 3,000 PSI mix for pedestrian patios and a 4,000 PSI mix with 5-7% air entrainment for driveways exposed to freeze-thaw cycles. Pour the concrete continuously to avoid cold joints. Strike off the surface with a straight 2x4 using a sawing motion. Follow immediately with a bull float to embed aggregate and level ridges. Wait until the bleed water sheen disappears before applying a broom finish for slip resistance.
3. Control Joints and Curing
According to the Portland Cement Association, control joints must be cut to a depth of 25% of the slab thickness (e.g., 1 inch deep for a 4-inch slab) and spaced at intervals 24 to 30 times the slab thickness. For a 4-inch slab, space joints every 10 feet. Apply a membrane-forming curing compound immediately after finishing, or use wet burlap curing for a minimum of 7 days to prevent rapid moisture loss.
If ambient temperatures are forecasted to drop below 40°F (4°C) within 24 hours of pouring, utilize an accelerating admixture and insulate the slab with concrete curing blankets. Never pour concrete on frozen subgrades, as thawing will cause immediate differential settling and catastrophic slab cracking.
Brick Paver Base and Laying Workflow
Brick paver installation relies entirely on the integrity of the granular base and the confinement of the perimeter. Unlike concrete, pavers cannot span voids; any settlement in the aggregate base will immediately telegraph through to the surface.
1. Excavation and Geotextile Integration
Excavate 9 to 12 inches below finished grade. If the native soil is expansive clay or poorly draining silt, lay a non-woven geotextile fabric over the subgrade before adding aggregate. This prevents the base rock from migrating into the clay over time, a primary cause of paver settlement.
2. Aggregate Base and Bedding Sand
Install 4 to 8 inches of crushed angular aggregate (ASTM D2940), compacting in 2-inch layers with a vibratory plate compactor delivering at least 5,000 lbs of centrifugal force. Over the compacted base, spread exactly 1 inch of coarse, washed concrete sand (ASTM C33). Do not use masonry sand or play sand, as the fine particles will wash out and cause joint failure. Screed the sand using 1-inch PVC pipes and a straight edge, then remove the pipes and fill the voids without stepping on the screeded surface.
3. Laying, Compacting, and Edge Restraint
Lay the brick pavers tightly against one another, maintaining a consistent pattern. Once the field is laid, install a rigid edge restraint (such as SnapEdge or a poured concrete curb) secured with 10-inch galvanized steel spikes driven every 12 inches. Run the plate compactor over the entire surface to vibrate the pavers into the bedding sand. Finally, sweep polymeric sand into the joints, mist with water to activate the polymers, and allow 24 hours to cure.
The most frequent point of failure in brick paver installations is edge creep. If perimeter restraints are not secured into the compacted base layer (not just the bedding sand), lateral forces from traffic and frost heave will push the outer pavers outward, causing the entire field to unzip and the jointing sand to wash away.
2026 Cost and Labor Matrix
Installation costs vary significantly based on site accessibility, regional labor rates, and material selections. The following matrix reflects national average installed costs for residential hardscapes in 2026.
| Cost Component | Poured Concrete (Per Sq. Ft.) | Brick Pavers (Per Sq. Ft.) |
|---|---|---|
| Site Prep & Excavation | $1.50 - $2.50 | $2.00 - $3.50 |
| Base Materials (Rock, Sand, Forms) | $1.50 - $2.50 | $2.50 - $4.00 |
| Surface Material (Concrete or Brick) | $2.50 - $4.00 | $4.00 - $9.00 |
| Labor (Installation & Finishing) | $3.00 - $5.00 | $6.00 - $10.00 |
| Total Installed Cost | $8.50 - $14.00 | $14.50 - $26.50 |
Note: Decorative concrete finishes (stamping, staining) will increase concrete costs by $4 to $8 per square foot, narrowing the gap with mid-tier brick pavers.
Troubleshooting Installation Failures
Understanding how each material fails informs both the installation process and long-term maintenance strategies. The Brick Industry Association provides extensive guidelines on mitigating efflorescence and weathering in clay pavers, while concrete failures are largely tied to mix design and jointing errors.
- Concrete Random Cracking: Caused by omitting control joints or cutting them too late. Fix: Epoxy injection for structural cracks; routing and sealing with polyurethane caulk for cosmetic cracks.
- Concrete Surface Scaling: Occurs when finishing operations trap bleed water under the surface, or when deicing chemicals are applied before the 28-day cure. Fix: Grind the surface and apply a penetrating silane/siloxane sealer.
- Brick Paver Settling: Caused by inadequate base compaction or missing geotextile fabric over clay soils. Fix: Remove affected pavers, add and compact base aggregate, re-screed sand, and reinstall.
- Brick Polymeric Sand Washout: Happens if the sand is over-watered during activation or if the joints were not completely filled to the top. Fix: Scrape out failed sand, reapply, and mist lightly with a fine nozzle.
Decision Framework: Which Installation Fits Your Site?
Choose the installation method based on your specific site conditions and performance requirements:
Choose Poured Concrete If:
- You require a perfectly level, smooth surface for activities like basketball, rollerblading, or placing heavy stationary equipment.
- The budget is strictly constrained, and decorative finishes are not a priority.
- The subgrade is highly stable, well-draining bedrock or dense gravel where rigid slab bridging is advantageous.
Choose Brick Pavers If:
- The site is located in a region with severe freeze-thaw cycles; the flexible matrix of pavers will heave and settle uniformly without cracking.
- Utility lines run beneath the hardscape; pavers can be unzipped, removed, and reinstalled after trenching without visible patch marks.
- You are installing over existing, cracked concrete (provided the existing slab is structurally sound and properly sloped, it can serve as the rigid base for a sand-set paver overlay).
Written by
Elena RodriguezElena Rodriguez is a civil engineer and technical writer specializing in concrete technology, masonry systems, and ASTM/ACI compliance. She earned her B.S. in Civil Engineering from Texas A&M University and spent a decade at a materials testing laboratory, performing over 2,000 concrete compressive strength tests and masonry prism evaluations. Elena is an ACI-certified Field Testing Technician (Grade I) and a member of ASTM Committee C12 on Natural Building Stone. She currently consults on forensic engineering cases involving concrete failures and moisture intrusion. Based in San Antonio, TX, Elena is a proud member of the Society of Women Engineers (SWE) and coaches her daughter's FIRST Robotics team.
More from Elena Rodriguez
View all
Walls & Panels
Cost Analysis: Light Gauge Steel Framing Advantages and Disadvantages
Evaluate light gauge steel framing advantages and disadvantages through a strict cost analysis lens, comparing material, labor, and lifecycle expenses.
Aug 4, 2026

Walls & Panels
Gypsum Board Types: Exact Specifications, Thickness & Dimensions
Compare standard, Type X, and moisture-resistant gypsum board types. Get exact specifications, thicknesses, dimensions, and ASTM standards for your project.
Aug 4, 2026

Fire Resistance
Best Fire-Resistant Outdoor Decking Materials: 2026 Buyer Guide
Discover the best fire-resistant outdoor decking materials for 2026. Compare Class A PVC, aluminum, and hardwood options for WUI compliance and safety.
Aug 4, 2026