Fence Post Foam vs Concrete: Troubleshooting & Repair Guide
Diagnose and fix leaning or rotted fence posts. Compare fence post foam vs concrete for repairs, frost heave fixes, and extraction methods.
Diagnosing Fence Post Failures: The Root Causes
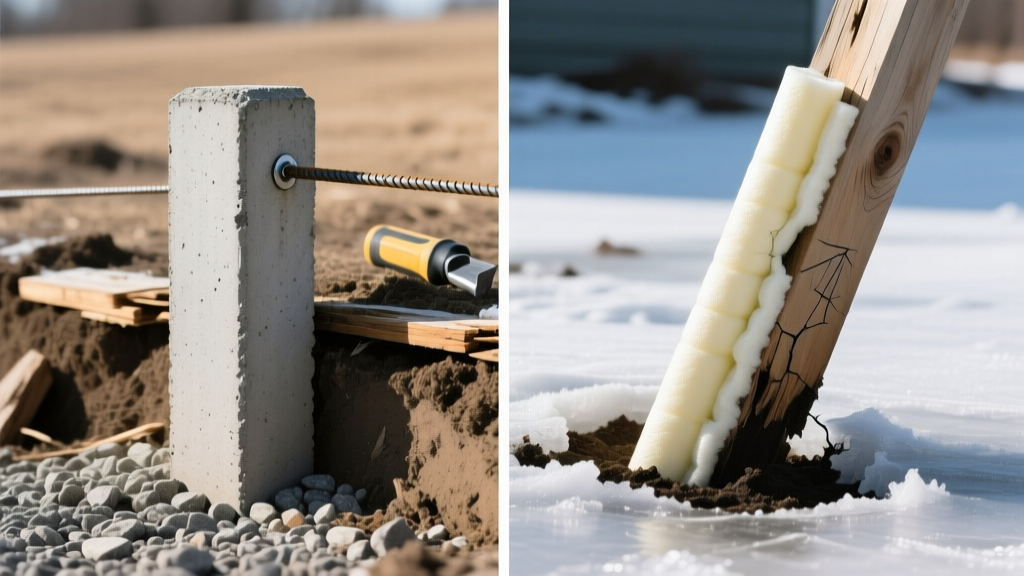
When a fence post leans, rots, or heaves out of the ground, the setting material is often the primary culprit—or at least the medium that dictates how the repair must be executed. The debate surrounding fence post foam vs concrete usually centers on initial installation speed, but from a troubleshooting perspective, the two materials fail in fundamentally different ways. Expanding polyurethane foams (like Sika SikaPost Mix) and traditional cementitious blends (like Quikrete Fast-Setting) interact with soil moisture, freeze-thaw cycles, and wood end-grain uniquely.
Before grabbing a shovel, you must identify whether the failure is structural (frost heave pushing the anchor), biological (fungal decay at the ground line), or mechanical (soil erosion undermining the base). According to the USDA Forest Products Laboratory Wood Handbook, wood moisture content consistently exceeding 20% at the soil interface is the primary catalyst for fungal decay, making the moisture-management profile of your setting material critical for long-term repair success.
Symptom-Cause-Fix Matrix: Fence Post Troubleshooting
Use this diagnostic matrix to identify your specific failure mode and determine whether foam or concrete is the superior choice for your repair strategy.
| Symptom | Primary Cause | Foam Vulnerability | Concrete Vulnerability | Repair Action |
|---|---|---|---|---|
| Post leaning (soil intact) | Wood rot at ground line | High if top foam cap is concave and pools water against end-grain. | Moderate; concrete wicks ground moisture directly into wood pores. | Extract post, treat soil, reset with foam and a sloped cap. |
| Post and anchor lifted | Frost heave | Low; foam compresses and flexes with soil expansion. | High; rigid concrete cylinders act as frost-jacking anchors. | Break concrete collar, dig below frost line, reset with bell-shaped hole. |
| Post loose in anchor | Wood shrinkage / mechanical wear | Moderate; foam loses grip if wood shrinks significantly. | Low; rigid grip, but wood can rot inside the concrete collar. | Shim and inject structural epoxy (concrete) or carve and re-foam. |
| Base soil erosion | Water runoff / poor grading | High; lightweight foam anchor can float or tip if soil washes away. | Low; heavy concrete mass resists minor soil displacement. | Regrade soil, add gravel French drain, reset with heavy concrete. |

Deep Dive: Repairing Posts Set in Expanding Polyurethane Foam
The 'Water Cap' Failure Mode
Polyurethane fence post foams are closed-cell structures, meaning the material itself will not absorb water or wick it up into the wood. However, the most common troubleshooting issue with foam-set posts is the 'water cap.' When the foam expands out of the hole, it is often left flat or slightly concave. Rainwater pools on this foam shelf, keeping the bottom two inches of the wood post perpetually saturated. Over 3 to 5 years, this leads to severe end-grain rot.
Extraction and Repair Steps for Foam
Unlike concrete, you cannot simply dig around a foam anchor and pry it out. The foam binds aggressively to both the soil matrix and the wood fibers.
- Sever the Bond: Use a reciprocating saw with a long, flexible pruning blade to slice vertically between the wood post and the foam/soil interface.
- Core Extraction: If the post is heavily rotted and snaps off at grade, use a 2-inch spade bit or hole saw to core out the center of the remaining wood inside the foam sleeve.
- Prep the Cavity: Scrape out the rotted wood debris. Treat the interior cavity with a copper naphthenate wood preservative.
- Splice and Reset: Cut a 24-inch length of pressure-treated 4x4 or a galvanized steel post sleeve. Insert it into the cored foam cavity, inject fresh two-part expanding foam to lock it in, and attach your new upper post section using structural screws.
- Slope the Cap: Use a hot wire cutter or a rasp to carve a 15-degree downward slope on the top surface of the foam to shed water away from the wood.
Deep Dive: Repairing and Extracting Concrete-Set Posts
The Frost-Jacking Failure Mode
Concrete is rigid and porous. When a straight-sided hole is filled with concrete, the resulting cylinder has a uniform friction profile against the surrounding soil. During winter, the Portland Cement Association notes that freezing soil expands laterally, gripping the concrete cylinder and pushing it upward—a phenomenon known as frost heave. Once the concrete plug is pushed up, it rarely settles back down evenly in the spring, resulting in a permanently leaning fence line.
Extraction and Repair Steps for Concrete
Repairing a concrete-set post requires brute force and precise soil preparation to prevent repeat failures.
- Expose the Collar: Dig a 12-inch diameter trench around the post down to the bottom of the concrete footing. For a standard 4x4 post, this concrete plug will weigh between 80 and 120 lbs.
- Leverage Extraction: Wrap a heavy-duty ratchet strap around the base of the post and use a high-lift farm jack or a sturdy pry bar resting on a wooden fulcrum to pop the concrete plug out of the earth.
- Break the Cylinder (Optional): If the post is rotted but the concrete is sound, use a 5-lb sledgehammer to fracture the concrete collar, freeing the wood.
- Regrade the Hole: This is the critical troubleshooting step. You must dig the new hole 6 inches deeper than the local frost line and flare the bottom into a 'bell shape.' The bell shape creates a mechanical lock that prevents frost from pushing the anchor upward.
- Gravel Base: Add 4 inches of crushed 3/4-inch gravel to the base for drainage. Rest the post on the gravel, ensuring the wood does not touch the bare earth.
- Pour and Slope: Pour Quikrete Fast-Setting Concrete, stopping 2 inches below grade. Trowel the top into a dome shape to shed water.
Frost Heave & Moisture: Regional Repair Considerations
Regional Decision Guide
- Deep Freeze Zones (USDA Zones 3-5): Frost lines exceed 48 inches. Concrete requires massive excavation and bell-shaped footings to survive. Expanding foam is highly recommended here for repairs, as its compressive yield strength allows it to absorb soil expansion without lifting the post.
- High Water Table / Coastal Zones: Sandy, perpetually damp soils undermine lightweight foam anchors. Concrete is mandatory here to provide the sheer mass required to resist lateral shifting and soil liquefaction during heavy rains.
- Arid / Expansive Clay Zones (Southwest US): Clay soils swell dramatically when wet and crack when dry. Concrete collars often crack under the lateral pressure of expanding clay. Foam's flexibility accommodates these soil volume changes without fracturing.
2026 Cost & Time Breakdown for Post Repairs
When deciding how to tackle a repair, material costs are only a fraction of the equation. The labor time and tool requirements heavily influence whether foam or concrete is the right choice for your weekend project.
| Metric | Expanding Polyurethane Foam (e.g., SikaPost) | Fast-Setting Concrete (e.g., Quikrete) |
|---|---|---|
| Material Cost (Per Post) | $13.00 - $16.00 (1 bag) | $18.00 - $24.00 (2.5 to 3 bags + gravel) |
| Preparation Time | 5 minutes (no mixing) | 20 minutes (mixing, gravel base prep) |
| Cure Time to Load | 15 to 30 minutes | 4 to 6 hours (depending on temperature) |
| Required Tools | Gloves, safety glasses, level, reciprocating saw (for extraction) | Wheelbarrow, hoe, shovel, sledgehammer, trowel, high-lift jack |
| Physical Demand | Low (Bag weighs ~2 lbs) | High (Moving 150+ lbs of dry mix and wet concrete) |
Decision Framework: Which Material for Your Next Repair?
Do not default to the material originally used if it failed due to environmental mismatch. Use this framework to select the optimal repair material for your specific scenario:
- Choose Foam If: You are repairing a single post in hard, rocky soil where digging a wide, bell-shaped hole is impossible. Foam expands into soil voids and cracks, creating a massive subterranean grip without requiring a perfectly shaped hole. It is also the only viable choice if you have physical limitations that prevent lifting 60-lb bags of concrete.
- Choose Concrete If: You are repairing a corner post or a gate post. These structural nodes experience high dynamic tension and lateral wind loads. The sheer mass and rigid compressive strength of a concrete footing are required to prevent the post from leaning under the tension of the fence fabric or the swinging weight of a gate.
- Choose a Steel Sleeve / Epoxy Hybrid If: The concrete footing is perfectly intact and below the frost line, but the wood post rotted at the ground line. Do not break out good concrete. Cut the wood flush with the concrete, core out the center, and epoxy a galvanized steel repair sleeve into the existing footing, then bolt a new wood post to the sleeve.
Troubleshooting fence failures requires looking below the soil line. By matching the physical properties of your repair material to your specific soil mechanics and failure mode, you can ensure the repair outlasts the original installation.
Written by
Elena RodriguezElena Rodriguez is a civil engineer and technical writer specializing in concrete technology, masonry systems, and ASTM/ACI compliance. She earned her B.S. in Civil Engineering from Texas A&M University and spent a decade at a materials testing laboratory, performing over 2,000 concrete compressive strength tests and masonry prism evaluations. Elena is an ACI-certified Field Testing Technician (Grade I) and a member of ASTM Committee C12 on Natural Building Stone. She currently consults on forensic engineering cases involving concrete failures and moisture intrusion. Based in San Antonio, TX, Elena is a proud member of the Society of Women Engineers (SWE) and coaches her daughter's FIRST Robotics team.
More from Elena Rodriguez
View all
Walls & Panels
Cost Analysis: Light Gauge Steel Framing Advantages and Disadvantages
Evaluate light gauge steel framing advantages and disadvantages through a strict cost analysis lens, comparing material, labor, and lifecycle expenses.
Aug 4, 2026

Walls & Panels
Gypsum Board Types: Exact Specifications, Thickness & Dimensions
Compare standard, Type X, and moisture-resistant gypsum board types. Get exact specifications, thicknesses, dimensions, and ASTM standards for your project.
Aug 4, 2026
Fire Resistance
Best Fire-Resistant Outdoor Decking Materials: 2026 Buyer Guide
Discover the best fire-resistant outdoor decking materials for 2026. Compare Class A PVC, aluminum, and hardwood options for WUI compliance and safety.
Aug 4, 2026