Gunite vs Concrete Repair: Troubleshooting Cracks and Delamination
Diagnose and repair structural defects in gunite and cast-in-place concrete. Expert troubleshooting for rebound, honeycombing, and crack injection.

Diagnosing the Root Cause: Material-Specific Failures
When troubleshooting structural defects, understanding the fundamental placement differences between gunite (dry-mix shotcrete) and traditional cast-in-place concrete is critical. Gunite relies on pneumatic velocity and nozzle hydration for compaction, which introduces unique failure modes like rebound entrapment and shadowing. Conversely, cast-in-place concrete relies on mechanical vibration and formwork, making it susceptible to honeycombing, cold joints, and plastic shrinkage. Misidentifying the origin of a defect leads to improper material selection and premature repair failure. According to guidelines published by the American Shotcrete Association, dry-mix shotcrete requires distinct surface preparation protocols compared to formed concrete due to its inherently higher cement-to-aggregate ratio at the surface.
| Defect Type | Primary Material | Root Cause | Structural Impact |
|---|---|---|---|
| Rebound Entrapment | Gunite | Aggregate bouncing off substrate during pneumatic placement | Creates porous, sandy layers leading to severe delamination |
| Shadowing | Gunite | Improper nozzle angle behind dense rebar grids | Voids behind steel causing corrosion and spalling |
| Honeycombing | Cast-in-Place | Insufficient mechanical vibration or high slump loss | Exposes rebar, reduces compressive strength, allows water ingress |
| Cold Joint Shear | Cast-in-Place | Pouring delays exceeding initial set time without bonding agents | Horizontal shear weakness, water migration pathways |
Troubleshooting Gunite: Rebound, Shadowing, and Delamination
Rebound is the most pervasive issue in gunite construction. During dry-mix application, larger aggregate particles bounce off the substrate while the cement paste adheres. If the nozzleman fails to chip away this rebound material before the next pass, it becomes buried. This trapped rebound lacks structural integrity, possessing high porosity and near-zero tensile strength. Over time, moisture infiltrates these layers, causing the gunite shell to delaminate from the substrate or rebar grid.
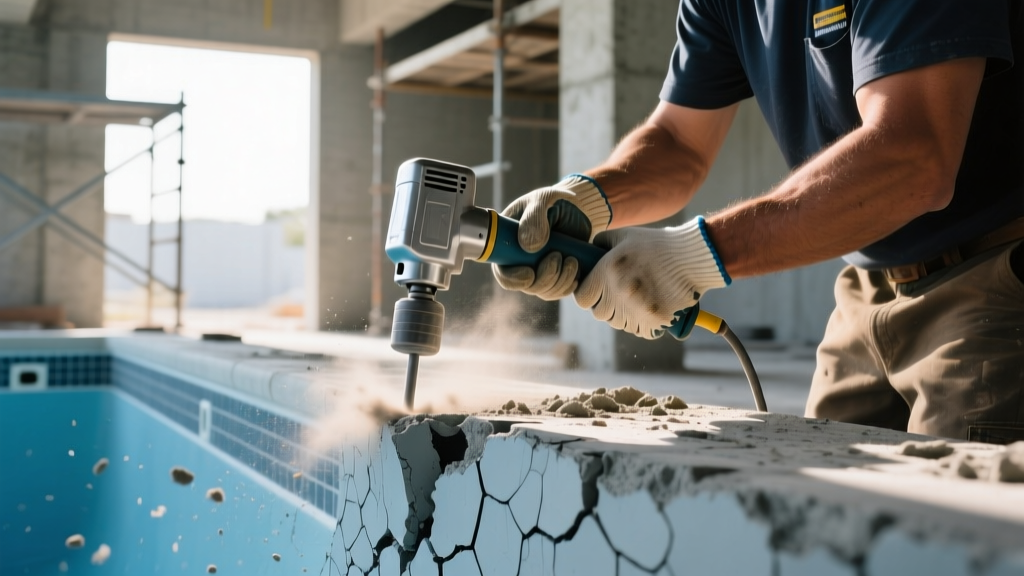
Never attempt to patch over suspected rebound delamination with surface-level skim coats. Acoustic sounding (dragging a heavy chain or tapping with a steel rod) will reveal hollow spots. All delaminated gunite must be removed down to a sound, dense substrate before any repair mortar is applied.
Step-by-Step Gunite Delamination Repair
- Acoustic Mapping and Outlining: Identify all hollow-sounding areas and outline them with a lumber crayon. Extend the boundary 6 inches into solid, sound gunite.
- Pneumatic Chipping: Use a 15-pound pneumatic chipping hammer with a blunt moil point to remove the delaminated material. Do not use rotary hammers, as the percussive shock can cause micro-fractures in the surrounding sound gunite.
- Edge Squaring: Saw-cut the perimeter of the repair area to a minimum depth of 1/4 inch. This creates a sharp, 90-degree featheredge that prevents the repair mortar from chipping out at the boundaries.
- Substrate Preparation: Saturate the exposed substrate with clean water for 2 hours prior to repair. Gunite is highly absorptive; if dry, it will flash-set the repair mortar by stealing its hydration water.
- Application of Polymer-Modified Mortar: Apply a high-build, silica-fume modified repair mortar (such as MasterEmaco S 488 or SikaTop 122). Trowel firmly to eliminate air pockets, building out the patch in 1-inch lifts if the depth exceeds 1.5 inches.
Troubleshooting Cast-in-Place Concrete: Honeycombing and Cold Joints
Cast-in-place concrete failures typically stem from formwork and consolidation errors. Honeycombing occurs when the mortar fails to fill the voids between coarse aggregates, usually due to inadequate vibration, congested rebar, or a stiff mix design. Unlike gunite rebound, which is a distinct layer, honeycombing penetrates deep into the structural cross-section.
Repairing deep honeycombing requires a form-and-pour methodology rather than simple troweling. The defective area must be routed out to solid concrete, creating an undercut geometry that mechanically locks the repair material in place. For structural repairs exceeding 3 inches in depth, utilize a flowable micro-concrete repair material (such as MAPEI Planitop 330 Fast). These materials contain engineered aggregates and superplasticizers that allow them to flow into tight cavities without the need for mechanical vibration, achieving compressive strengths exceeding 6,000 psi within 28 days.
Cold joints represent another critical vulnerability. If a concrete pour is delayed and the initial batch begins to set before the subsequent batch is placed, a weak shear plane forms. To troubleshoot a leaking or structurally compromised cold joint, the joint must be routed to a depth of 1 inch and sealed with a hydrophobic polyurethane injection resin, which expands upon contact with moisture to create a permanent, flexible waterstop.
Crack Injection Decision Framework: Epoxy vs. Polyurethane
When addressing active or dormant cracks in both gunite and traditional concrete, selecting the correct injection resin is paramount. The American Concrete Institute provides stringent guidelines on crack repair, emphasizing that structural restoration requires different chemistry than simple water sealing.
| Property | Epoxy Injection (ASTM C881 Type I) | Polyurethane Injection (Hydrophobic) |
|---|---|---|
| Primary Function | Structural bonding and load transfer | Water sealing and flexible joint filling |
| Tensile Strength | > 4,000 psi (Stronger than concrete) | < 1,500 psi (Flexible, non-structural) |
| Moisture Tolerance | Very Low (Fails if crack is damp) | High (Reacts with moisture to cure) |
| Crack Width Range | 0.002 in. to 0.25 in. | 0.010 in. to 1.0 in. |
| Best Use Case | Dormant structural cracks in beams/columns | Active cracks, retaining walls, water tanks |
For structural cracks in load-bearing cast-in-place elements, low-viscosity epoxy is mandatory. The epoxy must be injected via surface-mounted ports using a two-component metering pump, starting from the lowest port and moving upward until pure epoxy purges from the next port. Conversely, for gunite swimming pool shells or basement walls experiencing hydrostatic pressure, hydrophobic polyurethane is superior. It chemically reacts with the water inside the crack, expanding up to 20 times its liquid volume to chase water out and seal the pathway permanently.
2026 Repair Cost Benchmarks and ROI
Understanding the financial parameters of concrete and gunite troubleshooting helps contractors and facility managers allocate budgets effectively. Based on current 2026 market rates for commercial and high-end residential structural repairs, costs vary significantly based on access and material requirements.
- Pneumatic Chipping and Removal: $8.50 to $14.00 per square foot, depending on rebar exposure and depth of defective material.
- Polymer-Modified Mortar Patching (Hand-Applied): $22.00 to $38.00 per square foot for overhead and vertical applications.
- Low-Viscosity Epoxy Injection: $18.00 to $28.00 per linear foot for cracks under 0.05 inches; wider cracks require more resin volume, pushing costs to $45.00+ per linear foot.
- Form-and-Pour Micro-Concrete Repairs: $110.00 to $165.00 per cubic foot, factoring in custom formwork fabrication and material costs.
Verification and Structural Testing
A repair is only as reliable as its verification. Visual inspection is insufficient for confirming the structural integration of gunite patches or concrete overlays. Industry best practices dictate quantitative testing post-repair.
The most definitive method for verifying the bond strength of a repair mortar to an existing gunite or concrete substrate is the direct tension pull-off test, governed by ASTM C1583. This involves epoxying a 2-inch diameter metal disc to the cured repair surface and using a portable hydraulic pull-off tester to measure the force required to cause failure. A successful structural repair should exhibit a minimum tensile bond strength of 200 psi, with the failure occurring cohesively within the base concrete substrate rather than adhesively at the bond line. If the failure occurs at the interface, the surface preparation was inadequate, and the repair protocol must be audited and repeated.
Written by
Elena RodriguezElena Rodriguez is a civil engineer and technical writer specializing in concrete technology, masonry systems, and ASTM/ACI compliance. She earned her B.S. in Civil Engineering from Texas A&M University and spent a decade at a materials testing laboratory, performing over 2,000 concrete compressive strength tests and masonry prism evaluations. Elena is an ACI-certified Field Testing Technician (Grade I) and a member of ASTM Committee C12 on Natural Building Stone. She currently consults on forensic engineering cases involving concrete failures and moisture intrusion. Based in San Antonio, TX, Elena is a proud member of the Society of Women Engineers (SWE) and coaches her daughter's FIRST Robotics team.
More from Elena Rodriguez
View all
Walls & Panels
Cost Analysis: Light Gauge Steel Framing Advantages and Disadvantages
Evaluate light gauge steel framing advantages and disadvantages through a strict cost analysis lens, comparing material, labor, and lifecycle expenses.
Aug 4, 2026

Walls & Panels
Gypsum Board Types: Exact Specifications, Thickness & Dimensions
Compare standard, Type X, and moisture-resistant gypsum board types. Get exact specifications, thicknesses, dimensions, and ASTM standards for your project.
Aug 4, 2026

Fire Resistance
Best Fire-Resistant Outdoor Decking Materials: 2026 Buyer Guide
Discover the best fire-resistant outdoor decking materials for 2026. Compare Class A PVC, aluminum, and hardwood options for WUI compliance and safety.
Aug 4, 2026