How to Troubleshoot and Repair Different Types of Concrete Sealers
Diagnose and fix failed concrete sealers. Learn troubleshooting steps for acrylic, epoxy, polyurethane, and penetrating sealers with expert repair methods.

The Anatomy of Sealer Failure: Why Your Concrete Looks Ruined
When a concrete sealer fails, it rarely degrades uniformly. Instead, it manifests as unsightly blushing, aggressive peeling, amber yellowing, or localized dark spots. In the repair industry, there is a common maxim: sealers do not fail; the substrate preparation and environmental conditions do. According to the American Concrete Institute (ACI), over 80% of coating and sealer failures are directly attributable to moisture vapor transmission, improper surface profiling, or application outside the manufacturer's specified temperature and humidity windows.
Troubleshooting these failures requires identifying the specific chemistry of the sealer applied. The repair protocol for a failed acrylic is vastly different from the mechanical removal required for a delaminated epoxy. Below is a comprehensive diagnostic and repair guide for the most common types of concrete sealers.
Diagnosing and Fixing Film-Forming Sealers
Film-forming sealers sit on top of the concrete substrate, creating a physical barrier. Because they are exposed to UV radiation, foot traffic, and thermal expansion, they are the most prone to visible failures.
Acrylic Sealers: The "Blushing" and Peeling Epidemic
Acrylics are the most common decorative concrete sealers due to their low cost and ease of application. However, they are highly susceptible to moisture-related defects.
- Symptom: White, cloudy haze (blushing) or milky patches.
- Root Cause: Trapped moisture. This occurs when acrylic is applied to a damp slab, or when high humidity causes the solvent to evaporate faster than the trapped water can escape, emulsifying the resin.
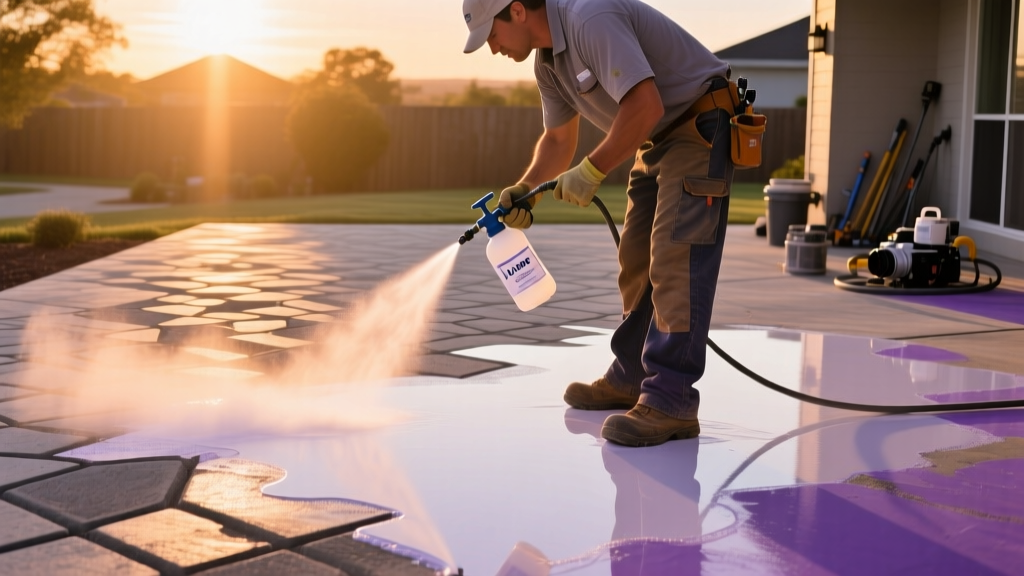
- Repair Protocol (The Solvent Bath): You do not need to strip a blushed acrylic. Spray pure xylene solvent evenly over the affected area using a pump sprayer. The xylene will re-emulsify the acrylic resin, releasing the trapped moisture. Immediately back-roll the area with a 3/8-inch nap, solvent-resistant roller to ensure an even film. Note: As of 2026, strict VOC regulations limit xylene use in several states; always check local environmental guidelines and consult OSHA Chemical Data for required PPE, as xylene is highly flammable and a respiratory irritant.
If the acrylic is peeling or flaking (rather than just blushing), a solvent bath will not work. This indicates over-application (applied too thick) or severe UV degradation. You must chemically strip the sealer using an NMP (N-Methyl-2-pyrrolidone) based stripper, pressure wash, and reapply two thin coats.
Epoxy Coatings: Yellowing and Outgassing Bubbles
Epoxies provide immense chemical resistance and are ideal for interior garage floors or industrial slabs, but they are notoriously unforgiving during application.
- Symptom: Amber or yellow tinting.
- Root Cause: UV degradation. Standard aromatic epoxies are not UV-stable. If applied outdoors or in direct sunlight through a window, they will yellow irreversibly.
- Repair Protocol: Chemical strippers do not work on fully cured epoxy. You must mechanically grind the surface using a walk-behind grinder equipped with 30-grit diamond cup wheels. Once removed, apply an aliphatic (UV-stable) polyurethane or a UV-stable polyaspartic topcoat.
- Symptom: Pinholes and bubbles in the cured film.
- Root Cause: Outgassing. As the concrete slab warms up during the day, air inside the pores expands and pushes upward through the curing epoxy.
- Repair Protocol: Sand the bubbles flat with a 120-grit screen. Wipe the floor with denatured alcohol. Apply a very thin "mist" or primer coat of epoxy to seal the pores, followed by the final topcoat.
Polyurethane: Delamination and Gloss Loss
Polyurethanes offer superior abrasion resistance but require a perfectly dry substrate.
- Symptom: Peeling in large sheets or localized delamination.
- Root Cause: High Moisture Vapor Emission Rate (MVER). If the slab exceeds 3 lbs/1000 sq ft/24 hours (per ASTM F1869 testing), the hydrostatic pressure will break the adhesive bond of the polyurethane.
- Repair Protocol: Remove the delaminated sections. You must install a moisture mitigation system—such as a two-part epoxy moisture vapor barrier—before reapplying the polyurethane topcoat.
Troubleshooting Penetrating Sealers (Silane/Siloxane)
Penetrating sealers do not form a surface film; they react chemically within the concrete pores to create a hydrophobic barrier. Because they are invisible, failures are usually only noticed when water stops beading or when the concrete begins to spall.
"In freeze-thaw climates, a functioning penetrating sealer is not a luxury; it is a structural necessity to prevent the expansion of freezing water within the concrete matrix." — Portland Cement Association (PCA)
Symptom: Water Penetration and Dark Damp Spots
- Root Cause: The sealer was applied over a curing compound, a densifier, or a slab with high surface moisture. Penetrating sealers require open, dry pores to absorb into the capillary network.
- Repair Protocol: You cannot strip a penetrating sealer. You must mechanically profile the surface via shot blasting or scarifying to achieve a Concrete Surface Profile (CSP) of 2 or 3. This physically removes the blocked pores. Once profiled, apply a water-based siloxane sealer (such as Armor SX5000 WB) which can penetrate deeper without being repelled by residual surface tension.
Sealer Failure Diagnostic Matrix
| Sealer Type | Visual Symptom | Root Cause | Repair Method |
|---|---|---|---|
| Acrylic | White haze / Blushing | Trapped moisture / High humidity | Xylene solvent bath & back-roll |
| Acrylic | Flaking / Peeling | Over-application / UV breakdown | NMP chemical strip & reapply |
| Epoxy | Amber / Yellow tint | UV degradation (Aromatic epoxy) | Mechanical grind & UV-stable topcoat |
| Epoxy | Pinholes / Bubbles | Outgassing from warming slab | Sand, alcohol wipe, mist primer coat |
| Polyurethane | Sheet delamination | High MVER (Hydrostatic pressure) | Moisture mitigation epoxy barrier |
| Silane/Siloxane | Water absorption / Spalling | Blocked pores (Densifier/Curing agent) | Shot blast to CSP 2-3 & reapply |
2026 Cost Breakdown: Repair vs. Full Strip-and-Seal
Understanding the financial impact of sealer repair is critical for contractors and property managers. The costs below reflect national averages for professional remediation in 2026.
Xylene Solvent Bath
$0.15 - $0.30 / sq ft
Highly cost-effective for acrylic blushing. Requires minimal labor but high material safety compliance.
NMP Chemical Stripping
$1.75 - $2.80 / sq ft
Required for peeling acrylics or failing water-based urethanes. Includes stripper application, dwell time, and pressure washing.
Mechanical Grinding
$2.50 - $4.50 / sq ft
The only option for failed epoxies and polyaspartics. Includes diamond tooling wear, dust extraction, and surface profiling.
Step-by-Step Protocol: Executing a Flawless Solvent Bath
When repairing blushed acrylics, the solvent bath technique must be executed rapidly to prevent the solvent from evaporating before the resin re-flows.
- Verify the Sealer: Ensure the sealer is a solvent-based acrylic. (Water-based acrylics will not reactivate with xylene; they must be stripped).
- Prep the Area: Sweep the concrete thoroughly. Any debris left on the surface will be permanently trapped in the re-liquefied sealer.
- Flood the Surface: Using a solvent-resistant pump sprayer, apply a generous, even coat of pure xylene over a manageable 10x10 foot section.
- Allow Dwell Time: Let the xylene sit for 30 to 60 seconds. You will visually see the white haze begin to turn clear as the resin softens.
- Back-Roll: Immediately use a solvent-resistant roller cover to roll out the puddled xylene, ensuring an even film thickness and eliminating roller marks.
- Cure: Allow 24 hours for the xylene to fully evaporate and the acrylic to re-harden before allowing foot traffic.
Environmental and Safety Considerations for 2026
The concrete sealing industry has seen a massive shift toward low-VOC and water-based formulations due to tightening EPA regulations. When troubleshooting older sealers applied prior to 2024, you will likely encounter high-solvent formulations. Always utilize organic vapor respirators when working with xylene or NMP strippers in enclosed spaces. For future applications, consider transitioning to high-solids, water-based polyurethanes or advanced nano-siloxane penetrants, which offer the same durability profiles with a fraction of the VOC footprint and vastly reduced risk of moisture-related blushing during application.
Written by
Sarah WhitfieldSarah Whitfield is a chartered quantity surveyor (MRICS) and construction cost analyst with 15 years of experience in material pricing, procurement strategy, and project budgeting. She earned her degree in Construction Management from the University of Reading (UK) and has worked on projects ranging from $2M custom homes to $180M mixed-use developments across North America and Europe. Sarah currently leads cost estimating for BuildMat Insight, maintaining a proprietary database of 4,000+ material price points updated quarterly. She is a frequent contributor to RSMeans cost data panels and has presented at the International Cost Engineering Council (ICEC) congress. Based in Denver, CO, Sarah is an avid trail runner and volunteer mentor for Women in Construction.
More from Sarah Whitfield
View all
Wood & Lumber
What Are the Different Types of Wood? A Builder's Guide
Compare structural softwoods, finish hardwoods, and engineered lumber. Analyze Janka ratings, MOE values, and 2026 pricing for construction.
Aug 4, 2026

Walls & Panels
Steel Framing vs Wood Framing: Corrosion and Moisture Defense
Compare steel framing vs wood framing for moisture resistance. Learn about galvanized coatings, condensation risks, and corrosion protection strategies.
Jul 21, 2026

Stone & Masonry
How to Cut Stone Veneer: Wet Saw vs Grinder Comparison
Compare the best tools for cutting stone veneer. We review wet saws, angle grinders, and chop saws to help you achieve clean, chip-free cuts.
Jul 21, 2026