Complete 10x12 Deck Material List and Framing Installation Guide
Get the exact 10x12 deck material list, framing dimensions, and step-by-step installation guide to build a code-compliant 120 sq ft backyard platform.

Project Scope: The 10x12 Attached Deck
A 10x12 deck (120 square feet) represents the optimal threshold for residential DIY construction. It provides enough space for a standard dining set and a grill while remaining small enough to be framed, squared, and decked by a two-person crew over a single weekend. This guide assumes a ledger-attached configuration, where the 12-foot side is anchored to the house rim joist, and the deck projects 10 feet outward into the yard. All framing calculations and material quantities below are based on the American Wood Council’s DCA 6 Prescriptive Residential Wood Deck Construction Guide and the 2021 International Residential Code (IRC).
The Core 10x12 Deck Material List
Procuring the correct lumber grades and corrosion-resistant hardware is the first critical phase. The quantities below assume a standard 16-inch on-center (OC) joist layout using #2 Grade Southern Yellow Pine (SYP) pressure-treated lumber, which is rated for ground contact (UC4A) for posts and above-ground (UC3B) for framing.
| Component | Specification & Dimensions | Quantity | Est. 2026 Cost |
|---|---|---|---|
| Ledger Board | 2x10x12' PT (UC3B) | 1 | $28.00 |
| Rim Joists | 2x8x12' PT (Opposite ledger) | 1 | $16.50 |
| Rim Joists | 2x8x10' PT (Side perimeters) | 2 | $27.00 |
| Interior Joists | 2x8x10' PT (16" OC layout) | 9 | $121.50 |
| Structural Posts | 6x6x8' PT (UC4A Ground Contact) | 4 | $112.00 |
| Decking Boards | 5/4x6x12' PT or Composite | 26 | $234.00 (PT) |
| Concrete & Footings | 10" Sonotubes + 50lb Quikrete 5000 | 4 tubes / 12 bags | $96.00 |
| Post Bases | Simpson ABA66Z (ZMAX coated) | 4 | $68.00 |
| Joist Hangers | Simpson LUS28Z (2x8 face mount) | 18 | $27.00 |
| Fasteners (Framing) | 1.5" Hot-Dipped Galv. Hanger Nails | 1 lb box | $12.00 |
| Fasteners (Ledger) | 1/2" x 3" HDG Lag Screws + Washers | 12 | $18.00 |
Phase 1: Ledger Board Attachment and Flashing
The ledger board transfers roughly 50% of the deck's live and dead load directly into the home's foundation. Failure here is the leading cause of catastrophic deck collapses.
Step-by-Step Ledger Installation
- Remove Siding: Strip the house siding to expose the sheathing and rim joist. The ledger must bolt directly to the structural rim joist, never just to plywood sheathing or brick veneer.
- Apply Peel-and-Stick Membrane: Apply a self-adhering flashing tape (such as Grace Vycor Plus) over the exposed house wrap and up the wall by at least 4 inches.
- Position and Tack: Hold the 2x10x12' ledger board perfectly level, 1.5 inches below the interior floor threshold to allow for door clearance and decking thickness.
- Lag Screw Pattern: Drill pilot holes and install 1/2-inch hot-dipped galvanized lag screws in a staggered two-row pattern. Per IRC Table R507.9.1.3, spacing for a 10-foot joist span requires lags spaced no more than 12 inches apart on the top row and 16 inches apart on the bottom row.
- Cap Flashing: Install custom-bent Z-flashing over the top edge of the ledger, sliding the upper fin behind the existing house wrap to shed water away from the end-grain of the ledger.
Phase 2: Footings and Structural Posts
For a 10x12 deck, you need a minimum of four footings supporting a primary drop beam located at the 10-foot projection mark. The frost line depth dictates your excavation requirements. In northern climates, footings must extend 48 inches below grade, whereas southern regions may only require 12-inch depths.
Alternative to Concrete: Helical Piles
While 10-inch Sonotubes filled with 5000 PSI concrete are the traditional route, IRC Chapter 5 and modern engineering approvals have popularized helical piles for residential decks. A helical pile (such as the Diamond Pier DP-50) is driven into the soil using a rotary hammer, bypassing the need for wet concrete, curing time, and extensive excavation. For a 120 sq ft deck, four DP-50 pins installed to the local frost line can support the required 50 PSF live load and 10 PSF dead load, often completing the footing phase in under two hours.
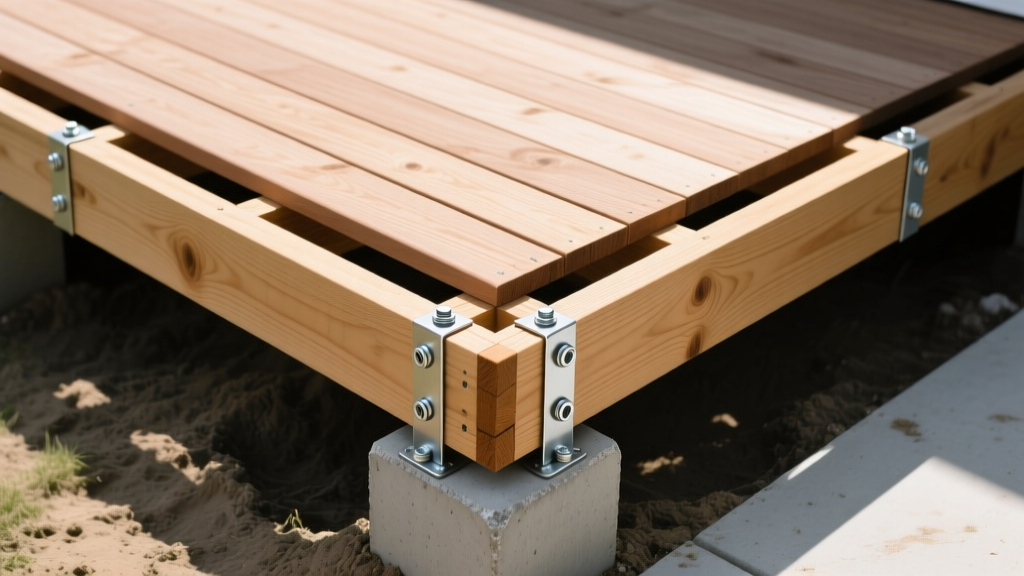
Phase 3: Framing the 10x12 Platform
With the ledger secured and footings cured (or piles driven), the framing phase begins. Accuracy in squaring the frame is mandatory before installing decking.
Joist Layout and Crown Alignment
- Marking the Layout: Hook your tape measure on the edge of the ledger and mark at 15.25 inches, then every 16 inches thereafter. This accounts for the 0.75-inch thickness of the joist, ensuring the center of the joist lands exactly on the 16-inch mark.
- Crowning: Every piece of dimensional lumber has a natural bow or "crown." Sight down the edge of each 2x8x10' joist and mark the crown with an arrow. Install every joist with the crown facing UP. As the deck bears weight over time, gravity will pull the crowned joists flat rather than allowing them to sag into a bowl shape.
- Joist Tape Application: Before securing the rim joists, apply butyl-based joist tape (e.g., Trex Protect) to the top edge of every joist and the ledger board. This seals the end-grain and screw penetrations from moisture, doubling the lifespan of the substructure.
Phase 4: Decking Selection and Fastener Strategy
A 10x12 deck requires approximately 270 linear feet of decking material. Factoring in a 10% waste margin for cuts and defects, procure 26 boards of 12-foot length. Your choice of material dictates the fastening system.
Material Comparison Matrix
| Material Type | Cost per Sq Ft (2026) | Maintenance Profile | Fastener Requirement |
|---|---|---|---|
| #1 Pressure-Treated Pine | $2.10 - $2.60 | Annual sealing; prone to cupping and checking. | 3" #10 Ceramic Coated Star-Drive Screws (Face screwed) |
| Capped Composite (e.g., Trex Select) | $5.50 - $7.20 | Zero sealing; requires soap/water cleaning. | Hidden Clip System (e.g., Trex Hideaway) or color-matched composite screws. |
| PVC Decking (e.g., Azek Landmark) | $8.50 - $11.00 | Stain-proof; highly resistant to moisture. | Cortex Hidden Fastener System (plugs match board color). |
Installation Protocol for Decking
When laying 5/4x6 decking boards, maintain a strict 1/8-inch gap between boards for pressure-treated lumber. If installing green (wet) pressure-treated wood, butt the boards tightly together; they will shrink to a 1/4-inch gap as they acclimate over the summer. For composite decking, strictly follow the manufacturer's thermal expansion gap requirements—typically 1/8-inch side-to-side and 1/4-inch end-to-end. Stagger end-joints in a randomized pattern rather than creating a single continuous seam line, which draws the eye and highlights minor height variations.
Phase 5: Passing the Building Inspection
Local building departments will typically require two inspections for a 10x12 deck: an open-hole footing inspection before concrete is poured, and a final framing/decking inspection. To ensure a first-time pass, verify the following common failure points:
- Joist Hanger Nails: Inspectors will check that every hole in the Simpson LUS28Z hanger is filled with a 1.5" x 0.148" hot-dipped galvanized nail. Missing even two nails per hanger is an automatic red-tag.
- Mid-Span Blocking: For a 10-foot joist span, a continuous row of solid blocking is required at the 5-foot mark to prevent joist rotation and provide lateral stability.
- Stair Stringer Attachment: If your 10x12 design includes stairs, the stringers must be attached to a dedicated 2x10 header bolted to the rim joist, utilizing structural screws (like Simpson SDWS) rather than standard lag bolts, to resist the outward sheer force of descending foot traffic.
- Guardrail Load Capacity: Any deck over 30 inches above grade requires a guardrail capable of withstanding a 200-lb concentrated load in any direction. Ensure 4x4 railing posts are through-bolted to the framing with 1/2-inch carriage bolts, not just toe-nailed to the rim joist.
By adhering strictly to this material list and structural protocol, your 10x12 deck will meet all IRC load-bearing requirements, resist moisture degradation for decades, and provide a perfectly level foundation for your outdoor living space.
Written by
Sarah WhitfieldSarah Whitfield is a chartered quantity surveyor (MRICS) and construction cost analyst with 15 years of experience in material pricing, procurement strategy, and project budgeting. She earned her degree in Construction Management from the University of Reading (UK) and has worked on projects ranging from $2M custom homes to $180M mixed-use developments across North America and Europe. Sarah currently leads cost estimating for BuildMat Insight, maintaining a proprietary database of 4,000+ material price points updated quarterly. She is a frequent contributor to RSMeans cost data panels and has presented at the International Cost Engineering Council (ICEC) congress. Based in Denver, CO, Sarah is an avid trail runner and volunteer mentor for Women in Construction.
More from Sarah Whitfield
View all
Wood & Lumber
What Are the Different Types of Wood? A Builder's Guide
Compare structural softwoods, finish hardwoods, and engineered lumber. Analyze Janka ratings, MOE values, and 2026 pricing for construction.
Aug 4, 2026

Walls & Panels
Steel Framing vs Wood Framing: Corrosion and Moisture Defense
Compare steel framing vs wood framing for moisture resistance. Learn about galvanized coatings, condensation risks, and corrosion protection strategies.
Jul 21, 2026

Stone & Masonry
How to Cut Stone Veneer: Wet Saw vs Grinder Comparison
Compare the best tools for cutting stone veneer. We review wet saws, angle grinders, and chop saws to help you achieve clean, chip-free cuts.
Jul 21, 2026