Top Do It Yourself Flooring Options: 2026 DIY Guide
Discover the best do it yourself flooring options for 2026. Compare LVP, laminate, and engineered wood with expert installation tips and hidden costs.

The Reality of DIY Flooring: Where Beginners Fail
Saving $3 to $6 per square foot on professional installation labor makes do it yourself flooring options highly attractive. However, the most common point of failure for DIYers is not the installation of the material itself, but the preparation of the subfloor. According to industry standards, a floating floor requires a subfloor that is flat to within 3/16 of an inch over a 10-foot span. If your concrete slab or plywood subfloor exceeds this variance, the click-lock mechanisms on rigid core planks will eventually snap under foot traffic, leading to gapping and structural failure.
Before purchasing any materials, perform a moisture test. For concrete slabs, use a calcium chloride test kit or a relative humidity (RH) probe. The Environmental Protection Agency (EPA) emphasizes that trapping moisture beneath impermeable flooring layers like vinyl can lead to severe mold growth and subfloor degradation. If your slab emits more than 3-5 lbs of moisture per 1,000 square feet over 24 hours, you must apply a penetrating concrete sealer or use a specialized vapor-barrier underlayment before proceeding.
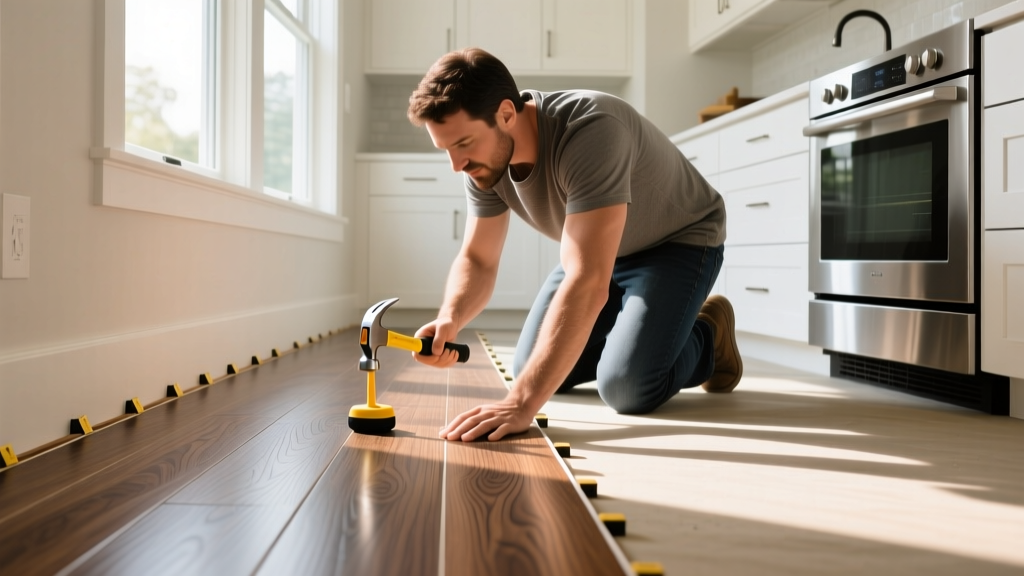
Tier 1: True Beginner-Friendly Floating Floors
For first-time installers, floating click-lock systems are the undisputed champions of DIY flooring. They require no adhesives, nails, or specialized pneumatic tools.
Stone Plastic Composite (SPC) Luxury Vinyl Plank
SPC LVP has dominated the market due to its 100% waterproof limestone-PVC core. For a successful DIY install in 2026, look for planks with a minimum 5mm total thickness and a 20-mil (0.5mm) wear layer. Thinner 12-mil wear layers will scratch easily if you have large dogs. SPC is highly rigid, which means it will not conform to subfloor dips; it will bridge them until the joint breaks. Always use a 6-mil polyethylene vapor barrier over concrete, even if the LVP has an attached cork or IXPE pad.
Water-Resistant Laminate
Modern laminate has evolved past the swelling issues of the early 2000s. High-pressure laminates (HPL) with hydrophobic edge treatments can now withstand surface water for up to 72 hours. When selecting laminate, check the Abrasion Class (AC) rating. AC3 is suitable for light residential use, but DIYers should invest in AC4-rated products for kitchens and high-traffic hallways to prevent premature wear-through.
Never try to cut flooring planks to fit perfectly around existing door jambs. Instead, lay a scrap piece of your new flooring against the jamb, rest an oscillating multi-tool on top of it, and cut the bottom of the wooden trim. This allows the new plank to slide cleanly underneath the jamb for a seamless, professional finish without requiring caulk or quarter-round to hide gaps.
Material Comparison Matrix: LVP vs. Laminate
| Feature | SPC Luxury Vinyl Plank (LVP) | Water-Resistant Laminate |
|---|---|---|
| Average Material Cost (2026) | $2.50 - $5.50 / sq. ft. | $2.00 - $4.50 / sq. ft. |
| Water Resistance | 100% Waterproof (Core & Surface) | Water-Resistant (Surface only) |
| Subfloor Forgiveness | Low (Requires extremely flat subfloor) | Medium (Slightly more flexible) |
| Underfoot Feel | Hard, can be cold without attached pad | Warmer, slight acoustic dampening |
| Cutting Method | Score and snap, or fine-tooth saw | Jigsaw or fine-tooth handsaw |
Tier 2: High-Risk DIY Options (And How to Survive Them)
Not all do it yourself flooring options are created equal. The following materials are frequently marketed as 'easy DIY' but carry significant hidden complexities.
Peel-and-Stick Vinyl Tile
While the concept sounds foolproof, peel-and-stick tiles are notorious for 'telegraphing'—where every minor imperfection, screw head, or seam in the subfloor becomes visible through the thin vinyl. Furthermore, the factory-applied adhesive often fails to bond to dusty or sealed plywood. The Fix: You must install a 1/4-inch luan or birch underlayment over your existing subfloor, sand it smooth, and apply a coat of latex floor primer before laying the tiles. Skipping the primer guarantees the tiles will shift and pop up within six months.
Floating Engineered Hardwood
Engineered hardwood offers the authentic look of solid wood with better dimensional stability. However, wood is a hygroscopic material. The National Wood Flooring Association (NWFA) strictly mandates that engineered wood must be acclimated to the home's interior environment before installation. This means opening the boxes and letting the planks sit in the room where they will be installed for a minimum of 48 to 72 hours, with the HVAC system running at normal living temperatures (60-80°F) and humidity levels between 30-50%. Failing to acclimate will result in severe cupping or gapping once the wood adjusts to the home's moisture levels.
The Hidden Costs: Tooling and Subfloor Prep
When budgeting for DIY flooring, homeowners often calculate the square footage cost and stop there. A realistic 2026 budget must include the following hidden expenses:
- Subfloor Leveling: Self-leveling compound (SLC) costs roughly $35-$50 per 50-lb bag, which covers about 40 square feet at a 1/8-inch depth. A single low spot in a concrete slab can add $150 to your project.
- Specialty Tools: A flooring pull bar ($15), heavy-duty tapping block ($12), and a pull-bar mallet ($25). Do not use a standard hammer directly on the click-lock edges; you will shatter the locking mechanism.
- Transitions and Moldings: T-moldings, reducers, and stair nosings are notoriously expensive, often costing $30 to $60 per 8-foot stick. A single doorway transition can cost more than 20 square feet of the flooring itself.
- Waste Factor: Always purchase 10% extra material for standard layouts, and 15% extra if you are installing the planks on a 45-degree diagonal or in a room with multiple closets and alcoves.
Room-by-Room Decision Matrix
Selecting the right material depends heavily on the specific environmental conditions of the room.
Kitchens and Bathrooms
Winner: SPC Luxury Vinyl Plank.
Why: Spills, dropped dishes, and high humidity are guaranteed. SPC will not swell when exposed to standing water, and its rigid core resists denting from dropped cast-iron pans. Avoid laminate entirely in full bathrooms.
Living Rooms and Bedrooms
Winner: Engineered Hardwood or High-End Laminate.
Why: These areas prioritize acoustic warmth and aesthetic resale value. Laminate with an attached acoustic pad reduces hollow 'click-clack' sounds, while engineered hardwood provides the highest return on investment for main living spaces.
Below-Grade Basements
Winner: WPC (Wood Plastic Composite) LVP.
Why: Basements are prone to minor hydrostatic pressure and cold slabs. WPC has an expanded core that provides better thermal insulation than SPC and is completely impervious to basement dampness. Always pair with a 6-mil poly vapor barrier.
Expert Troubleshooting: Fixing Common DIY Mistakes
Even with careful planning, DIY installs can present issues. Here is how to diagnose and fix the three most common problems reported by amateur installers.
- Peaking (Planks Pushing Upward at the Seams):
Cause: Lack of an adequate expansion gap. Floating floors expand and contract with temperature changes. If the planks are installed tight against the drywall or baseboards, they have nowhere to go but up.
Fix: Remove the baseboards or quarter-round molding. Use a pry bar to create a minimum 1/4-inch gap between the flooring edge and the wall. Reinstall the molding to cover the gap. - Gapping (Visible Spaces Between Plank Ends):
Cause: Failure to properly engage the click-lock mechanism during installation, or dragging planks across the locking lips, which shaves off microscopic pieces of the fiberglass locking ridge.
Fix: For minor gaps, use a suction cup puller and a rubber mallet to tap the plank back into place. For severe gaps, the affected row must be unclicked and reinstalled, ensuring the short-end joints are fully seated before engaging the long-edge lock. - Hollow Sounds and Squeaking:
Cause: The subfloor was not properly secured to the floor joists, or debris (like drywall chunks or staples) was left on the subfloor before laying the underlayment.
Fix: If the squeak is localized, you may need to pull up the flooring, vacuum the subfloor completely, and drive 2-inch deck screws through the plywood subfloor into the joists to eliminate movement before reinstalling.
According to recent market analysis by Floor Covering News, the shift toward rigid core vinyl products has fundamentally changed the DIY landscape, allowing homeowners to achieve professional-grade waterproof floors without the need for mortar, trowels, or wet saws. However, the ease of the click-lock mechanism often lulls installers into skipping critical prep steps.
Successfully executing do it yourself flooring options requires a shift in mindset: treat subfloor preparation as 80% of the job, and the actual plank installation as the final 20%. By respecting moisture limits, investing in the correct undercutting tools, and maintaining strict expansion perimeters, you can achieve a flawless, durable floor that rivals any professional contractor's work.
Written by
Sarah WhitfieldSarah Whitfield is a chartered quantity surveyor (MRICS) and construction cost analyst with 15 years of experience in material pricing, procurement strategy, and project budgeting. She earned her degree in Construction Management from the University of Reading (UK) and has worked on projects ranging from $2M custom homes to $180M mixed-use developments across North America and Europe. Sarah currently leads cost estimating for BuildMat Insight, maintaining a proprietary database of 4,000+ material price points updated quarterly. She is a frequent contributor to RSMeans cost data panels and has presented at the International Cost Engineering Council (ICEC) congress. Based in Denver, CO, Sarah is an avid trail runner and volunteer mentor for Women in Construction.
More from Sarah Whitfield
View all
Wood & Lumber
What Are the Different Types of Wood? A Builder's Guide
Compare structural softwoods, finish hardwoods, and engineered lumber. Analyze Janka ratings, MOE values, and 2026 pricing for construction.
Aug 4, 2026

Walls & Panels
Steel Framing vs Wood Framing: Corrosion and Moisture Defense
Compare steel framing vs wood framing for moisture resistance. Learn about galvanized coatings, condensation risks, and corrosion protection strategies.
Jul 21, 2026

Stone & Masonry
How to Cut Stone Veneer: Wet Saw vs Grinder Comparison
Compare the best tools for cutting stone veneer. We review wet saws, angle grinders, and chop saws to help you achieve clean, chip-free cuts.
Jul 21, 2026