Installing Gymnasium Flooring Options: Hardwood and Rubber Methods
Master installation techniques for top gymnasium flooring options. Learn subfloor prep, hardwood sleeper systems, and rubber adhesive methods.

The Critical Role of Precision in Athletic Flooring
Selecting the right material is only the first step in athletic facility construction. The performance, shock absorption, and lifespan of gymnasium flooring options are ultimately dictated by the precision of the installation. A premium Northern Hard Maple floor or a high-density vulcanized rubber surface will fail prematurely if subfloor tolerances, moisture thresholds, and fastening protocols are ignored. This guide details the exact installation techniques, material specifications, and environmental controls required for the two most demanding athletic surfaces: anchored hardwood systems and adhered rubber floors.
Subfloor Preparation: The Universal Prerequisite
Regardless of the surface material, the concrete or wood subfloor must meet strict flatness and moisture criteria. Skipping these tests is the leading cause of adhesive failure and hardwood cupping.
Moisture Testing Protocols
For concrete slabs, installers must conduct in-situ relative humidity (RH) testing per ASTM F2170. Drill holes to 40% of the slab depth (if drying from one side) and insert sealed probes. The RH must read below 75% before any moisture barrier or adhesive is applied. For wood subfloors, use a pin-type moisture meter; the subfloor moisture content must be within 2% to 4% of the hardwood flooring's equilibrium moisture content (EMC).
Flatness Tolerances
Athletic floors require a flatness tolerance of 1/8 inch in 10 feet, and 1/16 inch in 6 feet. High spots must be ground down using a diamond cup wheel, and low spots filled with a Portland cement-based self-leveling underlayment (SLU) possessing a minimum compressive strength of 4,000 psi. Gypsum-based levelers are strictly prohibited in gymnasium environments due to their susceptibility to moisture degradation.
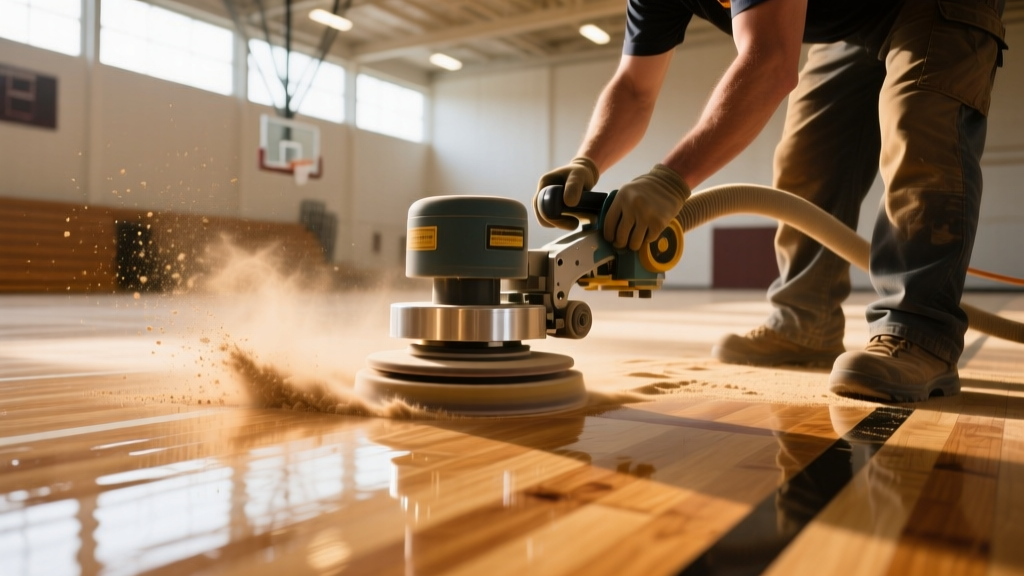
Hardwood Maple Systems: Anchored Resilient Sleeper Installation
The gold standard for competitive basketball and volleyball is a 25/32-inch Northern Hard Maple (Acer saccharum) floor installed over an anchored resilient sleeper system. This configuration provides the necessary area deflection and shock absorption mandated by the Maple Flooring Manufacturers Association (MFMA).
Step-by-Step Sleeper Assembly
- Vapor Retarder Application: Lay a continuous 6-mil polyethylene sheet or a specialized asphalt-laminated kraft paper over the concrete. Overlap seams by 6 inches and tape them with moisture-resistant sheathing tape.
- Sleeper Layout: Use kiln-dried, pressure-treated Southern Yellow Pine sleepers (typically 1x4 or 2x4 nominal). Lay them perpendicular to the direction of the floorboards, spaced exactly 16 inches on center (O.C.).
- Resilient Pads: Attach neoprene or EPDM rubber pads to the bottom of each sleeper. Specify pads with a 40 to 50 durometer hardness rating, measuring 3 inches wide by 4 inches long, placed every 18 inches along the sleeper. This specific durometer ensures optimal energy return without bottoming out under heavy point loads.
- Anchoring: Secure the sleepers to the concrete using powder-actuated fasteners or concrete screws. Do not overtighten; the sleeper must rest flat on the resilient pads without compressing them fully. Leave a 1/8-inch gap between sleeper ends to allow for minor subfloor undulations.
Blind Nailing the Maple Boards
Once the sleeper grid is verified for level (using a 10-foot straightedge), begin laying the tongue-and-groove maple. Use a 2-inch flooring cleat or staple, driving it at a 45-degree angle through the tongue (blind nailing). Fasteners should be spaced every 10 to 12 inches along the board, and no less than 2 inches from the board ends. Rack the boards to ensure end joints are staggered by at least 6 inches and do not align across adjacent rows.
Vulcanized Rubber and Polyurethane: Adhesive Techniques
For multi-purpose facilities, weight rooms, and indoor tracks, vulcanized rubber rolls (typically 3/8-inch or 9.5mm thick) offer superior durability and acoustic dampening. Unlike hardwood, rubber relies entirely on the chemical bond between the backing and the subfloor.
Adhesive Selection and Trowel Specifications
The choice of adhesive dictates the floor's resistance to rolling loads and plasticizer migration. Always use a moisture-cured urethane adhesive for rubber floors over concrete. This adhesive chemically cross-links with ambient moisture, creating a bond stronger than the rubber itself.
| Adhesive Type | Trowel Notch Size | Open Time | Best Application |
|---|---|---|---|
| 1-Component Urethane | 1/16" x 1/16" x 1/16" Square | 30-45 minutes | Standard rubber rolls over porous concrete |
| 2-Component Epoxy/Urethane | 1/8" x 1/8" x 1/8" V-Notch | 15-20 minutes | Heavy weight rooms, non-porous subfloors |
| Acrylic Pressure-Sensitive | 3/32" x 3/32" x 3/32" U-Notch | Until dry to touch | Light-duty fitness areas (not recommended for drop zones) |
Roll Placement and Seam Welding
Acclimate the rubber rolls in the installation space for at least 48 hours. When spreading the urethane adhesive, maintain a consistent trowel angle to ensure uniform ridges. Lay the rubber into the wet adhesive and immediately roll the entire surface with a 100-pound segmented floor roller to ensure full adhesive transfer and eliminate air pockets. For seamless transitions, use a color-matched hot-melt weld rod or a two-part chemical seam sealer to prevent moisture from penetrating the seams and degrading the adhesive bond.
Environmental Controls: The Invisible Installation Factor
Athletic flooring installations are highly sensitive to ambient conditions. The building's HVAC system must be fully operational and balanced before materials are delivered to the site.
- Temperature: Maintain a continuous ambient temperature between 65°F and 85°F (18°C - 29°C) for 72 hours prior to, during, and for 7 days after installation.
- Humidity: Keep relative humidity strictly between 40% and 60%. High humidity delays urethane curing and causes hardwood to expand, leading to compression-set cupping when the winter heating season dries the building out.
- Airflow: Avoid directing high-velocity HVAC supply air directly across the floor surface, which can cause uneven curing of adhesives and premature drying of floor finishes.
Troubleshooting Common Installation Failures
Even with meticulous planning, field conditions can introduce variables that compromise the floor. Recognizing the mechanical causes of these failures allows installers to correct them before they become permanent liabilities.
Hardwood Gapping and Cupping
Symptom: Visible gaps between boards (gapping) or raised board edges (cupping).
Cause: Gapping is caused by installing wood that is too wet for the building's dry winter environment, or a failure to maintain 40% minimum RH. Cupping occurs when the bottom of the board absorbs moisture from the concrete subfloor, expanding more than the top surface.
Correction: For gapping, introduce commercial humidification to the facility. For cupping, verify the vapor retarder integrity. If the moisture source is eliminated, the floor may flatten over a 3-to-6-month acclimation period, after which it can be sanded flat. Never sand a cupped floor while it is still actively absorbing moisture; it will crown when it eventually dries.
Rubber Floor Adhesive Bleed and Seam Peaking
Symptom: Adhesive oozing through the seams or the edges of adjacent rubber rolls lifting upward at the joint.
Cause: Adhesive bleed is caused by using too large of a trowel notch or rolling the floor before the adhesive has achieved initial grab (tack time). Seam peaking occurs when the rubber rolls are installed too tightly together without allowing for thermal expansion.
Correction: Clean adhesive bleed immediately with the manufacturer-recommended solvent before it cures. For peaking, cut a 1/16-inch relief groove at the seam using a specialized seam stripper, inject a flexible urethane seam sealer, and weight the seam flat with 50-pound sandbags for 24 hours.
Mastering the installation techniques for these premier gymnasium flooring options requires strict adherence to material science and building physics. By enforcing rigorous subfloor tolerances, selecting the correct chemical adhesives, and maintaining precise environmental controls, contractors can deliver athletic surfaces that perform flawlessly under the extreme dynamic loads of competitive sports.
Written by
Sarah WhitfieldSarah Whitfield is a chartered quantity surveyor (MRICS) and construction cost analyst with 15 years of experience in material pricing, procurement strategy, and project budgeting. She earned her degree in Construction Management from the University of Reading (UK) and has worked on projects ranging from $2M custom homes to $180M mixed-use developments across North America and Europe. Sarah currently leads cost estimating for BuildMat Insight, maintaining a proprietary database of 4,000+ material price points updated quarterly. She is a frequent contributor to RSMeans cost data panels and has presented at the International Cost Engineering Council (ICEC) congress. Based in Denver, CO, Sarah is an avid trail runner and volunteer mentor for Women in Construction.
More from Sarah Whitfield
View all
Wood & Lumber
What Are the Different Types of Wood? A Builder's Guide
Compare structural softwoods, finish hardwoods, and engineered lumber. Analyze Janka ratings, MOE values, and 2026 pricing for construction.
Aug 4, 2026

Walls & Panels
Steel Framing vs Wood Framing: Corrosion and Moisture Defense
Compare steel framing vs wood framing for moisture resistance. Learn about galvanized coatings, condensation risks, and corrosion protection strategies.
Jul 21, 2026

Stone & Masonry
How to Cut Stone Veneer: Wet Saw vs Grinder Comparison
Compare the best tools for cutting stone veneer. We review wet saws, angle grinders, and chop saws to help you achieve clean, chip-free cuts.
Jul 21, 2026