Identifying RV Roof Material Types for Targeted Repair
Learn to identify RV roof material types (EPDM, TPO, fiberglass) and apply the correct repair methods, sealants, and maintenance protocols to prevent leaks.

The Critical First Step: Identifying Your RV Roof Material
Applying the wrong chemical or sealant to a recreational vehicle roof is the leading cause of accelerated membrane degradation and catastrophic water intrusion. Before purchasing any repair supplies, you must accurately determine your specific roof composition. The chemical makeup of RV roof material types dictates their reaction to UV radiation, temperature fluctuations, and aftermarket sealants. Misidentifying a Thermoplastic Polyolefin (TPO) roof as Ethylene Propylene Diene Monomer (EPDM) and applying a petroleum-based lap sealant will cause the TPO to blister, melt, and permanently fail.
Diagnostic Matrix: 4 Primary RV Roof Material Types
Use this tactile and visual diagnostic matrix to confirm your roof material. Perform the "chalk test" by rubbing your hand firmly across a clean, dry section of the roof membrane.
| Material | Visual & Tactile Cues | Chalk Test Result | Common Failure Modes |
|---|---|---|---|
| EPDM Rubber | Matte finish, slightly textured, feels like a heavy-duty inner tube. Usually white or black. | Leaves a distinct white or black chalky residue on your hand. | UV oxidation, puncture from branches, shrinkage pulling away from vents. |
| TPO / PVC | Glossy or semi-gloss finish, smooth to the touch, rigid feel with a fabric backing visible at edges. | No chalky residue; hand remains clean. | Heat-weld seam failures, cracking in extreme cold, localized blistering. |
| Fiberglass | Hard, rigid shell. Seamless center with visible gelcoat. Often features molded ridges or crowns. | No chalk; surface may feel slightly rough if oxidation has begun. | Stress cracking around AC units, gelcoat crazing, spiderweb fractures. |
| Aluminum | Corrugated or flat metal sheets. Visible overlapping seams, screw heads, and metallic sheen under dirt. | No chalk; may leave gray metallic dust if heavily oxidized. | Butyl tape desiccation under seam caps, galvanic corrosion, screw back-out. |
EPDM Rubber: Maintenance Protocol & Repair Specifics
EPDM is the most common rubber roofing material on travel trailers and fifth wheels. It is highly resistant to extreme heat but vulnerable to petroleum distillates and animal fats. Over time, EPDM oxidizes, creating the chalky runoff that stains the sides of the RV. This chalking is a normal sacrificial process, but it requires specific maintenance to prevent the membrane from drying out and cracking.
Approved Sealants and Patching
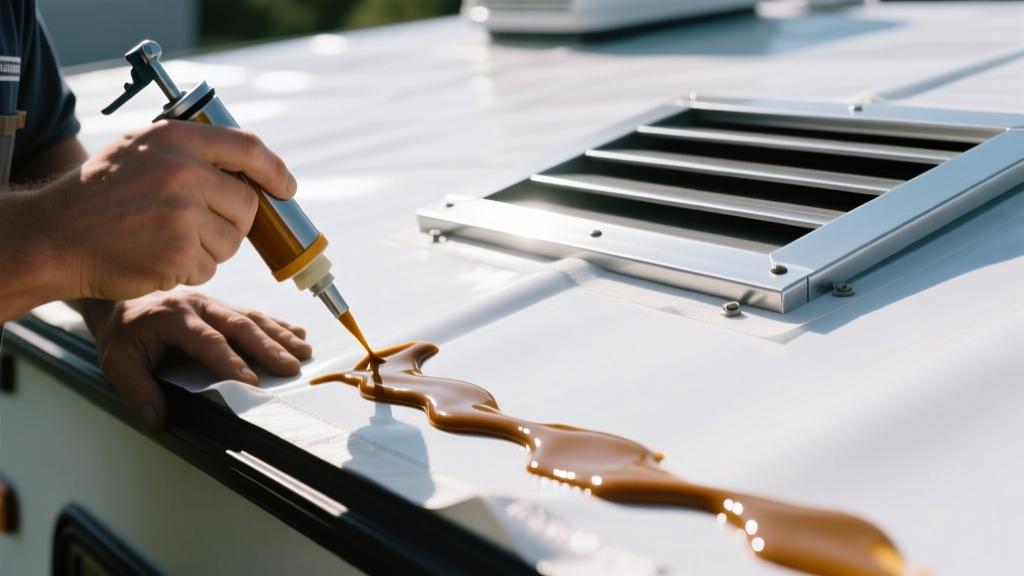
For horizontal seams and vent perimeters, use a self-leveling lap sealant. The industry standard is Dicor 501LSW-1 Self-Leveling Lap Sealant. For vertical applications (such as the sides of a vent pipe or roof-to-wall transitions), you must use a non-sag formula like Dicor 502LSW-1 to prevent the sealant from running down the sidewall before it cures.
Step-by-Step EPDM Puncture Repair
- Clean the Area: Wash the puncture site with a mild, non-abrasive cleaner like Spic and Span or Dawn dish soap. Rinse thoroughly and allow to dry completely.
- Prep with Primer: If using a vulcanizing EPDM patch kit, apply the manufacturer-specific primer to both the roof membrane and the patch backing. Allow it to flash off (become tacky) for 10-15 minutes.
- Apply the Patch: Peel the backing and carefully lay the patch over the puncture, ensuring at least a 2-inch overlap on all sides.
- Roll for Adhesion: Use a steel J-roller, applying firm, overlapping pressure across the entire patch to push out trapped air bubbles and activate the chemical bond.
- Seal the Edges: Run a continuous bead of self-leveling lap sealant around the perimeter of the patch for redundant waterproofing.
TPO and PVC: Heat Welding vs. Adhesive Patches
Thermoplastic Polyolefin (TPO) and Polyvinyl Chloride (PVC) are single-ply membranes favored for their resistance to UV degradation and lack of chalky oxidation. Because they are thermoplastics, their seams are fused together using hot air welders rather than chemical adhesives.
Repairing TPO Seam Failures
When a TPO seam peels back, liquid sealants are strictly a temporary emergency measure. The permanent repair requires a hot air welder to melt the overlapping layers together at temperatures between 500°F and 700°F. For DIY owners lacking a hot air welder, Eternabond RV Repair Tapes provide a highly durable, UV-stable mechanical bond. Eternabond utilizes a micro-sealant adhesive that melts into the membrane's pores when pressure is applied, creating a bond that is often stronger than the TPO material itself.
Fiberglass and Aluminum Hard Roofs
Class C motorhomes and smaller travel trailers frequently utilize hard roofs. Fiberglass roofs are molded from the same gelcoat materials as boat hulls, while aluminum roofs consist of overlapping metal sheets sealed with butyl tape.
Fiberglass: Combating Stress Cracks and Oxidation
Fiberglass does not leak through the center of the panel; it leaks at stress points. The weight and vibration of rooftop air conditioning units cause microscopic flexing in the fiberglass, leading to spiderweb stress cracks. To repair these, grind out the crack with a rotary tool, fill it with a marine-grade epoxy filler, and sand it flush. To prevent UV oxidation (chalking), fiberglass roofs must be waxed bi-annually with a high-quality marine polymer wax, such as Meguiar's Flagship Premium Marine Wax. Standard automotive waxes lack the UV inhibitors required to protect RV gelcoat.
Aluminum: Addressing Butyl Tape Desiccation
Aluminum roofs rely on butyl tape beneath the overlapping seam caps to prevent water intrusion. Over 5 to 7 years, butyl tape dries out, shrinks, and cracks. If you notice water stains on the interior ceiling near the lateral seams, the butyl tape has failed. The proper repair involves removing the aluminum seam cap, scraping out the desiccated butyl tape using a plastic putty knife, applying a fresh bead of high-quality butyl tape (such as Alpha Systems Butyl Tape), and reinstalling the cap with new stainless steel screws.
Universal Maintenance Rules Across All RV Roof Material Types
Regardless of the specific membrane, every RV roof requires adherence to these core maintenance protocols to maximize its lifespan:
- Bi-Annual Inspections: Inspect the roof in early spring and late fall. Pay close attention to the anterior and posterior caps, vent pipe collars, and the perimeters of skylights.
- Proper Cleaning Agents: Use only RV-specific roof cleaners (e.g., Bio-Kleen or Camco). Avoid pressure washers entirely; the high PSI will easily slice through EPDM and TPO membranes or force water under aluminum seam caps.
- Sealant Removal Protocol: When re-sealing a vent, do not simply apply new sealant over old, cracked lap sealant. UV degradation compromises the bottom layer. Use a heat gun on a low setting and a blunt scraper to remove the old sealant down to the bare membrane before applying a fresh bead.
- Walkway Protection: If you must walk on the roof to service an AC unit or solar panel, wear soft-soled shoes (like wrestling shoes or clean sneakers) and distribute your weight using a piece of plywood or a specialized RV roof mat to prevent localized puncture.
Cost Expectations for DIY vs. Professional RV Roof Repair
Understanding the financial baseline for RV roof maintenance helps owners decide when to tackle a repair themselves and when to hire a certified RV technician. The following estimates reflect 2026 market averages for materials and labor.
| Repair Scenario | DIY Material Cost | Professional Labor & Material Cost | Recommended Approach |
|---|---|---|---|
| Vent Perimeter Re-sealing (per vent) | $12 - $18 (Dicor Sealant) | $85 - $150 | DIY (High ROI for basic maintenance) |
| EPDM Puncture Patch (up to 6x6 inches) | $25 - $40 (Patch Kit + Cleaner) | $200 - $350 | DIY (Requires careful surface prep) |
| Liquid Roof Coating (Entire 30ft Trailer) | $450 - $700 (Coating + Primer) | $1,800 - $2,500 | DIY (Labor-intensive but straightforward) |
| TPO Seam Heat Welding (per linear foot) | N/A (Requires specialized tools) | $45 - $85 per linear foot | Professional (Specialized equipment required) |
| Full Roof Membrane Replacement (30ft) | $1,200 - $1,800 (Materials only) | $4,500 - $7,500 | Professional (Requires decking inspection) |
Accurate identification and material-specific maintenance are the cornerstones of RV roof longevity. By matching your repair techniques and chemical agents to the exact physical properties of your roof membrane, you eliminate the risk of chemical incompatibility and ensure a watertight seal for the duration of your travels.
Written by
Sarah WhitfieldSarah Whitfield is a chartered quantity surveyor (MRICS) and construction cost analyst with 15 years of experience in material pricing, procurement strategy, and project budgeting. She earned her degree in Construction Management from the University of Reading (UK) and has worked on projects ranging from $2M custom homes to $180M mixed-use developments across North America and Europe. Sarah currently leads cost estimating for BuildMat Insight, maintaining a proprietary database of 4,000+ material price points updated quarterly. She is a frequent contributor to RSMeans cost data panels and has presented at the International Cost Engineering Council (ICEC) congress. Based in Denver, CO, Sarah is an avid trail runner and volunteer mentor for Women in Construction.
More from Sarah Whitfield
View all
Wood & Lumber
What Are the Different Types of Wood? A Builder's Guide
Compare structural softwoods, finish hardwoods, and engineered lumber. Analyze Janka ratings, MOE values, and 2026 pricing for construction.
Aug 4, 2026

Walls & Panels
Steel Framing vs Wood Framing: Corrosion and Moisture Defense
Compare steel framing vs wood framing for moisture resistance. Learn about galvanized coatings, condensation risks, and corrosion protection strategies.
Jul 21, 2026

Stone & Masonry
How to Cut Stone Veneer: Wet Saw vs Grinder Comparison
Compare the best tools for cutting stone veneer. We review wet saws, angle grinders, and chop saws to help you achieve clean, chip-free cuts.
Jul 21, 2026