Roof Decking Material Options: Installation & Selection Guide
Compare roof decking material options including OSB, plywood, and ZIP systems. Master span ratings, nailing schedules, and installation.

The Structural Baseline: Understanding Span Ratings
Before selecting from available roof decking material options, you must decode the span rating stamped on every engineered wood panel. The APA (The Engineered Wood Association) mandates a two-number index, such as 32/16 or 48/24. The first number dictates the maximum allowable center-to-center spacing of roof trusses or rafters (in inches) when the panel is used for roof sheathing. The second number applies to floor joist spacing. For a standard residential roof framed with trusses spaced 24 inches on center (o.c.), a 24/16 or 32/16 panel is structurally required. Using a panel with a lower roof span rating than your truss spacing will result in a spongy deck, sagging between trusses, and premature failure of the asphalt shingles or metal panels above.
Always install roof decking panels with their long axis (the 8-foot dimension) perpendicular to the roof trusses or rafters. This orientation maximizes the panel's bending strength and ensures the span rating is valid. Installing panels parallel to the framing reduces structural capacity by up to 50%.
Comparing Roof Decking Material Options
The choice of sheathing impacts not only structural integrity but also moisture management, thermal bridging, and labor costs. Below is a direct comparison of the primary materials used in modern residential and light-commercial construction.
| Material | Standard Thickness | Moisture Resistance | Avg. Cost (per 4x8 Sheet) | Best Application |
|---|---|---|---|---|
| OSB | 5/8" or 19/32" | Moderate (Prone to edge swelling) | $35 - $45 | Standard tract homes, budget-conscious builds |
| CDX Plywood | 1/2" or 5/8" | High (Recovers well from wetting) | $55 - $75 | High-wind zones, heavy tile roofs, custom homes |
| ZIP System | 1/2" or 5/8" | Exceptional (Integrated barrier) | $85 - $110 | Tight building envelopes, rapid dry-in schedules |
| T&G Wood Planks | 2x6 or 3x6 Nominal | Low (Requires immediate underlayment) | $120 - $160 | Exposed cathedral ceilings, timber-frame cabins |
Material Deep-Dive & Installation Nuances
Oriented Strand Board (OSB)
OSB dominates the North American market due to its cost-efficiency and uniform density. Manufactured from compressed wood strands and waterproof phenolic resins, OSB provides excellent shear strength. However, its critical vulnerability lies in the cut edges. When exposed to rain before the underlayment is applied, OSB edges can swell irreversibly, creating visible ridges (telegraphing) through asphalt shingles. According to APA guidelines for OSB, maintaining a strict 1/8-inch gap at all panel edges and ends is non-negotiable to accommodate thermal and moisture expansion.
CDX Plywood
CDX plywood features a 'C' grade face and 'D' grade back, with the 'X' denoting exposure-rated glue. While more expensive than OSB, plywood's cross-laminated veneer structure gives it superior screw-holding power and impact resistance. This makes it the preferred roof decking material option in hurricane-prone regions where high pull-through resistance is required for hurricane clips and heavy clay tile fastening. Plywood also dries out and recovers its structural integrity much faster than OSB if caught in a sudden downpour during framing.
Engineered ZIP System Panels
Huber's ZIP System roof sheathing integrates a water-resistive barrier directly into the OSB panel, eliminating the need for traditional felt paper or synthetic underlayment. The installation requires sealing all seams with proprietary ZIP tape. As detailed in the Huber ZIP System installation manual, the tape must be applied using a specialized roller tool to ensure adhesive activation and void-free bonding. This system allows crews to 'dry in' a structure in a single day, drastically reducing weather-related delays and labor costs associated with rolling out underlayment.
Tongue-and-Groove (T&G) Planks
For timber-frame homes or designs featuring exposed interior vaulted ceilings, 2x6 or 3x6 Douglas Fir T&G planks serve a dual structural and aesthetic purpose. Installation requires blind-nailing through the tongue at a 45-degree angle. Because T&G lacks the diaphragm shear strength of large 4x8 panels, it often requires supplementary diagonal bracing or a secondary layer of structural sheathing on top if the local building code mandates strict lateral load resistance for seismic or high-wind events.
If you are installing any of these roof decking material options for an unvented 'hot roof' assembly (where closed-cell spray foam is applied directly to the underside of the deck), you must use a vapor-permeable underlayment or ZIP system. Trapping moisture between an impermeable roof covering (like metal or asphalt) and an impermeable interior foam layer will cause the wood deck to rot from the inside out within 3 to 5 years.
Step-by-Step Installation Framework
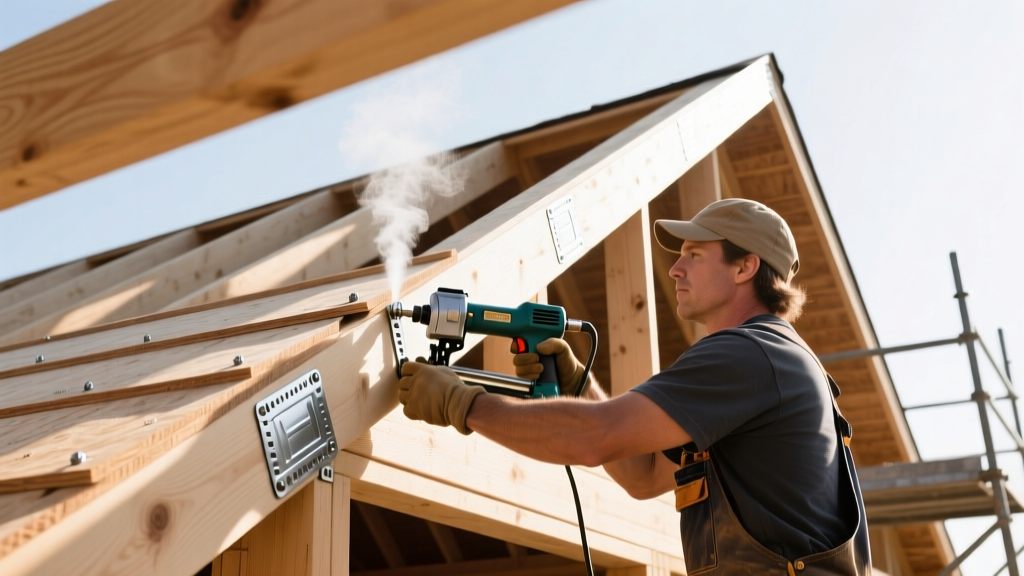
Proper fastening is just as critical as material selection. A poorly nailed deck will squeak, deflect, and fail during high-wind uplift events. Follow this standard protocol for 4x8 OSB and Plywood panels:
- Layout and Staggering: Begin at the lower eave corner. Stagger the vertical end joints of adjacent rows by at least 24 inches (typically half a panel length). This prevents continuous weak lines across the roof diaphragm.
- Edge Support (H-Clips): For trusses spaced 24 inches o.c. or wider, install metal H-clips midway between the trusses on the unsupported long edges of the panels. H-clips transfer the load from one panel to the next, preventing edge sag and reducing bounce.
- Fastener Selection: Use 8d common nails (2.5 inches long) or 8d ring-shank pneumatic nails. Ring-shank nails provide up to 40% greater withdrawal resistance compared to smooth-shank nails, a crucial factor for wind uplift resistance.
- Nailing Schedule: Drive fasteners 6 inches on center (o.c.) along all supported panel edges (where the panel rests on a truss) and 12 inches o.c. in the intermediate field supports. Keep nails 3/8 inch back from the panel edges to prevent splitting the wood.
- Expansion Gaps: Use a 10d nail as a temporary spacer to ensure a consistent 1/8-inch gap between all panel edges and ends before nailing. Remove the spacer nail once the panel is secured.
Troubleshooting Common Decking Failures
Symptom: Spongy or Bouncy Roof Deck
Cause: Using panels with an inadequate span rating for the truss spacing (e.g., using 24/16 panels on trusses spaced 32 inches o.c.), or failing to install H-clips on unsupported long edges.
Fix: If the roof covering is not yet installed, add intermediate blocking or purlins between the trusses to reduce the effective span. If the panels are permanently deformed, they must be replaced with thicker panels (e.g., upgrading from 5/8" to 3/4" or switching to a 48/24 span rating).
Symptom: Edge Ridging (Telegraphing through Shingles)
Cause: Panels were installed tightly butt-jointed without the mandatory 1/8-inch expansion gap, causing the edges to buckle upward when the wood absorbed ambient moisture.
Fix: Sand down the swollen edges using a heavy-grit floor edger before applying underlayment. To prevent this, ensure roofers do not 'snap' panels tightly together during installation.
Symptom: Delamination or Fungal Decay
Cause: OSB was left exposed to the elements for weeks before shingling, allowing water to pool on the surface and wick into the unsealed edges.
Fix: Cut out and replace any panels that show signs of flaking, severe swelling, or black fungal staining. Do not attempt to seal rotted OSB with epoxy or waterproofing paint; the structural integrity of the resin bond is already compromised.
Final Selection Checklist
When finalizing your roof decking material options, cross-reference your choice against these project parameters:
- Local Wind Speeds: If designing for >110 mph ultimate wind speeds, mandate CDX plywood or ZIP system with ring-shank fasteners.
- Roof Pitch: For low-slope roofs (below 3:12), prioritize materials with integrated moisture barriers or plan for a fully adhered ice and water shield over the entire deck.
- Dry-In Timeline: If the project schedule requires immediate interior work and the weather forecast is unpredictable, the premium paid for ZIP system panels is quickly offset by eliminated underlayment labor and prevented water damage.
Written by
Elena RodriguezElena Rodriguez is a civil engineer and technical writer specializing in concrete technology, masonry systems, and ASTM/ACI compliance. She earned her B.S. in Civil Engineering from Texas A&M University and spent a decade at a materials testing laboratory, performing over 2,000 concrete compressive strength tests and masonry prism evaluations. Elena is an ACI-certified Field Testing Technician (Grade I) and a member of ASTM Committee C12 on Natural Building Stone. She currently consults on forensic engineering cases involving concrete failures and moisture intrusion. Based in San Antonio, TX, Elena is a proud member of the Society of Women Engineers (SWE) and coaches her daughter's FIRST Robotics team.
More from Elena Rodriguez
View all
Walls & Panels
Cost Analysis: Light Gauge Steel Framing Advantages and Disadvantages
Evaluate light gauge steel framing advantages and disadvantages through a strict cost analysis lens, comparing material, labor, and lifecycle expenses.
Aug 4, 2026

Walls & Panels
Gypsum Board Types: Exact Specifications, Thickness & Dimensions
Compare standard, Type X, and moisture-resistant gypsum board types. Get exact specifications, thicknesses, dimensions, and ASTM standards for your project.
Aug 4, 2026

Fire Resistance
Best Fire-Resistant Outdoor Decking Materials: 2026 Buyer Guide
Discover the best fire-resistant outdoor decking materials for 2026. Compare Class A PVC, aluminum, and hardwood options for WUI compliance and safety.
Aug 4, 2026