Which Roof Flashing Material Is Best for Leak Repairs?
Discover which roof flashing material stops leaks permanently. Compare copper, aluminum, and membrane costs, lifespans, and repair techniques.

The Hidden Culprit Behind 90% of Roof Leaks
When a roof leaks, homeowners and facility managers immediately suspect failed shingles or degraded underlayment. However, according to the National Roofing Contractors Association (NRCA), up to 90% of all moisture intrusions occur at penetrations, valleys, and wall-to-roof transitions. These high-stress junctions rely entirely on flashing. Selecting the correct roof flashing material for repairs is not just about stopping water today; it is about matching the thermal expansion rates, galvanic properties, and expected lifespan of the surrounding roof assembly.
Using the wrong roof flashing material during a repair can accelerate decay. For instance, pairing incompatible metals creates a galvanic battery that eats through the flashing in under three years. This guide breaks down the exact material specifications, failure diagnostics, and 2026 market costs required to execute a permanent flashing repair.
Diagnostic Matrix: Matching the Symptom to the Material Fix
Before purchasing materials, identify the specific failure mode. Water behaves differently depending on the junction type. Use this diagnostic framework to select the appropriate repair material.
| Leak Symptom | Probable Junction Failure | Recommended Repair Material | Why It Works |
|---|---|---|---|
| Staining on interior ceiling near chimney | Cracked counter-flashing or failed sealant at masonry joint | 16 oz Cold-Rolled Copper or Lead-Coated Copper | Conforms to masonry irregularities; survives extreme thermal cycling without tearing. |
| Water ingress at sidewall during wind-driven rain | Missing or corroded step flashing woven into shingles | .019" Aluminum Step Flashing (Anodized) | Lightweight, easily bent on-site, and resists alkaline degradation from concrete siding. |
| Pooling water at flat roof parapet base | TPO/EPDM membrane peeling away from 90-degree angle | SBS-Modified Bitumen Peel-and-Stick Membrane | Creates a seamless, self-sealing inside corner that bridges the gap without mechanical fasteners. |
| Valley leak after heavy snowmelt | Punctured or undersized woven valley metal | 24-Gauge G90 Galvanized Steel (Woven or Open Valley) | Provides structural rigidity to support ice dam weight and resist puncture from debris. |
Deep Dive: Core Roof Flashing Materials for Repairs
1. Copper (16 oz and 20 oz Cold-Rolled)
Copper remains the gold standard for permanent flashing repairs, particularly around chimneys, skylights, and complex architectural details. In 2026, material costs for copper have stabilized but remain premium. For residential repairs, 16-ounce copper (approx. 0.021 inches thick) is standard for step and counter-flashing. For high-wear areas like box gutters or wide open valleys, 20-ounce copper provides the necessary rigidity to resist denting from hail or foot traffic.
2. Aluminum (.019" to .024" Thickness)
Aluminum is the most common roof flashing material for residential step-flashing and drip edges due to its low cost and high malleability. However, raw aluminum is highly susceptible to alkaline corrosion when in direct contact with fresh concrete, stucco, or fiber-cement siding (like James Hardie). If repairing flashing against these materials, you must specify anodized or factory-painted aluminum to create a protective barrier.
3. Galvanized Steel (G90 Coating)
Galvanized steel is heavily utilized in commercial applications and agricultural buildings. The "G90" designation means there is 0.90 ounces of zinc coating per square foot. For repairs, avoid G60 or lower, as the thinner zinc layer will rust through within a decade in humid or coastal climates. Galvanized steel must be painted or coated after installation if the protective zinc layer is scratched during the bending and cutting process.
4. Self-Adhering SBS-Modified Bitumen Membranes
For flat roofs, low-slope transitions, and emergency leak mitigation, peel-and-stick membranes (such as Grace Ice & Water Shield HT or Vycor) have revolutionized repair protocols. These SBS-modified bitumen sheets feature a split-release backing and self-seal around nail penetrations. They are the only acceptable roof flashing material for sealing the internal corners of parapet walls or creating a secondary water barrier in ice-dam-prone eaves.
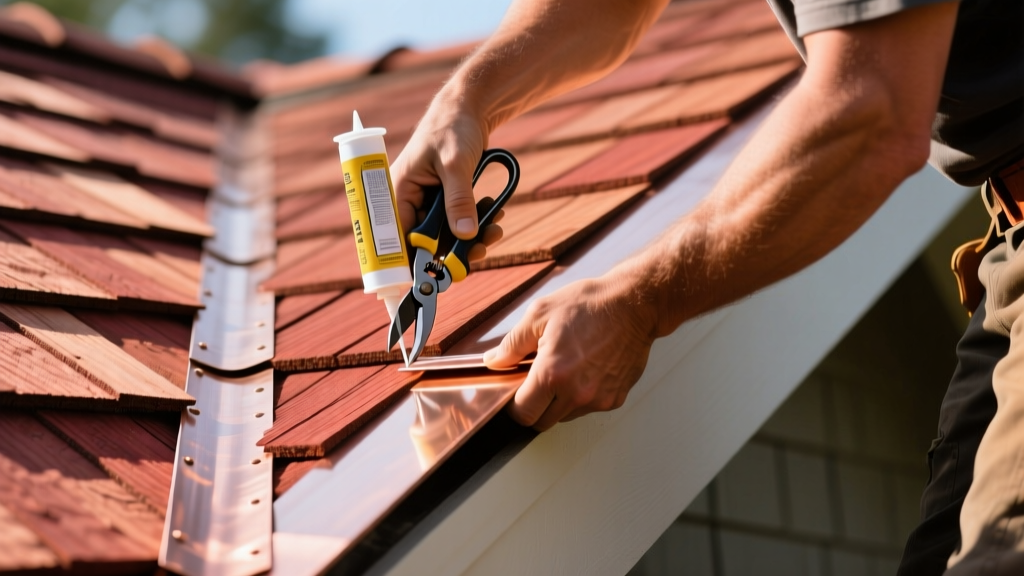
2026 Cost and Lifespan Comparison Matrix
Budgeting a flashing repair requires looking beyond the initial material cost. Labor often accounts for 70% of a flashing repair bill, making it economically illogical to install a 15-year flashing material on a roof with 30-year architectural shingles.
| Roof Flashing Material | Material Cost (per Linear Ft) | Installed Cost (per Linear Ft) | Expected Lifespan | Best Application |
|---|---|---|---|---|
| 16 oz Copper | $6.50 - $9.00 | $18.00 - $28.00 | 70+ Years | Chimneys, valleys, historic restorations |
| .019" Aluminum | $1.20 - $2.00 | $5.00 - $9.00 | 20 - 30 Years | Step flashing, drip edge, siding transitions |
| 24-Gauge Galvanized | $2.50 - $4.00 | $8.00 - $14.00 | 25 - 40 Years | Commercial parapets, open valleys |
| SBS Peel-and-Stick | $1.50 - $2.50 (per Sq Ft) | $4.00 - $7.00 (per Sq Ft) | 15 - 25 Years | Flat roof inside corners, eaves, emergency patches |
The Galvanic Corrosion Trap: What NOT to Mix
According to building envelope research published by Building Science Corporation, mixing dissimilar metals in the presence of an electrolyte (rainwater) triggers galvanic corrosion. The less noble metal will rapidly deteriorate. This is the most common cause of premature flashing failure in DIY and unmanaged contractor repairs.
Step-by-Step Protocol: Repairing Step Flashing at a Sidewall
Step flashing is woven into the shingle courses along a sidewall. When it fails, water tracks behind the siding. The Insurance Institute for Business & Home Safety (IBHS) notes that wind-driven rain exploits even 1/16-inch gaps in poorly integrated step flashing. Follow this precise repair sequence:
- Expose the Junction: Carefully remove the siding or wall cladding up to 12 inches above the roofline. Pry up the shingles covering the compromised flashing area using a flat pry bar, taking care not to snap the fiberglass mat of the surrounding shingles.
- Extract and Clean: Pull the corroded or bent flashing pieces. Sweep away all granular debris and old roofing cement from the roof deck. Inspect the underlying underlayment; if it is brittle or torn, patch it with a 6-inch square of self-adhering membrane.
- Fabricate the New Pieces: Cut .019" aluminum step flashing into 5x7 inch rectangles. Bend each piece to a strict 90-degree angle using a sheet metal brake. A hand-bent piece will result in an uneven pitch that pools water.
- Weave and Integrate: Slide the first piece of step flashing under the siding's weather-resistive barrier (WRB) but over the roof underlayment. The vertical leg must extend at least 5 inches up the wall, and the horizontal leg must extend 2 inches past the shingle exposure line.
- Secure Correctly: Nail the flashing only to the vertical wall, never to the roof deck. Nailing the horizontal deck leg creates a direct puncture path for water and restricts the natural thermal movement of the roof deck.
- Re-Lay Shingles and Counter-Flash: Weave the shingles back over the horizontal legs. Install a continuous piece of counter-flashing over the vertical legs, sealing the top edge with polyurethane sealant and a termination bar if masonry is involved.
Final Verification
A successful flashing repair does not rely on caulk to stop water; it relies on gravity and overlapping geometry. Sealants are strictly secondary weather barriers used to prevent wind-driven capillary action. By selecting the correct roof flashing material for your specific junction and respecting galvanic boundaries, you ensure the repair outlasts the primary roofing material itself.
Written by
Elena RodriguezElena Rodriguez is a civil engineer and technical writer specializing in concrete technology, masonry systems, and ASTM/ACI compliance. She earned her B.S. in Civil Engineering from Texas A&M University and spent a decade at a materials testing laboratory, performing over 2,000 concrete compressive strength tests and masonry prism evaluations. Elena is an ACI-certified Field Testing Technician (Grade I) and a member of ASTM Committee C12 on Natural Building Stone. She currently consults on forensic engineering cases involving concrete failures and moisture intrusion. Based in San Antonio, TX, Elena is a proud member of the Society of Women Engineers (SWE) and coaches her daughter's FIRST Robotics team.
More from Elena Rodriguez
View all
Walls & Panels
Cost Analysis: Light Gauge Steel Framing Advantages and Disadvantages
Evaluate light gauge steel framing advantages and disadvantages through a strict cost analysis lens, comparing material, labor, and lifecycle expenses.
Aug 4, 2026

Walls & Panels
Gypsum Board Types: Exact Specifications, Thickness & Dimensions
Compare standard, Type X, and moisture-resistant gypsum board types. Get exact specifications, thicknesses, dimensions, and ASTM standards for your project.
Aug 4, 2026

Fire Resistance
Best Fire-Resistant Outdoor Decking Materials: 2026 Buyer Guide
Discover the best fire-resistant outdoor decking materials for 2026. Compare Class A PVC, aluminum, and hardwood options for WUI compliance and safety.
Aug 4, 2026