Artesia Building Materials: Stone Veneer Application Guide
Master the installation of Artesia building materials with this step-by-step stone veneer application guide covering prep, mortar, and sealing.

Scope and Material Specifications
Artesia building materials, specifically their manufactured and natural stone veneer profiles, demand rigorous adherence to moisture management and masonry standards. Unlike traditional full-bed masonry, adhered veneer systems rely entirely on the substrate's structural integrity and the mortar's bond strength. Improper application of Artesia stone profiles leads to delamination, efflorescence, and voided manufacturer warranties. This guide details the exact application protocols for exterior and interior installations, aligning with the latest ASTM C1670 specifications for adhered manufactured stone masonry veneer.
Phase 1: Substrate Preparation and Weatherproofing
The longevity of any Artesia stone veneer installation is determined before the first stone is laid. Water management is the primary defense against structural degradation and freeze-thaw spalling.
Weather-Resistive Barrier (WRB) and Flashing
For exterior wood or steel stud framing, apply two layers of Grade D asphalt-impregnated paper or a high-performance commercial WRB (such as a fluid-applied membrane or non-woven polyolefin). According to Building Science Corporation's water management guidelines, the secondary layer acts as a slip plane and a backup drainage matrix. Install a corrosion-resistant weep screed at the base of the wall system. Per ASTM C1063, the weep screed must maintain a minimum clearance of 1 inch above unpaved grade and 2 inches above paved surfaces or decks to prevent capillary action and soil moisture ingress.
Lath and Scratch Coat Application
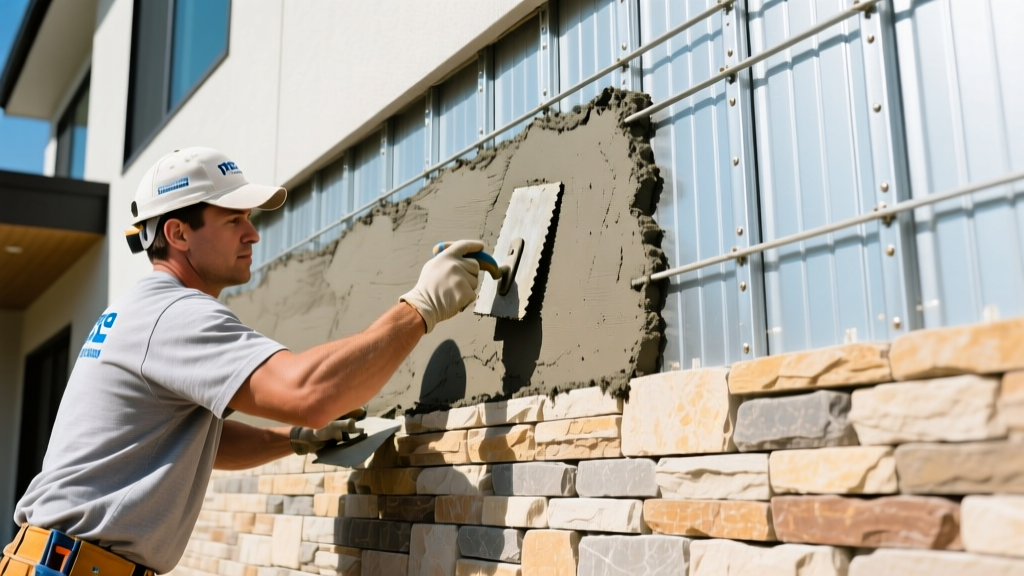
Fasten self-furring, galvanized steel metal lath (minimum 2.5 lb/sq yd, ASTM C847) using corrosion-resistant nails or staples spaced no more than 6 inches apart on center. Ensure the lath cups face upward to catch the mortar. Overlap horizontal seams by 1 inch and vertical seams by 2 inches.
- Scratch Coat Thickness: Apply a 3/8-inch to 1/2-inch layer of Type S mortar directly over the lath.
- Scoring: Horizontally score the wet mortar every 6 inches using a coarse rake to create a mechanical key for the setting bed.
- Curing: Allow the scratch coat to cure for a minimum of 48 hours. In temperatures exceeding 90°F, mist the scratch coat twice daily to prevent rapid moisture loss and shrinkage cracking.
Phase 2: Mortar Selection and Mixing Protocols
Selecting the correct mortar is critical for accommodating the thermal expansion and contraction of Artesia building materials. Do not use pre-mixed mastics or thin-set adhesives designed for ceramic tile; they lack the vapor permeability and compressive strength required for masonry veneers.
| Mortar Type | Application Zone | Compressive Strength | Mix Ratio (Cement : Lime : Sand) | Curing Time |
|---|---|---|---|---|
| Type S | Exterior, Below Grade, High Wind | 1,800 psi (minimum) | 1 : 0.5 : 4.5 | 28 days (full cure) |
| Type N | Interior, Climate-Controlled | 750 psi (minimum) | 1 : 1.25 : 6.75 | 28 days (full cure) |
| Polymer-Modified | High-Vibration / Seismic Zones | 2,500+ psi | Pre-bagged (follow OEM) | 14-21 days |
Mixing Directive: Mix mortar in a mechanical drum mixer for a minimum of 5 minutes after all ingredients are added. The consistency should resemble stiff mashed potatoes—it must hold its shape on a trowel held at a 90-degree angle without slumping. Discard any mortar that begins to stiffen (initial set); never re-temper with water.
Phase 3: Stone Placement and Jointing Techniques
Following the guidelines established by the Masonry Veneer Manufacturers Association (MVMA), proper placement ensures uniform load distribution and aesthetic consistency.
- Dry-Fit and Layout: Lay out corner pieces and field stones on the ground to blend color variations and sizes. Avoid clustering identical shapes or hues.
- Install Corners First: Apply a 1/2-inch setting bed to the scratch coat and back-butter the back of the corner stone with a 1/2-inch layer of mortar. Press firmly until mortar squeezes out on all sides. Alternate long and short corner legs to mimic natural masonry bonding patterns.
- Field Stone Application: Work from the bottom up. For Artesia profiles exceeding 12 inches in length or 10 pounds in weight, 100% back-buttering is mandatory. Push the stone into the setting bed with a slight twisting motion to eliminate air pockets.
- Jointing: Maintain consistent joint widths (typically 1/2 inch for standard profiles; 0 inches for dry-stack profiles). Use a pointing tool to compact the mortar joints when they are 'thumb-print hard' (firm enough to resist light pressure but soft enough to take an impression). This compaction increases joint density and weather resistance.
Critical Warning: Cutting Manufactured Stone
When cutting Artesia manufactured stone to fit around outlets or windows, use a diamond-tipped masonry blade on a wet saw or angle grinder. Never cut from the front face. Always cut from the back to prevent chipping the colored aggregate surface. After cutting, use a masonry rubbing stone or a stiff wire brush to soften the sharp cut edges, exposing the inner aggregate to blend with the natural stone profile.
Phase 4: Sealing and Moisture Protection
Artesia building materials are inherently porous. While sealing is not always strictly required for interior applications, exterior installations in freeze-thaw climates or regions with driving rain benefit significantly from a penetrating sealer.
Wait a full 28 days after installation to allow the mortar and stone to cure and release excess moisture. Apply a breathable, silane/siloxane-based penetrating masonry sealer. These sealers line the capillary pores without forming a surface film, allowing water vapor to escape while preventing liquid water intrusion. Avoid acrylic or polyurethane film-forming sealers, which trap moisture inside the masonry system and lead to catastrophic freeze-thaw spalling.
Troubleshooting: Efflorescence Management
Symptom: A white, powdery residue appears on the stone surface or mortar joints weeks after installation.
Cause: Water migrating through the unsealed masonry dissolves soluble salts present in the Portland cement and carries them to the surface, where they crystallize upon evaporation.
Resolution: Do not use muriatic acid or harsh chemical cleaners, as these will etch the manufactured aggregate and permanently alter the stone's color. Instead, allow the efflorescence to dry completely and remove it with a stiff, non-metallic bristle brush. For stubborn deposits, apply a diluted solution of white vinegar and water (1:5 ratio), agitate gently, and rinse thoroughly with low-pressure water.
Frequently Asked Questions
Can I install Artesia stone veneer directly over existing painted brick?
No. Paint acts as a bond-breaker. If the brick is painted, you must either sandblast the paint off entirely or frame out a new stud wall in front of the brick, apply a WRB, metal lath, and a scratch coat before installing the veneer. Unpainted, raw brick can receive a direct scratch coat application, provided the brick surface is clean and free of sealers.
What is the freeze-thaw durability rating for these materials?
High-quality Artesia manufactured stone profiles meet ASTM C1670 standards, which require the material to absorb less than 14% water by weight and withstand 50 freeze-thaw cycles without significant degradation. Proper installation of the WRB and weep screed is what ultimately ensures the system survives real-world winter conditions.
How do I handle expansion joints in long wall runs?
For exterior wall runs exceeding 30 linear feet, or at transitions between different structural materials (e.g., where wood framing meets a concrete foundation), install a flexible sealant joint. Do not bridge these structural transitions with continuous mortar or stone, as differential movement will cause the veneer to crack.
Written by
Sarah WhitfieldSarah Whitfield is a chartered quantity surveyor (MRICS) and construction cost analyst with 15 years of experience in material pricing, procurement strategy, and project budgeting. She earned her degree in Construction Management from the University of Reading (UK) and has worked on projects ranging from $2M custom homes to $180M mixed-use developments across North America and Europe. Sarah currently leads cost estimating for BuildMat Insight, maintaining a proprietary database of 4,000+ material price points updated quarterly. She is a frequent contributor to RSMeans cost data panels and has presented at the International Cost Engineering Council (ICEC) congress. Based in Denver, CO, Sarah is an avid trail runner and volunteer mentor for Women in Construction.
More from Sarah Whitfield
View all
Wood & Lumber
What Are the Different Types of Wood? A Builder's Guide
Compare structural softwoods, finish hardwoods, and engineered lumber. Analyze Janka ratings, MOE values, and 2026 pricing for construction.
Aug 4, 2026

Walls & Panels
Steel Framing vs Wood Framing: Corrosion and Moisture Defense
Compare steel framing vs wood framing for moisture resistance. Learn about galvanized coatings, condensation risks, and corrosion protection strategies.
Jul 21, 2026

Stone & Masonry
How to Cut Stone Veneer: Wet Saw vs Grinder Comparison
Compare the best tools for cutting stone veneer. We review wet saws, angle grinders, and chop saws to help you achieve clean, chip-free cuts.
Jul 21, 2026