What Is the Best Material for a Crown on Your Chimney?
Discover what is the best material for a crown on masonry chimneys. Compare concrete, mortar, and metal caps for lasting weatherproofing and structural integrity.

The Critical Role of the Chimney Crown in Building Envelopes
The chimney crown is the primary horizontal defense against water intrusion in a masonry chimney system. It acts as the roof of the chimney, shedding precipitation away from the porous brickwork, mortar joints, and flue liners below. When evaluating building envelope components, homeowners and contractors frequently ask what is the best material for a crown on their masonry chimney. The answer requires moving beyond convenience and understanding the material science of freeze-thaw dynamics, thermal expansion, and water permeability.
A failing crown allows water to penetrate the chimney chase. Once inside, trapped moisture expands during freezing cycles, causing spalling, efflorescence, and eventually the structural degradation of the entire masonry column. Selecting the correct material is not merely an aesthetic choice; it is a critical structural intervention that dictates whether a chimney will last 5 years or 50 years without major reconstruction.
The most common mistake in chimney construction and repair is using standard Type N or Type S masonry mortar to form the crown. Mortar is engineered to be slightly softer and more porous than the brick it binds, allowing it to act as a sacrificial layer that accommodates minor settling. When used horizontally as a crown, mortar acts like a sponge. It absorbs water rapidly and lacks the tensile strength to span across the chimney chase, leading to catastrophic cracking within 3 to 5 freeze-thaw cycles. Never use standard bricklaying mortar for a chimney crown.
Evaluating the Contenders: Material Science and Performance
To determine the optimal material, we must evaluate the three primary options used in modern masonry: high-density Portland cement concrete, polymer-modified concrete mixes, and fabricated metal caps.
1. High-Density Portland Cement Concrete (The Masonry Standard)
Standard Portland cement-based concrete is the baseline requirement for a masonry crown. Unlike mortar, concrete contains coarse aggregate (pea gravel), which provides the necessary compressive and tensile strength to bridge the chimney span without cracking. According to guidelines published by the Brick Industry Association (BIA), a proper concrete crown must be formed with a low water-cement ratio to minimize shrinkage and capillary porosity.
- Mix Design: 1 part ASTM C150 Type I/II Portland cement, 2 parts ASTM C33 fine sand, and 3 parts washed pea gravel (maximum 3/8-inch aggregate).
- Water-Cement Ratio: Strictly maintained at 0.45 to 0.50. A drier mix yields a denser, less permeable surface.
- Cost: $150–$300 for DIY materials; $600–$950 for professional installation.
2. Polymer-Modified Concrete Mixes (The Premium Upgrade)
For environments subjected to extreme freeze-thaw cycles or coastal salt spray, polymer-modified concrete offers superior performance. By integrating acrylic or latex polymers into the concrete matrix, the material achieves higher flexural strength and significantly lower water absorption rates. Products like Quikrete Concrete Resurfacer or specialized polymer-modified structural repair mortars (which are formulated differently than standard brick mortar) can be used for thinner crown applications where adding 3 inches of standard concrete would overload the masonry.
3. Fabricated Metal Caps (Stainless Steel and Copper)
While concrete is the traditional choice, fabricated metal crowns (often referred to as chimney caps or chase covers) represent the ultimate waterproofing solution. A custom-fabricated 16-gauge 304 stainless steel or 16-ounce copper cap completely eliminates the risk of concrete cracking. These are mechanically fastened to the masonry and sealed with high-temperature polyurethane. The Chimney Safety Institute of America (CSIA) frequently recommends metal covers for chimneys with a history of chronic water intrusion where concrete crowns have repeatedly failed.
Material Comparison Matrix
| Material Type | Expected Lifespan | Water Permeability | Avg. Professional Cost |
|---|---|---|---|
| Type N/S Mortar (Not Recommended) | 3–7 Years | High | $400–$600 |
| Portland Cement Concrete | 20–30 Years | Low (if sealed) | $600–$950 |
| Polymer-Modified Concrete | 30–40 Years | Very Low | $800–$1,200 |
| 16-Gauge 304 Stainless Steel | 50+ Years | Zero | $1,200–$2,500 |
| 16oz Copper Cap | 75+ Years | Zero | $2,000–$4,500+ |
Application Guide: Pouring a Code-Compliant Concrete Crown
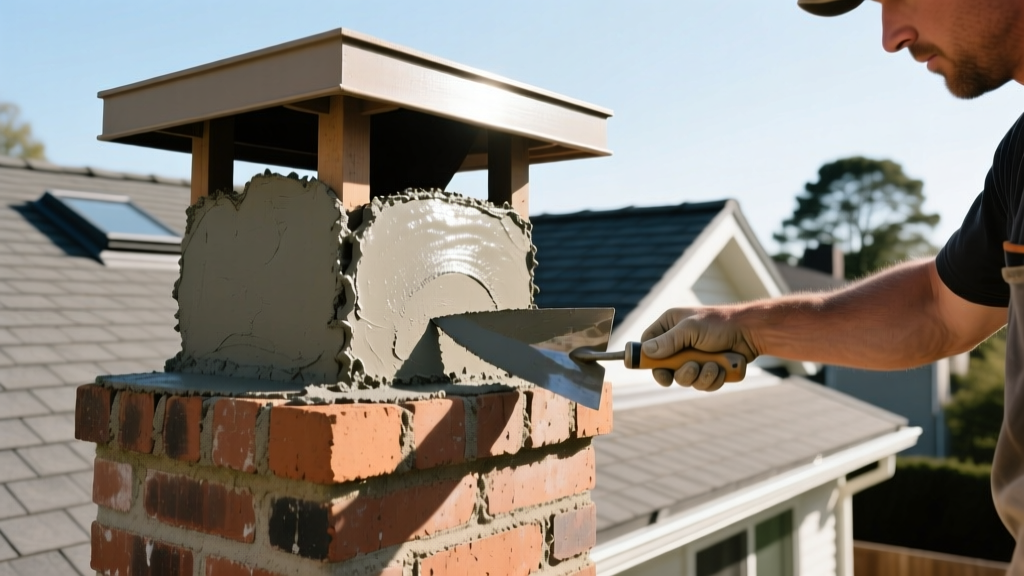
If you opt for a Portland cement concrete crown, precise execution is just as important as the material selection. The NFPA 211 Standard for Chimneys, Fireplaces, Vents, and Solid Fuel-Burning Appliances outlines strict geometric and structural requirements for crown construction.
- Prepare the Substrate and Flue Liner: Clean the top course of brickwork. Wrap the protruding clay flue liner with a 1/2-inch closed-cell polyethylene backer rod. This creates a crucial expansion joint. Concrete and clay expand at different rates when heated; without this isolation joint, the concrete will crack radially from the flue.
- Build the Sloped Formwork: Construct a wooden form that extends exactly 2.5 inches beyond the face of the masonry on all sides. The form must be pitched at a minimum slope of 1/4 inch per 12 inches of horizontal run, sloping away from the flue liner toward the edges.
- Mix and Place the Concrete: Mix the 1:2:3 concrete batch to a stiff, low-slump consistency. Trowel it into the form, ensuring it is at least 2 inches thick at the thinnest edge and 3.5 inches thick near the flue.
- Tool the Drip Edge (Kerf): Before the concrete fully sets, use a jointing tool to cut a continuous 3/8-inch deep drip groove (kerf) into the underside of the 2.5-inch overhang. This groove breaks surface tension, forcing water to drip off the edge rather than wicking back underneath onto the brickwork.
- Cure and Seal: Cover the crown with wet burlap and plastic sheeting for 7 days to ensure proper hydration and prevent plastic shrinkage cracking. After 28 days of full curing, apply a breathable, silane-siloxane penetrating masonry sealer to the surface.
Do not pour concrete crowns if the ambient temperature is below 40°F (4°C) or expected to drop below freezing within 24 hours. Cold temperatures halt the hydration process and can cause the water in the mix to freeze, expanding and destroying the concrete matrix before it achieves structural integrity. If cold-weather application is unavoidable, use accelerating admixtures and insulating blankets per ACI 306 guidelines.
Sealant Selection for the Expansion Joint
The gap left by the backer rod around the flue liner must be sealed with a high-performance elastomeric sealant. Standard silicone or acrylic latex caulks will degrade rapidly under the UV exposure and high surface temperatures present on a chimney crown. Procure a high-grade, single-component polyurethane sealant, such as Sikaflex-1A or ChemLink DuraSil. These sealants maintain adhesion and flexibility across temperature swings from -20°F to 180°F, accommodating the thermal expansion of the clay flue liner without tearing away from the concrete.
Final Verdict and Procurement Advice
When determining what is the best material for a crown, the decision hinges on budget and long-term performance expectations. For standard residential applications, a properly sloped, low water-cement ratio Portland cement concrete crown with a tooled drip edge and a polyurethane-sealed expansion joint offers the best balance of cost and durability, easily lasting 25+ years. However, for historic restorations, high-moisture climates, or homeowners seeking a lifetime, zero-maintenance solution, investing in a custom-fabricated 16-gauge 304 stainless steel or copper cap is the undisputed premium choice. Avoid the false economy of standard brick mortar at all costs; the resulting water damage to the masonry chase will cost thousands of dollars to rebuild within a decade.
Written by
Elena RodriguezElena Rodriguez is a civil engineer and technical writer specializing in concrete technology, masonry systems, and ASTM/ACI compliance. She earned her B.S. in Civil Engineering from Texas A&M University and spent a decade at a materials testing laboratory, performing over 2,000 concrete compressive strength tests and masonry prism evaluations. Elena is an ACI-certified Field Testing Technician (Grade I) and a member of ASTM Committee C12 on Natural Building Stone. She currently consults on forensic engineering cases involving concrete failures and moisture intrusion. Based in San Antonio, TX, Elena is a proud member of the Society of Women Engineers (SWE) and coaches her daughter's FIRST Robotics team.
More from Elena Rodriguez
View all
Walls & Panels
Cost Analysis: Light Gauge Steel Framing Advantages and Disadvantages
Evaluate light gauge steel framing advantages and disadvantages through a strict cost analysis lens, comparing material, labor, and lifecycle expenses.
Aug 4, 2026

Walls & Panels
Gypsum Board Types: Exact Specifications, Thickness & Dimensions
Compare standard, Type X, and moisture-resistant gypsum board types. Get exact specifications, thicknesses, dimensions, and ASTM standards for your project.
Aug 4, 2026

Fire Resistance
Best Fire-Resistant Outdoor Decking Materials: 2026 Buyer Guide
Discover the best fire-resistant outdoor decking materials for 2026. Compare Class A PVC, aluminum, and hardwood options for WUI compliance and safety.
Aug 4, 2026