Selecting the Ideal Build of Materials for Exterior Walls
Learn how to specify the right build of materials for exterior walls. Compare insulation, sheathing, and WRBs for optimal thermal and moisture performance.

In commercial and high-performance residential construction, the phrase "build of materials" refers to the precise, layered composition of an assembly. When architects and builders select the build of materials for an exterior wall, they are not merely picking individual products; they are engineering a cohesive system that must manage heat, water, air, and vapor. A flawed material build leads to interstitial condensation, thermal bridging, and premature structural decay. This guide details how to specify, sequence, and validate the build of materials for high-performance exterior wall assemblies in 2026.
The Four Control Layers of a Material Build
Every durable exterior wall build of materials must incorporate four continuous control layers. If any layer is compromised or improperly sequenced, the entire assembly's performance degrades. According to the foundational principles established by the Building Science Corporation, these layers must be continuous across all transitions, including roofs, foundations, and penetrations.
The "Perfect Wall" Material Sequence
- Water Resistive Barrier (WRB): The outermost defensive layer, shedding bulk water while allowing water vapor to escape (vapor-permeable).
- Thermal Control Layer: Insulation placed outside the structural sheathing to prevent thermal bridging through wood or steel studs.
- Air Control Layer: A continuous membrane that stops unconditioned air infiltration, which is the primary driver of moisture-laden condensation inside wall cavities.
- Vapor Control Layer: A retarder positioned based on the dominant climate-driven vapor drive to prevent interstitial condensation.
Evaluating Sheathing and WRB Combinations
The structural sheathing and WRB form the critical mid-section of your wall's build of materials. The industry has moved away from traditional OSB with stapled housewrap toward integrated, high-performance panels and fluid-applied membranes. Selecting the right combination depends on your project's budget, exposure risk, and drying potential.
| Assembly Type | Product Examples | Perm Rating | Approx. Cost (per sq ft) | Best Application |
|---|---|---|---|---|
| Integrated ZIP Sheathing | Huber ZIP System, LP WeatherLogic | Class III (5-10 perms) | $1.60 - $2.10 | Standard residential, light commercial with standard drying potential. |
| Faced Polyiso Sheathing | Rmax Thermasheath, Johns Manville CI | Class I (< 1.0 perm) | $2.20 - $2.80 | Cold climates where exterior vapor drive is the primary concern. |
| Fluid-Applied over DensGlass | Prosoco R-Guard, Henry Blueskin VP100 | Class III (15+ perms) | $2.50 - $3.40 | High-performance commercial, Passive House, mixed-humid climates. |
The Case for Fluid-Applied Membranes
When specifying the build of materials for high-exposure or complex geometries, fluid-applied membranes (like Prosoco R-Guard FastFlash) offer distinct advantages over sheet goods. They eliminate the thousands of staple holes and taped seams that act as failure points over a 50-year lifespan. While the upfront material and labor cost is 20-30% higher, the airtightness results (routinely achieving < 0.6 ACH50) and elimination of WRB shrinkage justify the investment in premium builds.
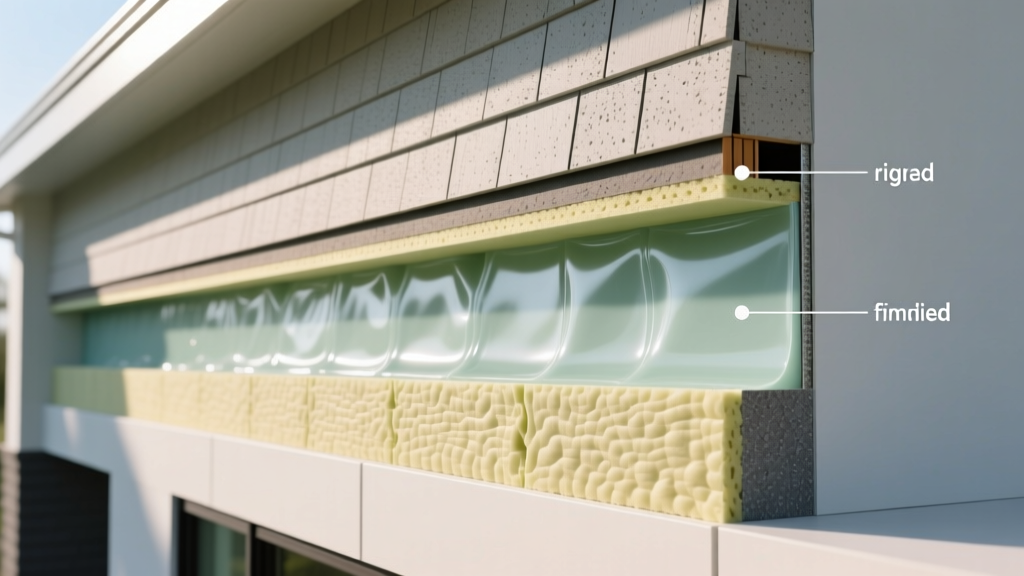
Continuous Insulation (ci) Integration
Modern energy codes mandate continuous insulation to break the thermal bridge created by wall framing. Wood studs account for roughly 25% of a wall's surface area, and steel studs can reduce cavity insulation effectiveness by up to 50%. Therefore, the exterior build of materials must incorporate a robust ci layer.
"Adding R-5 of continuous insulation to a 2x6 wall framed with steel studs increases the overall assembly R-value from an effective R-7 to an R-12. The continuous layer is not optional; it is the primary thermal driver." — U.S. Department of Energy Building Technologies Office.
Material Selection for ci:
- Mineral Wool (e.g., Rockwool Comfortboard 80): Highly vapor-permeable (40+ perms), non-combustible, and hydrophobic. Ideal for assemblies that need to dry to the exterior. Cost: ~$1.25/sq ft for 2 inches.
- Expanded Polystyrene (EPS): Cost-effective (~$0.60/sq ft for 2 inches) and vapor-permeable, but lower R-value per inch (R-3.8) and requires careful fastener detailing to prevent crushing.
- Extruded Polystyrene (XPS): High compressive strength and R-5 per inch, but acts as a vapor retarder. Avoid using XPS on the exterior of wall assemblies in cooling-dominated climates, as it traps moisture inside the wall cavity.
Climate-Specific Material Builds (Decision Matrix)
The optimal build of materials changes drastically depending on the IECC Climate Zone. The U.S. Department of Energy categorizes these zones based on heating and cooling degree days. Selecting interior vapor retarders or exterior insulation without referencing your specific climate zone is the leading cause of assembly failure.
Zones 1-3 (Hot/Humid & Mixed-Humid)
Dominant Drive: Inward vapor drive from exterior heat and humidity.
Required Build: Use a Class II or III vapor-permeable WRB. Never use an interior polyethylene vapor barrier. Use unfaced fiberglass or mineral wool in the cavity to allow inward drying.
Zones 5-8 (Cold & Very Cold)
Dominant Drive: Outward vapor drive from interior heating.
Required Build: Interior Class I or II vapor retarder is required. Exterior continuous insulation must be thick enough to keep the sheathing above the dew point (typically R-7.5 to R-10 minimum ci).
Critical Edge Cases and Assembly Failures
Even with premium products, a flawed sequence in the build of materials will cause catastrophic failure. Watch for these specific edge cases during the submittal and construction phases:
1. The "Moisture Sandwich" Effect
Occurring when builders install low-perm exterior insulation (like foil-faced polyiso) combined with an interior polyethylene vapor barrier. The wall cavity is trapped between two impermeable layers. If any bulk water enters via a window flashing defect, the assembly cannot dry in either direction, leading to rapid OSB rot and mold proliferation. Always ensure at least one side of the assembly has a high perm rating (Class III or higher) to facilitate drying.
2. Fastener Thermal Bridging in ci Layers
When attaching heavy cladding (like fiber cement or masonry veneer) through thick exterior mineral wool, the metal fasteners act as thermal bridges, negating up to 15% of the ci's R-value. To mitigate this, specify structural thermal break pads (like Armatherm) at high-load attachment points, or utilize specialized structural screws with low thermal conductivity caps designed specifically for thick ci assemblies.
3. Incompatible Tapes and Fluid Membranes
Not all acrylic construction tapes adhere to all sheathing facers. Applying a standard butyl flashing tape over a foil-faced polyiso board will result in adhesive failure within 24 months due to plasticizer migration. Always verify the manufacturer's compatibility matrix. For foil-faced boards, use specific aluminum-backed acrylic tapes (e.g., 3M All Weather Flashing Tape 8067) or prime the surface before applying fluid-applied flashing.
Specifying the correct build of materials requires moving beyond individual product data sheets and analyzing the hygrothermal behavior of the entire assembly. By aligning your sheathing, WRB, insulation, and vapor control layers with the specific climate zone and drying potential of your project, you ensure a durable, high-performance envelope that meets the rigorous demands of modern construction standards.
Written by
Sarah WhitfieldSarah Whitfield is a chartered quantity surveyor (MRICS) and construction cost analyst with 15 years of experience in material pricing, procurement strategy, and project budgeting. She earned her degree in Construction Management from the University of Reading (UK) and has worked on projects ranging from $2M custom homes to $180M mixed-use developments across North America and Europe. Sarah currently leads cost estimating for BuildMat Insight, maintaining a proprietary database of 4,000+ material price points updated quarterly. She is a frequent contributor to RSMeans cost data panels and has presented at the International Cost Engineering Council (ICEC) congress. Based in Denver, CO, Sarah is an avid trail runner and volunteer mentor for Women in Construction.
More from Sarah Whitfield
View all
Wood & Lumber
What Are the Different Types of Wood? A Builder's Guide
Compare structural softwoods, finish hardwoods, and engineered lumber. Analyze Janka ratings, MOE values, and 2026 pricing for construction.
Aug 4, 2026

Walls & Panels
Steel Framing vs Wood Framing: Corrosion and Moisture Defense
Compare steel framing vs wood framing for moisture resistance. Learn about galvanized coatings, condensation risks, and corrosion protection strategies.
Jul 21, 2026

Stone & Masonry
How to Cut Stone Veneer: Wet Saw vs Grinder Comparison
Compare the best tools for cutting stone veneer. We review wet saws, angle grinders, and chop saws to help you achieve clean, chip-free cuts.
Jul 21, 2026