Advanced Installation Techniques for Modern Insulation Materials
Master advanced installation techniques for fiberglass, spray foam, and rigid insulation materials to eliminate thermal bridges and moisture traps.
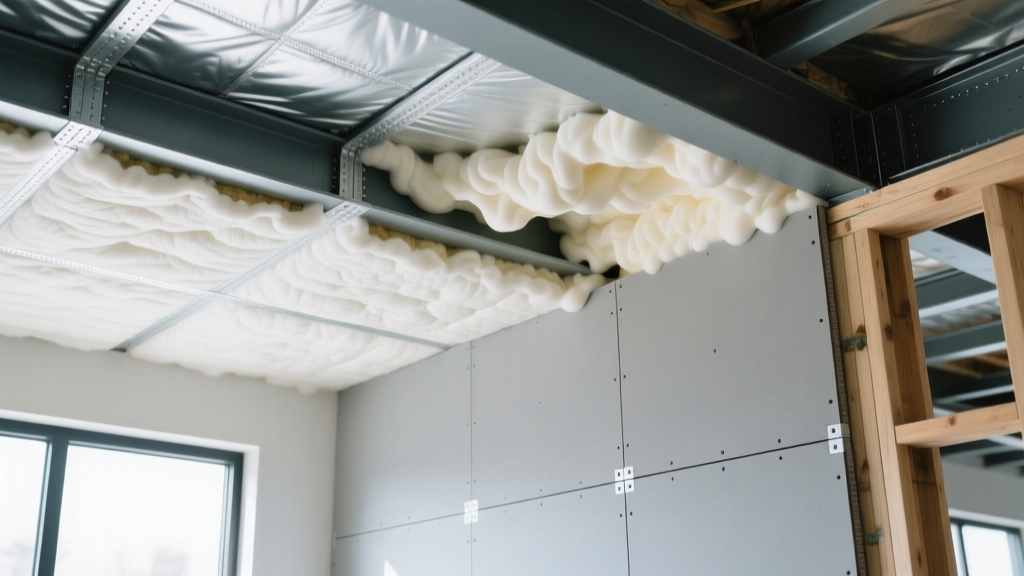
The Hidden Cost of Poor Insulation Installation
An insulation material's laboratory-rated R-value is only a theoretical maximum. In the field, the thermal resistance of fiberglass, mineral wool, spray foam, and rigid boards is entirely dependent on installation precision. According to the U.S. Department of Energy, even a 4% gap in cavity coverage can reduce the overall wall assembly's thermal performance by up to 50%. As the IECC 2024 and upcoming 2026 code cycles mandate stricter continuous insulation (ci) requirements and lower building envelope leakage targets (often 2.0 ACH50 or lower), mastering the installation techniques for modern insulation materials is no longer optional—it is a baseline requirement for code compliance and structural durability.
Never compress a standard R-38 fiberglass batt (designed for 2x6 or 2x8 cavities) into a 2x4 wall. Compressing the material increases its density but drastically reduces its trapped air pockets, dropping its effective R-value from R-38 down to approximately R-13, while simultaneously increasing the risk of moisture condensation within the cavity.
Fiberglass and Mineral Wool Batts: The Friction-Fit Protocol
Modern mineral wool products, such as ROCKWOOL Safe'n'Sound or Owens Corning Thermafiber, offer superior dimensional stability compared to traditional fiberglass. However, they require specific cutting and fitting techniques to achieve a Grade I installation rating per RESNET standards.
Cutting and Fitting Around Obstructions
The most common failure point in batt insulation is the area surrounding electrical boxes, plumbing stacks, and HVAC registers. The outdated 'stuff and hope' method creates massive thermal bridges.
- The L-Cut Method: For electrical boxes, measure the distance from the nearest stud to the box. Slit the batt to that depth, then make a perpendicular cut to create an 'L' shaped flap that folds neatly behind the box, ensuring the insulation completely encapsulates the drywall side of the junction box.
- The Picture Frame Technique: For windows and doors, cut rigid mineral wool boards or high-density fiberglass to fit tightly between the rough opening and the window flange. Use a low-expansion polyurethane window and door foam (like Great Stuff Pro Window & Door) to seal the micro-gaps between the insulation and the wood framing.
- Splitting for Wiring: When encountering Romex wiring running horizontally through studs, split the batt's thickness in half. Pass one half behind the wire and the other half in front, maintaining full cavity depth without compressing the material against the drywall.
Closed-Cell Spray Foam: Managing Expansion and Exothermic Reactions
The shift toward HFO-blown closed-cell spray foams (such as Demilec Heatlok XT HFO) has drastically reduced the Global Warming Potential (GWP) of these insulation materials to near 1. However, the installation physics remain volatile. Closed-cell foam expands rapidly and generates significant heat during the curing process.
| Parameter | Minimum Threshold | Ideal Range | Failure Consequence |
|---|---|---|---|
| Substrate Temperature | 60°F (15°C) | 70°F - 80°F | Poor adhesion, delamination, shrinkage |
| Ambient Humidity | 20% | 40% - 60% | Brittle foam, uneven cell structure |
| Pass Thickness | 0.5 inches | 1.0 - 1.5 inches | Exothermic smoldering, spontaneous combustion |
Applying closed-cell foam in lifts thicker than 1.5 to 2 inches per pass traps the exothermic heat inside the core. This can lead to internal charring, off-gassing of toxic isocyanates, and in severe cases, structural fires. Installers must use thermal imaging cameras between passes to verify the foam has cooled below 150°F before applying the next lift.
Rigid Foam Board: Taping, Sealing, and Thermal Bridging
Exterior continuous insulation (ci) utilizing rigid foam boards—such as Polyisocyanurate (Polyiso) or Expanded Polystyrene (EPS)—is critical for breaking the thermal bridge created by wood or steel studs. As noted by Building Science Corporation, the control layers (water, air, thermal, vapor) must be continuous. Rigid foam often serves as both the thermal and air control layer when detailed correctly.
The Fluid-Applied and Taped Membrane Approach
Simply butting rigid foam boards together and relying on housewrap is insufficient for modern blower door targets. The joints between insulation materials must be sealed to prevent convective heat loss.
- Shiplap vs. Square Edge: Specify shiplap or tongue-and-groove edges for Polyiso boards (like Rmax Thermasheath) to create a labyrinth seal that naturally blocks air infiltration at the seams.
- Tape Selection: Use acrylic-based flashing tapes (such as 3M All Weather Flashing Tape 8067 or ZIP System tape) rather than standard duct tape or basic housewrap tape. Acrylic adhesives cure over time and maintain adhesion across extreme temperature fluctuations (-40°F to 200°F).
- Fluid-Applied Alternatives: For complex geometries with numerous penetrations, transition from taped rigid boards to a fluid-applied air barrier (like Prosoco R-Guard FastFlash) at the rim joists and corners to guarantee a monolithic seal.
"The perfect wall requires the thermal control layer to be on the exterior of the structure. If your insulation materials are entirely within the stud cavity, you are insulating the studs, not just the building, and accepting a 20% to 30% thermal penalty from framing lumber."
Comparative Failure Modes and Field Corrections
Even experienced crews make errors when transitioning between different insulation materials. Below is a diagnostic matrix for identifying and correcting common field failures during the pre-drywall inspection phase.
| Insulation Material | Common Installation Error | Diagnostic Sign | Required Field Correction |
|---|---|---|---|
| Open-Cell Spray Foam | Trimmed flush before full cure; exposed to interior vapor drive in cold climates. | Frost formation on interior drywall in winter; moisture meter reads >18%. | Apply a Class II vapor retarder (e.g., MemBrain or specific vapor-retarding primer) over the drywall. |
| XPS Rigid Board | Installed directly against masonry without a drainage plane or capillary break. | Efflorescence on concrete; foam feels damp at the bottom plate. | Remove bottom 12 inches of foam; install dimpled drainage mat and flash to the weep screed. |
| Mineral Wool Batts | Left gaps at top and bottom plates due to uneven framing heights. | Thermal imaging shows dark horizontal bands at ceiling and floor lines. | Inject low-expansion canned foam into the horizontal gaps; do not stuff scrap batt pieces. |

Code Compliance and Blower Door Targets
Under the latest IECC frameworks, the building envelope must be tested via a blower door test. The installation techniques detailed above directly impact the Air Changes per Hour at 50 Pascals (ACH50). While code minimums in many climate zones sit at 3.0 ACH50, high-performance builders targeting ENERGY STAR or Passive House standards aim for 0.6 to 1.5 ACH50. Achieving these numbers requires treating the installation of insulation materials not just as a thermal exercise, but as a critical component of the air-sealing strategy. Every seam, cut, and penetration in the insulation layer must be addressed with compatible sealants, tapes, or fluid-applied membranes before the drywall crew arrives.
FAQ: Field Troubleshooting
Q: Can I mix closed-cell spray foam and fiberglass batts in the same wall cavity?
A: Yes, this is known as a 'flash and batt' assembly. You must apply a minimum of 1.5 to 2 inches of closed-cell foam directly against the exterior sheathing to raise the temperature of the condensing surface above the dew point. The remainder of the cavity can then be filled with a friction-fit fiberglass or mineral wool batt. Never place the foam on the interior side of the batt, as this traps moisture inside the fiberglass.
Q: How do I handle insulation materials around recessed can lights?
A: Only use IC-AT (Insulation Contact, Air Tight) rated LED recessed fixtures. Older non-IC fixtures require a 3-inch clearance from all insulation materials and must be covered by a fire-rated drywall box, which severely compromises the ceiling's thermal envelope. Upgrading to IC-AT fixtures allows the insulation to be installed directly over and around the fixture housing without fire risk or thermal bypass.
Written by
Sarah WhitfieldSarah Whitfield is a chartered quantity surveyor (MRICS) and construction cost analyst with 15 years of experience in material pricing, procurement strategy, and project budgeting. She earned her degree in Construction Management from the University of Reading (UK) and has worked on projects ranging from $2M custom homes to $180M mixed-use developments across North America and Europe. Sarah currently leads cost estimating for BuildMat Insight, maintaining a proprietary database of 4,000+ material price points updated quarterly. She is a frequent contributor to RSMeans cost data panels and has presented at the International Cost Engineering Council (ICEC) congress. Based in Denver, CO, Sarah is an avid trail runner and volunteer mentor for Women in Construction.
More from Sarah Whitfield
View all
Wood & Lumber
What Are the Different Types of Wood? A Builder's Guide
Compare structural softwoods, finish hardwoods, and engineered lumber. Analyze Janka ratings, MOE values, and 2026 pricing for construction.
Aug 4, 2026

Walls & Panels
Steel Framing vs Wood Framing: Corrosion and Moisture Defense
Compare steel framing vs wood framing for moisture resistance. Learn about galvanized coatings, condensation risks, and corrosion protection strategies.
Jul 21, 2026

Stone & Masonry
How to Cut Stone Veneer: Wet Saw vs Grinder Comparison
Compare the best tools for cutting stone veneer. We review wet saws, angle grinders, and chop saws to help you achieve clean, chip-free cuts.
Jul 21, 2026