Best Chicken Coop Insulation Material for Energy Efficiency
Discover the best chicken coop insulation material for energy efficiency. Compare R-values, moisture resistance, and costs to keep your flock healthy.

The Thermodynamics of Poultry Housing: Why Insulation Matters
Selecting the correct chicken coop insulation material requires understanding the unique metabolic output of poultry. A mature laying hen generates approximately 10 to 15 watts of metabolic heat. In a standard 8x10 coop housing 20 birds, the flock produces 200 to 300 watts of continuous thermal energy. However, the primary challenge in coop climate control is not heat generation; it is moisture management and draft mitigation.
Each bird exhales roughly 0.5 pounds of water vapor daily. If the wrong insulation material is used, or if it is installed without a proper vapor retarder, this moisture becomes trapped within the wall cavities. According to the Poultry Extension Collaborative, trapped moisture leads to structural rot, ammonia retention in porous materials, and dangerous humidity spikes that cause frostbite on combs and wattles during freezing temperatures.
Evaluating the Best Chicken Coop Insulation Material Options
When evaluating materials for agricultural and backyard poultry structures, we prioritize closed-cell structures, high R-values per inch, and ease of sanitization. Below are the top-performing materials for the job.
1. Extruded Polystyrene (XPS) Rigid Foam
XPS boards (such as Owens Corning FOAMULAR 250 or DuPont Styrofoam) are widely considered the gold standard for coop walls and ceilings. XPS provides an R-value of R-5 per inch and features a closed-cell structure that is virtually impervious to moisture absorption. Its high compressive strength also makes it resistant to minor impacts during coop cleaning.
- Best Application: Exterior sheathing under siding, or interior cavity fill in retrofit projects.
- Vapor Permeability: Low (approx. 1.1 perms at 1-inch thickness), acting as a semi-impermeable vapor retarder.
- Poultry-Specific Caveat: Chickens will aggressively peck at exposed foam. XPS must be covered with an interior liner of 1/4-inch galvanized hardware cloth or 1/2-inch plywood.
2. Polyisocyanurate (Polyiso) Foil-Faced Boards
Polyiso offers the highest thermal resistance of standard rigid foams, delivering up to R-6.5 per inch. The aluminum foil facers on products like Johns Manville CI or Hunter Panels serve a dual purpose: they act as a Class I vapor retarder (less than 0.05 perms) and a radiant barrier. As noted by the U.S. Department of Energy, foil-faced polyiso is highly effective in blocking radiant heat transfer, making it excellent for coop roofs exposed to direct summer sun.
3. Mineral Wool Batts
For builders who prefer traditional stud-framing, mineral wool (such as Rockwool Comfortbatt) offers R-4.2 per inch. Unlike fiberglass, mineral wool is hydrophobic—it repels liquid water while remaining vapor-permeable. It is also entirely fireproof and provides excellent acoustic dampening, which reduces stress on the flock from external predators or neighborhood noise.
Material Comparison Matrix
| Insulation Material | R-Value / Inch | Moisture Resistance | Peck-Proof Rating | Est. Cost (per Sq. Ft.) |
|---|---|---|---|---|
| XPS Rigid Foam | R-5.0 | Excellent (Closed-cell) | Poor (Must cover) | $1.10 - $1.50 |
| Foil-Faced Polyiso | R-6.5 | Superior (Foil facer) | Poor (Must cover) | $1.30 - $1.80 |
| Mineral Wool Batts | R-4.2 | Good (Hydrophobic) | Fair (Needs liner) | $1.40 - $1.90 |
| Reflective Bubble Foil | R-1.1 (Max) | Excellent | Poor (Easily torn) | $0.60 - $0.90 |
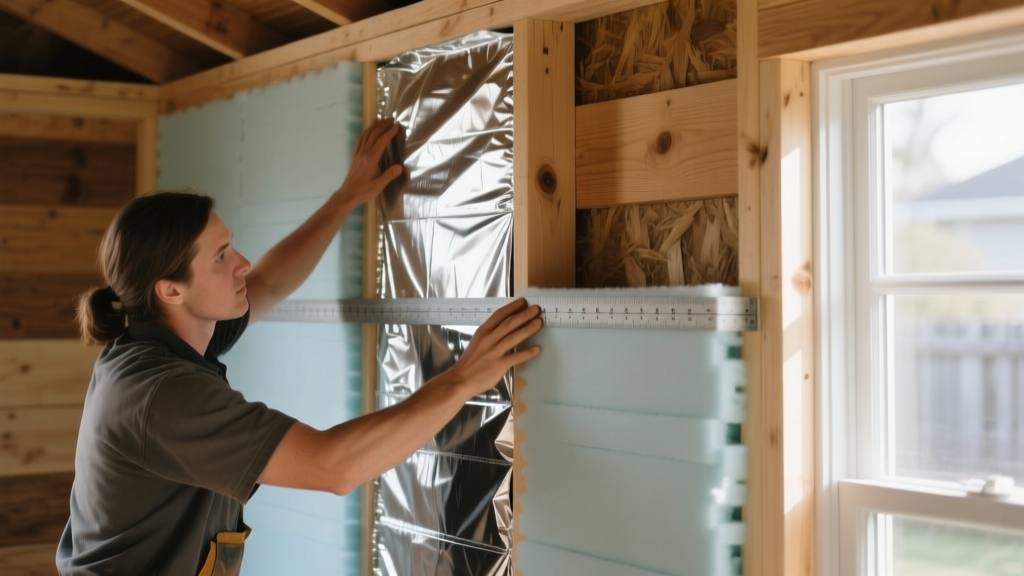
Materials to Strictly Avoid in Poultry Housing
Not all residential insulation materials translate well to agricultural environments. Avoid the following to prevent flock health issues and structural failure:
- Unfaced Fiberglass Batts: Fiberglass acts like a sponge for humidity. Once damp from chicken respiration, it loses its R-value entirely and becomes a breeding ground for mites and mold.
- Open-Cell Spray Foam: While it seals air leaks beautifully, the porous, spongy texture of open-cell foam traps ammonia, dust, and dander. It is impossible to power-wash or sanitize, violating basic biosecurity protocols.
- Reflective Bubble Wrap (Standalone): Often marketed as a cheap coop fix, reflective bubble wrap has an effective R-value of roughly R-1.1 unless installed with a perfect, sealed dead-air space on both sides. Chickens will easily shred the polyethylene bubbles with their beaks within days.
Step-by-Step Installation Framework for Maximum Efficiency
Proper installation dictates the actual performance of your chicken coop insulation material. Follow this sequence to ensure thermal efficiency and moisture durability, adhering to the principles of building science outlined by the Building Science Corporation.
- Air Sealing the Envelope: Before insulating, seal all framing joints, sill plates, and corner gaps with an acoustical sealant or closed-cell spray foam cans. A coop that leaks air will render any R-value useless due to convective heat loss.
- Cavity Fill & Rigid Layering: For a 2x4 framed wall, install 3.5-inch mineral wool batts (R-15) snugly between studs. Alternatively, cut 1.5-inch XPS boards to friction-fit the cavities, sealing the edges with canned foam.
- Vapor Retarder Placement: In cold climates (Zones 5 and higher), the vapor retarder must be on the 'warm-in-winter' side of the insulation (the interior). If using foil-faced Polyiso, tape all seams with foil-faced HVAC tape (not standard duct tape) to create a continuous vapor barrier.
- Interior Sheathing & Predator Proofing: Cover the insulation with 1/2-inch CDX plywood or OSB. Overlap the plywood seams and staple 1/4-inch galvanized hardware cloth over the entire interior surface. This prevents rodents from nesting in the walls and stops chickens from pecking through the wood into the insulation.
Balancing Insulation with Minimum Ventilation Rates
The most common failure mode in winterized coops is sealing the structure too tightly. Insulation keeps the heat in, but it also keeps moisture in. To maintain energy efficiency while expelling ammonia and humidity, you must implement passive stack ventilation.
'Winter ventilation requires a minimum of 1 CFM (Cubic Foot per Minute) per bird to remove moisture, and up to 5 CFM per bird to control ammonia levels. This airflow must be achieved without creating a direct draft on the roosting birds.'
— Poultry Extension Collaborative Guidelines
To achieve this, install continuous soffit vents at the eaves and a ridge vent at the roof peak. The insulation must be baffled at the eaves to prevent blocking the intake air. As the flock's body heat warms the interior air, the moisture-laden air rises and exhausts through the ridge vent, pulling dry, cold air in through the soffits. Because the cold air enters at the ceiling level, it mixes with the warm rising air before dropping to the bird level, eliminating dangerous drafts.
Cost Breakdown: Insulating a Standard 8x10 Coop
Below is an estimated material cost breakdown for insulating a standard 80-square-foot backyard coop (assuming 8-foot walls, totaling roughly 220 square feet of wall and ceiling area to insulate).
| Component | XPS / Polyiso Rigid Foam Strategy | Mineral Wool Batt Strategy |
|---|---|---|
| Insulation Material (220 sq ft) | $330.00 (1.5" Polyiso) | $375.00 (3.5" Rockwool) |
| Air Sealing & Seam Tape | $65.00 (Foam + Foil Tape) | $25.00 (Acoustic Sealant) |
| Interior Liner (Plywood) | $180.00 (1/2" OSB/Plywood) | $180.00 (1/2" OSB/Plywood) |
| Hardware Cloth & Fasteners | $110.00 (1/4" Galvanized) | $110.00 (1/4" Galvanized) |
| Total Estimated Material Cost | $685.00 | $690.00 |
While the upfront material costs are nearly identical, the rigid foam strategy offers superior moisture protection and requires less framing depth, making it the optimal choice for retrofitting existing uninsulated sheds into winter-ready poultry housing. By prioritizing closed-cell materials, strict air-sealing, and proper interior armoring, you ensure a dry, draft-free environment that sustains peak egg production and flock health through the harshest freezing months.
Written by
Elena RodriguezElena Rodriguez is a civil engineer and technical writer specializing in concrete technology, masonry systems, and ASTM/ACI compliance. She earned her B.S. in Civil Engineering from Texas A&M University and spent a decade at a materials testing laboratory, performing over 2,000 concrete compressive strength tests and masonry prism evaluations. Elena is an ACI-certified Field Testing Technician (Grade I) and a member of ASTM Committee C12 on Natural Building Stone. She currently consults on forensic engineering cases involving concrete failures and moisture intrusion. Based in San Antonio, TX, Elena is a proud member of the Society of Women Engineers (SWE) and coaches her daughter's FIRST Robotics team.
More from Elena Rodriguez
View all
Walls & Panels
Cost Analysis: Light Gauge Steel Framing Advantages and Disadvantages
Evaluate light gauge steel framing advantages and disadvantages through a strict cost analysis lens, comparing material, labor, and lifecycle expenses.
Aug 4, 2026

Walls & Panels
Gypsum Board Types: Exact Specifications, Thickness & Dimensions
Compare standard, Type X, and moisture-resistant gypsum board types. Get exact specifications, thicknesses, dimensions, and ASTM standards for your project.
Aug 4, 2026

Fire Resistance
Best Fire-Resistant Outdoor Decking Materials: 2026 Buyer Guide
Discover the best fire-resistant outdoor decking materials for 2026. Compare Class A PVC, aluminum, and hardwood options for WUI compliance and safety.
Aug 4, 2026