Installing the Best Home Insulation Material by Building Zone
Discover how proper installation techniques unlock the true R-value of the best home insulation material for attics, walls, and basements.

The Installation-First Framework for Insulation Selection
Homeowners and builders frequently search for the best home insulation material, assuming that a high laboratory-tested R-value per inch guarantees real-world thermal performance. However, field data consistently demonstrates that installation quality dictates actual energy efficiency. According to the Residential Energy Services Network (RESNET), a Grade III installation—which features significant gaps, compressions, and missed cavities—can reduce the effective R-value of a wall assembly by up to 28%. Conversely, a Grade I installation ensures the material performs exactly as engineered.
The true 'best' material is not a single universal product; it is the specific insulation type that aligns with the correct installation technique for a given building envelope zone. An attic requires different physical properties and installation methods than a below-grade basement wall. This guide breaks down the optimal materials and precise installation techniques for every major zone in a residential structure, utilizing 2026 building science standards.
Before installing any insulation, the building envelope must be air-sealed. The ENERGY STAR Seal and Insulate program emphasizes that insulation acts as a wool sweater, while air sealing acts as the windbreaker. Without sealing top plates, bottom plates, and penetrations with expanding foam or acoustic sealant, convective heat loss will bypass even the most expensive insulation.
Attic and Roof Deck Envelopes
Attics represent the largest source of thermal transfer in most homes. The installation technique here must address both thermal resistance and moisture management, specifically preventing ice dams in cold climates and managing solar heat gain in hot climates.
Dense-Pack Cellulose for Vented Attics
For flat, vented attic floors, blown-in cellulose remains the best home insulation material for balancing cost, coverage, and environmental impact. However, simply blowing it loosely leads to settling over time, which exposes top plates and reduces R-value.
- Target Density: Install cellulose at a dense-pack density of 3.5 lbs/ft³. This prevents settling and restricts convective air movement within the insulation layer.
- Baffle Installation: Before blowing insulation, staple rigid polystyrene or foam baffles to the roof decking at the eaves. This maintains a minimum 2-inch ventilation channel from the soffit vents to the ridge vent, preventing moisture accumulation and ice damming.
- Depth Markers: Staple depth gauges (rulers) to truss chords every 100 square feet. Blow cellulose to 10% above the target depth to account for initial fluff settling. For an R-60 assembly, this requires approximately 18 to 20 inches of settled material.
Open-Cell Spray Foam for Cathedral Ceilings
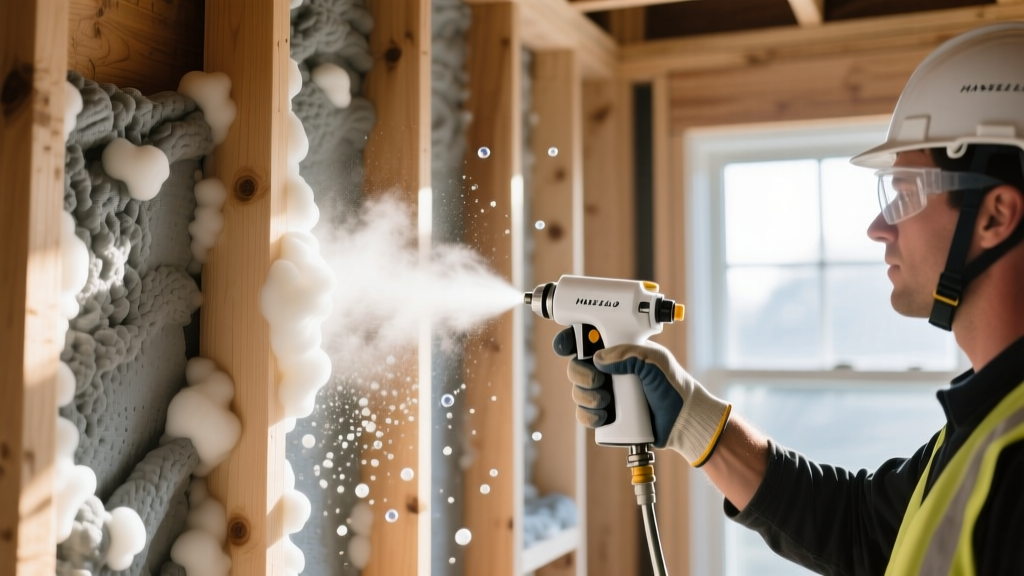
In unvented cathedral ceilings or complex rooflines with dormers, achieving Grade I coverage with batts is nearly impossible due to irregular framing. Open-cell polyurethane spray foam (0.5 lb/ft³ density) is the optimal choice here. It expands up to 100 times its liquid volume, sealing around wiring and plumbing penetrations. Because open-cell foam is vapor-permeable, it allows the roof sheathing to dry to the interior if a minor roof leak occurs, preventing concealed rot.
Exterior Wall Cavity Techniques
Exterior walls require insulation that fits tightly around electrical boxes, plumbing stacks, and structural blocking. Fiberglass batts are traditional, but mineral wool has emerged as the superior choice for modern high-performance walls due to its rigidity, fire resistance, and acoustic dampening.
Mineral Wool Batts: The Friction-Fit Method
Products like Rockwool Comfortbatt or Owens Corning Thermafiber offer higher R-values per inch (R-4.2) compared to standard fiberglass (R-3.1) and do not sag over time. The critical installation technique for mineral wool is the 'friction-fit' cut.
- Measure and Oversize: Measure the exact height of the wall cavity. Cut the mineral wool batt exactly 1/2 inch longer than the cavity height and 1/2 inch wider than the stud spacing.
- Compression and Release: Push the oversized batt into the cavity. The high-density stone wool will compress slightly and expand outward against the wood or steel studs, creating a friction seal that eliminates edge gaps.
- Splitting for Obstructions: When encountering horizontal fire blocking or plumbing, do not simply shove the batt behind the pipe. Split the batt's thickness in half with a serrated knife, passing one half behind the pipe and the other half in front, ensuring no uninsulated voids remain.
Never force a thick batt into a shallow cavity. Compressing an R-19 (6.25-inch) fiberglass or mineral wool batt into a 2x4 wall cavity (3.5 inches) does not yield R-19 performance. The trapped air pockets are crushed, dropping the effective R-value to approximately R-12 while increasing material costs.
Below-Grade and Basement Applications
Basement walls interact directly with the surrounding soil, which holds moisture and maintains a relatively constant temperature (usually around 50°F to 55°F in northern climates). The best home insulation material for this zone must resist liquid water absorption and act as a vapor retarder.
Closed-Cell Spray Foam (2 lb Density)
Closed-cell spray polyurethane foam (ccSPF) is the definitive choice for interior basement walls. At 2.0 lbs/ft³ density, it provides an R-value of roughly R-6.5 per inch. More importantly, at a thickness of 1.5 inches, ccSPF qualifies as a Class II vapor retarder, preventing interior warm, moist air from reaching the cold concrete wall and condensing.
- Preparation: Frame a 2x4 wood wall 1 inch away from the concrete foundation. This 1-inch gap is where the foam is sprayed, creating a continuous thermal and moisture barrier that completely isolates the wood framing from potential capillary moisture wicking from the concrete.
- Capillary Break: Ensure the bottom plate of the framed wall rests on a sill sealer or closed-cell foam gasket to prevent ground moisture from wicking up into the wood framing.
Rigid Extruded Polystyrene (XPS) Alternative
If spray foam equipment is unavailable, rigid XPS boards (such as Dow Styrofoam or Owens Corning Foamular) are the next best option. The installation technique requires cutting the boards precisely and sealing all perimeter edges and seams with canned polyurethane foam or specialized tape (e.g., Zip System tape) to create a monolithic vapor barrier. Never use expanded polystyrene (EPS) or polyisocyanurate below grade, as they can absorb moisture over time, severely degrading their R-value.
Common Installation Failures and Corrections
Even premium materials fail when installed incorrectly. The following matrix outlines frequent field errors and the required technical corrections to achieve Grade I standards.
| Failure Mode | Material Affected | Thermal Consequence | Pro Installation Fix |
|---|---|---|---|
| Missing Top Plate Coverage | Blown Cellulose / Fiberglass | Convective looping draws heat out of wall cavities into the attic. | Install damming material (cardboard or foam) at the eaves to retain insulation depth over the exterior top plates. |
| Batt Compression | Fiberglass / Mineral Wool | R-value drops by 20-30% due to loss of trapped insulating air pockets. | Use material sized exactly for the cavity depth; switch to higher R-value per inch material if cavity is shallow. |
| Thermal Bridging at Studs | All Cavity Insulation | Wood studs (R-1.25/inch) bleed heat, reducing whole-wall R-value by 15%. | Install continuous exterior rigid insulation (mineral wool or polyiso) over the sheathing to break the thermal bridge. |
| Unsealed Rim Joists | Fiberglass Batts | Massive air infiltration and condensation risk at the floor-to-wall junction. | Cut rigid foam to fit, seal edges with spray foam, then cover with a fire-rated mineral wool batt for code compliance. |
2026 Installed Cost and Performance Matrix
Budgeting for insulation requires looking at the installed cost per board-foot (a 12x12 inch square, 1 inch thick) rather than just the material cost. The table below reflects average 2026 professional installation pricing for a standard 2,500 sq. ft. home in a mixed-humid climate zone (e.g., IECC Zone 4).
| Insulation Type | Typical Application | R-Value per Inch | 2026 Installed Cost (per board-ft) | Best Use Case |
|---|---|---|---|---|
| Blown-in Cellulose | Vented Attic Floors | R-3.2 to R-3.8 | $1.60 - $2.30 | High-depth, flat applications requiring air-retardant density. |
| Mineral Wool Batts | Exterior Walls / Floors | R-4.2 | $2.10 - $2.90 | Framed cavities requiring fire resistance and acoustic control. |
| Open-Cell Spray Foam | Roof Decks / Complex Ceilings | R-3.6 to R-3.8 | $1.20 - $1.80 | Irregular framing where air sealing and vapor permeability are needed. |
| Closed-Cell Spray Foam | Basements / Rim Joists | R-6.0 to R-6.5 | $2.60 - $3.50 | Space-constrained areas requiring structural rigidity and vapor control. |
| Rigid Polyiso Board | Exterior Continuous Insulation | R-5.8 to R-6.5 | $1.80 - $2.50 | Breaking thermal bridges on exterior sheathing. |
For comprehensive guidance on regional requirements, builders should consult the Building America Solution Center, which provides climate-specific assembly details that integrate these materials into code-compliant, high-performance envelopes.
Final Verification: The Blower Door Test
The only way to verify that the best home insulation material has been installed correctly is through quantitative testing. After insulation and air sealing are complete, but before drywall is hung, a certified energy rater should perform a blower door test. For new construction aiming for high-performance standards, the target air exchange rate should be 2.0 ACH50 (Air Changes per Hour at 50 Pascals depressurization) or lower. If the test reveals localized leaks, the rater can use a theatrical fog machine in conjunction with the blower door to visually identify exactly where the insulation and air sealing failed, allowing for targeted corrections before the walls are closed in.
Written by
Elena RodriguezElena Rodriguez is a civil engineer and technical writer specializing in concrete technology, masonry systems, and ASTM/ACI compliance. She earned her B.S. in Civil Engineering from Texas A&M University and spent a decade at a materials testing laboratory, performing over 2,000 concrete compressive strength tests and masonry prism evaluations. Elena is an ACI-certified Field Testing Technician (Grade I) and a member of ASTM Committee C12 on Natural Building Stone. She currently consults on forensic engineering cases involving concrete failures and moisture intrusion. Based in San Antonio, TX, Elena is a proud member of the Society of Women Engineers (SWE) and coaches her daughter's FIRST Robotics team.
More from Elena Rodriguez
View all
Walls & Panels
Cost Analysis: Light Gauge Steel Framing Advantages and Disadvantages
Evaluate light gauge steel framing advantages and disadvantages through a strict cost analysis lens, comparing material, labor, and lifecycle expenses.
Aug 4, 2026

Walls & Panels
Gypsum Board Types: Exact Specifications, Thickness & Dimensions
Compare standard, Type X, and moisture-resistant gypsum board types. Get exact specifications, thicknesses, dimensions, and ASTM standards for your project.
Aug 4, 2026

Fire Resistance
Best Fire-Resistant Outdoor Decking Materials: 2026 Buyer Guide
Discover the best fire-resistant outdoor decking materials for 2026. Compare Class A PVC, aluminum, and hardwood options for WUI compliance and safety.
Aug 4, 2026