Veneer Stones Selection Guide: Natural vs Manufactured Options
Compare natural and manufactured veneer stones for your project. Explore costs, weight limits, ASTM standards, and critical installation requirements.

The Core Dilemma: Natural vs. Manufactured Veneer Stones
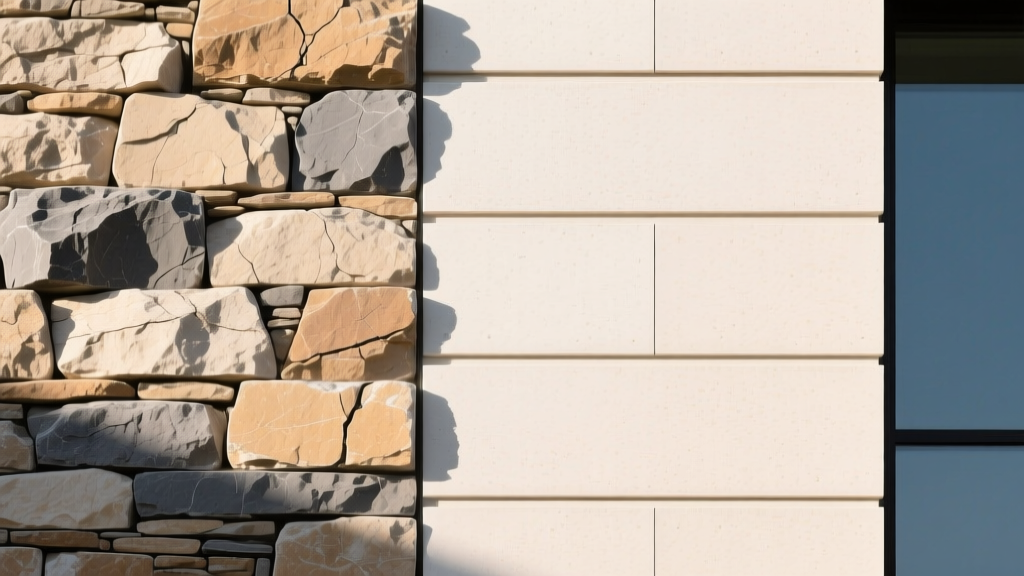
Selecting between natural and manufactured veneer stones dictates not only the aesthetic outcome of a facade but also the structural framing requirements, moisture management strategy, and long-term maintenance profile. While both materials serve as adhered masonry veneers, their physical properties diverge significantly at the manufacturing and installation stages.
Quick Decision Matrix
- Choose Natural Thin Veneer if: You require authentic geological variation, are cladding a high-end custom build, and have the structural capacity to support 10-15 lbs per square foot.
- Choose Manufactured Stone Veneer (MSV) if: You are retrofitting an existing wood-framed structure with strict load limits, need consistent color batching across large elevations, or require a budget-friendly material (6-9 lbs per square foot).
Weight and Structural Load Considerations
The most immediate engineering constraint when specifying veneer stones is the dead load imposed on the wall assembly. Standard wood framing (2x4 or 2x6 studs at 16 inches on center) can typically support up to 15 lbs per square foot (psf) of exterior cladding without additional structural reinforcement.
Load-Bearing Thresholds
Natural Stone Veneer: Sawn to a nominal thickness of 0.75 to 1.5 inches, natural thin veneer (such as limestone, slate, or fieldstone) weighs between 10 and 15 psf. If you are designing a multi-story application exceeding 30 feet in height, the cumulative load on the lower ledger or foundation shelf requires verification by a structural engineer.
Manufactured Stone Veneer: Cast from Portland cement, lightweight aggregates, and iron oxide pigments, MSV typically weighs between 6 and 9 psf. This 30-40% weight reduction makes it the default choice for interior accent walls, chimney chases, and upper-story gables where dead load minimization is critical.
Cost Breakdown: Material vs. Total Installed Price
Material costs only tell a fraction of the financial story. The total installed cost of veneer stones is heavily influenced by substrate preparation, lath installation, and the mason's hourly rate. Below is a comparative cost analysis reflecting current market rates.
| Cost Component | Natural Thin Veneer | Manufactured Stone Veneer (MSV) |
|---|---|---|
| Material Cost (per sq. ft.) | $8.50 - $16.00 | $5.00 - $11.00 |
| Wire Lath & Fasteners | $1.20 - $1.80 | $1.20 - $1.80 |
| Mortar & Scratch Coat | $1.50 - $2.50 | $1.50 - $2.50 |
| Labor (Installation per sq. ft.) | $18.00 - $28.00 | $14.00 - $22.00 |
| Total Installed Cost | $29.20 - $48.30 | $21.70 - $37.30 |
Note: Natural stone installation commands a premium because masons must spend additional time cutting, shaping, and fitting irregular geological edges to maintain consistent joint widths, whereas MSV units are often modular and interlock more predictably.
Moisture Management and ASTM Standards
Adhered veneer stones are porous and act as a reservoir cladding system. When driven rain saturates the stone, moisture migrates inward. If the wall assembly lacks a proper drainage plane, this moisture becomes trapped against the weather-resistive barrier (WRB), leading to wood rot and mold.
Critical Code Requirement: The Double-WRB Rule
Under the International Building Code (IBC) and guidelines detailed in Building Science Corporation's water management fundamentals, adhered masonry veneer requires a dual-layer moisture barrier. You must install two layers of Grade D building paper, or one layer of housewrap covered by a second layer of Grade D paper. The inner layer protects the sheathing, while the outer layer acts as a bond-breaker, allowing the scratch coat to slide slightly during thermal expansion without tearing the primary WRB.
Relevant ASTM Specifications
When reviewing product submittals, ensure the manufacturer provides test data compliant with the following standards:
- ASTM C1670: Standard Specification for Adhered Manufactured Stone Masonry Veneer. This covers compressive strength, water absorption, and freeze-thaw durability for cast stone products. Review the ASTM C1670 documentation for specific testing parameters.
- ASTM C568: Standard Specification for Limestone Dimension Stone. If specifying natural limestone veneer, verify the stone meets the minimum density and absorption requirements for exterior exposure classes.
- ASTM C1063: Standard Specification for Installation of Lathing and Furring. Dictates the requirement for a weep screed at the base of all exterior veneer stone applications to allow trapped water to escape.
Installation Gotchas: Mortar Selection and Lath Mechanics
The most common failure mode in veneer stone installation is not the stone itself falling off, but efflorescence (white, powdery salt deposits) and delamination of the scratch coat. Both are directly tied to material selection.
Mortar Chemistry: Type N vs. Type S
Masons often default to Type S mortar (minimum 1,800 psi compressive strength) for structural bricklaying. However, using high-strength Type S mortar for adhered veneer stones can be detrimental.
- The Efflorescence Risk: Type S mortar has a high Portland cement content. When moisture moves through the wall, it dissolves the soluble alkalis in the cement and deposits them on the stone face as white efflorescence. This is especially problematic with porous natural stones like sandstone and tuff.
- The Solution: Specify Type N mortar (minimum 750 psi) mixed with a latex bonding admixture. Type N provides sufficient shear strength to hold a 12 lb stone indefinitely while remaining vapor-permeable and lower in alkali content. For manufactured stones, always defer to the specific manufacturer's proprietary mortar blend requirements.
Wire Lath: Furring Dimples and Fastening
Never use flat, non-furring wire lath. You must specify 2.5 lb or 3.4 lb self-furring galvanized wire lath. The lath must be manufactured with dimples that hold the mesh 1/4 inch away from the WRB. This gap allows the wet scratch coat mortar to ooze through the mesh and encapsulate the wire completely, creating a mechanical lock. If the lath is nailed flat against the wall, the mortar only coats the front of the wire, resulting in a weak bond prone to sheer failure during freeze-thaw cycles.
Top Brand Profiles and Product Lines
When sourcing materials, these manufacturers represent the current benchmark for consistency, color-fastness, and profile variety in the North American market.
Manufactured Leaders
- Eldorado Stone: Known for their "Cut Stone" and "Ledge Stone" profiles. Their proprietary iron oxide pigment blending technique ensures UV stability, preventing the fading common in cheaper cast stones after 5-7 years of direct southern exposure.
- Coronado Stone Products: Offers the "Direct-Applied" thin veneer line, which is specifically engineered to be installed without a scratch coat in certain interior and protected exterior applications, reducing labor time by up to 20%.
Natural Stone Innovators
- Pangaea Natural Stone: Specializes in modular, interlocking natural thin veneer. Unlike traditional random-squared natural stone that requires high skill to layout, Pangaea's precision-sawn edges allow for faster installation with consistent 1/2-inch mortar joints, bridging the gap between natural authenticity and manufactured ease-of-use.
Final Selection Checklist for Specifiers
Before finalizing your bill of materials, verify the following parameters against your architectural plans:
- Verify Dead Load: Confirm the engineered framing can support the specific psf weight of the chosen veneer stone, plus a 20% safety margin for moisture retention.
- Specify the Weep Screed: Ensure a minimum 1-inch clearance between the bottom of the weep screed and any finished grade, concrete walkway, or roofline.
- Mandate the Scratch Coat Cure: Include a specification requiring the mason to mist and cure the Portland cement scratch coat for a minimum of 48 hours before applying the setting bed and stone units.
- Sealer Selection: If a sealer is required for stain resistance, specify a silane/siloxane penetrating breathable sealer. Never use a film-forming acrylic sealer, which will trap moisture inside the stone and cause spalling during winter freezes.
Written by
Elena RodriguezElena Rodriguez is a civil engineer and technical writer specializing in concrete technology, masonry systems, and ASTM/ACI compliance. She earned her B.S. in Civil Engineering from Texas A&M University and spent a decade at a materials testing laboratory, performing over 2,000 concrete compressive strength tests and masonry prism evaluations. Elena is an ACI-certified Field Testing Technician (Grade I) and a member of ASTM Committee C12 on Natural Building Stone. She currently consults on forensic engineering cases involving concrete failures and moisture intrusion. Based in San Antonio, TX, Elena is a proud member of the Society of Women Engineers (SWE) and coaches her daughter's FIRST Robotics team.
More from Elena Rodriguez
View all
Walls & Panels
Cost Analysis: Light Gauge Steel Framing Advantages and Disadvantages
Evaluate light gauge steel framing advantages and disadvantages through a strict cost analysis lens, comparing material, labor, and lifecycle expenses.
Aug 4, 2026

Walls & Panels
Gypsum Board Types: Exact Specifications, Thickness & Dimensions
Compare standard, Type X, and moisture-resistant gypsum board types. Get exact specifications, thicknesses, dimensions, and ASTM standards for your project.
Aug 4, 2026

Fire Resistance
Best Fire-Resistant Outdoor Decking Materials: 2026 Buyer Guide
Discover the best fire-resistant outdoor decking materials for 2026. Compare Class A PVC, aluminum, and hardwood options for WUI compliance and safety.
Aug 4, 2026