Gypsum Board Screw Spacing: Troubleshooting Pops and Failures
Learn how to troubleshoot gypsum board screw spacing errors, fix popped fasteners, and ensure ASTM-compliant drywall installations for lasting walls.

The Physics of Fastener Failure
When a gypsum board screw pops through the finished surface, it is rarely an isolated cosmetic defect; it is a structural symptom of improper fastener placement, framing movement, or core fracture. Troubleshooting gypsum board screw spacing requires understanding the mechanical relationship between the drywall panel, the fastener, and the framing substrate. Gypsum board relies on the paper envelope for tensile strength. If a screw is overdriven, it breaks the paper face, leaving the brittle gypsum core to hold the panel. If screws are spaced too far apart, the board flexes under lateral pressure, creating cyclic stress that gradually backs the fastener out of the wood or metal stud.
Quick Diagnostic: Is it Spacing or Shrinkage?
- Linear Pops across multiple studs: Usually truss uplift or wood framing shrinkage (moisture content dropping below 19%).
- Clustered Pops in the panel field: Typically indicates over-spacing (flexing) or under-spacing (core crushing from clustered stress).
- Perimeter Edge Pops: Screws driven too close to the tapered edge or panel end (less than 3/8 inch clearance).
ASTM C840 Spacing Matrix: The Baseline for Troubleshooting
Before diagnosing a failure, you must verify the original installation against industry standards. The Gypsum Association Technical Resources and ASTM C840 outline strict maximum spacing limits. Deviating from these metrics is the primary cause of field-flexing and subsequent fastener back-out.
| Application | Framing Type | Maximum Spacing (o.c.) | Edge/End Clearance |
|---|---|---|---|
| Ceilings (1/2 in. or 5/8 in.) | Wood or Metal | 12 inches | 3/8 in. from edges |
| Walls (1/2 in. or 5/8 in.) | Wood Studs | 16 inches | 3/8 in. edges, 1/2 in. ends |
| Walls (1/2 in. or 5/8 in.) | Metal Studs (25 ga.) | 12 inches | 3/8 in. edges, 1/2 in. ends |
| Walls (1/2 in. or 5/8 in.) | Metal Studs (16-20 ga.) | 16 inches | 3/8 in. edges, 1/2 in. ends |
Troubleshooting Guide: Symptoms, Causes, and Fixes
Symptom 1: Clustered Pops Along a Single Stud
The Cause: This occurs when installers 'cluster' screws within a 4-inch radius to secure a loose board, or when screws are driven too close to the panel edge. The gypsum core cannot distribute the clamping force of clustered fasteners, leading to localized crushing. As the house settles, the crushed core gives way, and the screw head pushes through the joint compound.
The Fix: You cannot simply drive the popped screw deeper; the core is already compromised. Drive a new 1-5/8 inch Type W (coarse thread) screw exactly 2 inches above or below the popped screw. Once the new screw bites and pulls the board tight, back the old, popped screw out completely. Fill both divots with setting-type joint compound (e.g., USG Sheetrock Brand Easy Sand 45).
Symptom 2: Mid-Panel Field Popping (Flex Failure)
The Cause: If wall screws are spaced at 24 inches on center instead of the required 16 inches (for wood) or 12 inches (for 25-gauge metal), the gypsum board lacks mid-span support. When a person leans against the wall or a door slams, the board flexes inward. This repeated mechanical flexing acts like a slow-motion lever, pulling the screw head through the paper face or backing the screw out of the stud.
The Fix: Locate the framing using a magnetic stud finder. Snap a chalk line down the center of the stud. Drive new screws every 12 inches along the entire stud line to eliminate the flex zone. Tape and finish the new dimples. According to Fine Homebuilding, addressing the structural flex is mandatory; patching the pop without adding intermediate fasteners guarantees the repair will fail within six months.
Symptom 3: Perimeter Edge Blowouts
The Cause: Screws placed closer than 3/8 inch from the bound edge or 1/2 inch from the cut end will fracture the gypsum core. The screw essentially blows out the edge of the board, providing zero holding power.
The Fix: If the edge is blown out, the screw must be removed. If the board is structurally sound elsewhere, drive a new screw 2 inches further inward along the same stud line. For severe edge blowouts that compromise the tapered seam, you may need to route out the damaged core, fill the void with a 5-minute setting compound, and embed fiberglass mesh tape before applying the finishing coats.
The Extract-and-Replace Repair Protocol
When repairing spacing-related pops, follow this exact sequence to ensure a permanent fix:
- Identify the Fastener Type: Use a magnetic stud finder to confirm if you are hitting wood or metal. If metal, ensure you are using Type S (fine thread) screws; if wood, use Type W (coarse thread).
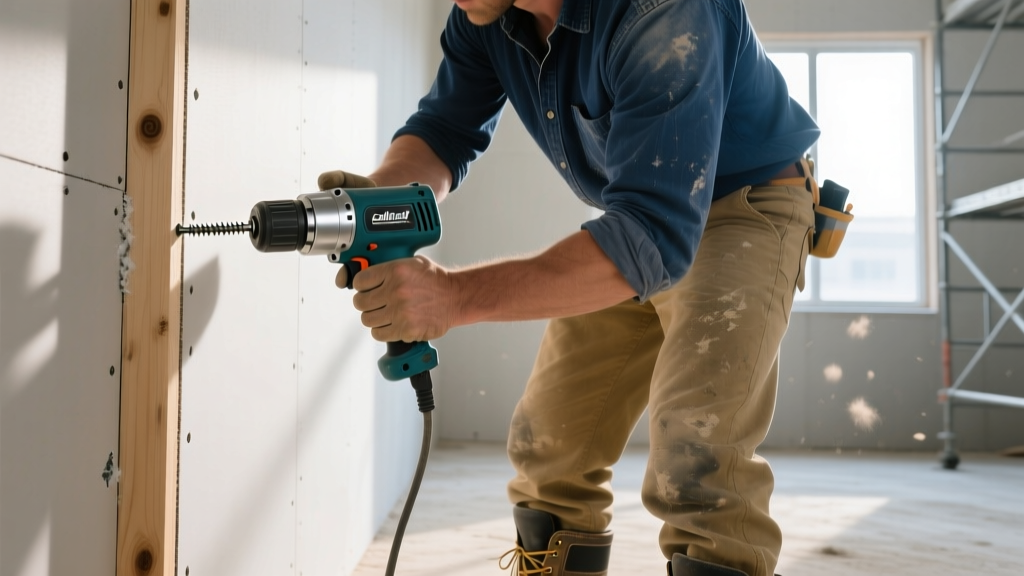
- Set the Depth Collar: Adjust the dimple bit on your drill so the screw head breaks the paper surface by exactly 1/32 inch without tearing the paper. Test on a scrap piece of drywall first.
- Drive the Relief Screw: Drive a new screw 2 inches away from the pop. This takes the tension off the failed fastener.
- Extract the Failed Screw: Back the popped screw out until it is flush with the wall, then pull it with pliers. Leaving a backed-out screw inside the wall can cause future rust bleed or interfere with the new joint compound.
- Patch with Setting Compound: Use a chemical-setting compound (20 or 45-minute set time) for the first fill. Pre-mixed all-purpose compound shrinks as it dries and will pull away from the deep void left by the extracted screw.
Advanced Prevention: Adhesive and Screw Synergies
In high-stress environments or areas prone to truss uplift, relying solely on mechanical fasteners is a liability. Integrating construction adhesive fundamentally changes the load distribution.
Expert Insight: Applying a continuous 3/8-inch bead of ASTM C557-compliant drywall adhesive to the face of the studs before hanging the board reduces the required screw count by up to 50% and virtually eliminates fastener pops caused by framing shrinkage. The adhesive bonds the paper face to the wood, accommodating minor seasonal movement without transferring stress to the screw heads.
Furthermore, always verify the moisture content of wood framing before hanging gypsum board. Use a pin-type moisture meter; if the lumber reads above 19%, delay the installation. As green lumber dries to the ambient interior humidity (typically 8-12%), it shrinks radially. If the board is screwed tightly to a shrinking stud, the stud pulls away from the board, leaving the screw head suspended against the back of the drywall paper. When interior humidity rises and the wood swells, the stud pushes back against the board, forcing the screw head through the finished surface.
Frequently Asked Questions
Can I just hammer a popped screw back into the drywall?
No. A screw pop means the gypsum core around the threads is crushed or the wood hole is stripped. Hammering it will only enlarge the void. You must drive a new screw nearby to re-establish the clamping force, then remove the old screw.
Does screw length affect spacing requirements?
Screw length does not change the ASTM spacing matrix, but using the wrong length causes failures. For 1/2-inch gypsum board, use 1-1/4 inch screws. For 5/8-inch board, or when applying a double layer, use 1-5/8 inch or 2-inch screws. A screw must penetrate the wood stud by a minimum of 5/8 inch and metal framing by at least 3/8 inch to achieve proper withdrawal resistance.
Are nails acceptable for modern drywall installation?
While ring-shank drywall nails are still recognized in some legacy building codes, the industry standard has shifted entirely to screws. Nails lack the withdrawal resistance of screws and are highly susceptible to popping due to seasonal wood shrinkage. For troubleshooting and repair, always replace failed nails with coarse-thread drywall screws.
For comprehensive installation specifications and framing tolerances, consult the USG Drywall Systems construction guide to ensure your repairs align with manufacturer warranties.
Written by
Sarah WhitfieldSarah Whitfield is a chartered quantity surveyor (MRICS) and construction cost analyst with 15 years of experience in material pricing, procurement strategy, and project budgeting. She earned her degree in Construction Management from the University of Reading (UK) and has worked on projects ranging from $2M custom homes to $180M mixed-use developments across North America and Europe. Sarah currently leads cost estimating for BuildMat Insight, maintaining a proprietary database of 4,000+ material price points updated quarterly. She is a frequent contributor to RSMeans cost data panels and has presented at the International Cost Engineering Council (ICEC) congress. Based in Denver, CO, Sarah is an avid trail runner and volunteer mentor for Women in Construction.
More from Sarah Whitfield
View all
Wood & Lumber
What Are the Different Types of Wood? A Builder's Guide
Compare structural softwoods, finish hardwoods, and engineered lumber. Analyze Janka ratings, MOE values, and 2026 pricing for construction.
Aug 4, 2026

Walls & Panels
Steel Framing vs Wood Framing: Corrosion and Moisture Defense
Compare steel framing vs wood framing for moisture resistance. Learn about galvanized coatings, condensation risks, and corrosion protection strategies.
Jul 21, 2026

Stone & Masonry
How to Cut Stone Veneer: Wet Saw vs Grinder Comparison
Compare the best tools for cutting stone veneer. We review wet saws, angle grinders, and chop saws to help you achieve clean, chip-free cuts.
Jul 21, 2026