How to Install Mold and Moisture Resistant Gypsum Board in Wet Areas
Master installation techniques for mold and moisture resistant gypsum board in wet areas. Covers framing, fastening, taping, and sealing best practices.

The Anatomy of Mold and Moisture Resistant Gypsum Board
Installing mold and moisture resistant gypsum board in high-humidity environments requires a departure from standard drywall protocols. While standard panels utilize a paper facing that readily absorbs ambient moisture and provides an organic food source for mold spores, moisture-resistant variants are engineered with either treated paper facings or inorganic fiberglass mats. The core is also treated with siloxanes or wax emulsions to reduce water absorption rates to less than 5% by weight, per ASTM C1396 and ASTM C1658 standards.
However, the panel itself is only half the battle. The majority of moisture-related failures in wet areas—such as bathrooms, commercial kitchens, and laundry rooms—stem from improper installation techniques rather than material defects. Capillary action, fastener corrosion, and incompatible joint compounds can compromise the most advanced moisture-resistant panels on the market.
Panel Selection Matrix: Paper-Faced vs. Glass-Mat
Selecting the correct panel depends on the expected moisture exposure. Below is a comparison of the three industry-leading mold and moisture resistant gypsum board products.
| Product | Facing Material | ASTM Standard | Best Application | Water Absorption |
|---|---|---|---|---|
| USG Sheetrock® Mold Tough® | Treated Paper (Green) | C1396 | Residential bathrooms, damp basements | < 5% |
| Georgia-Pacific DensArmor Plus® | Fiberglass Glass-Mat | C1658 | Commercial wet areas, shower surrounds (behind tile) | < 1% |
| National Gypsum Gold Bond® XP® | Treated Paper (Purple) | C1396 | High-humidity residential, pre-tile backing | < 5% |
Pre-Installation: Framing and Substrate Preparation
Before hanging any mold and moisture resistant gypsum board, the structural framing must be verified. Moisture trapped behind the wall cavity will inevitably lead to structural rot and mold growth, regardless of the panel's facing.
Never install moisture-resistant panels over wood framing that exceeds 19% moisture content. Use a pin-type moisture meter to verify. Trapping high-moisture lumber behind a vapor-impermeable tile assembly or sealed drywall will guarantee mold growth inside the wall cavity. For commercial wet areas, transition to 20-gauge (minimum) galvanized steel studs to eliminate organic framing materials entirely.
Ensure that all plumbing rough-ins have been pressure-tested and insulated. Condensation on uninsulated cold-water supply lines will drip onto the back of the gypsum board, bypassing the treated facing entirely. Wrap all cold-water lines with closed-cell foam insulation (minimum 1/2-inch thickness) before closing the walls.
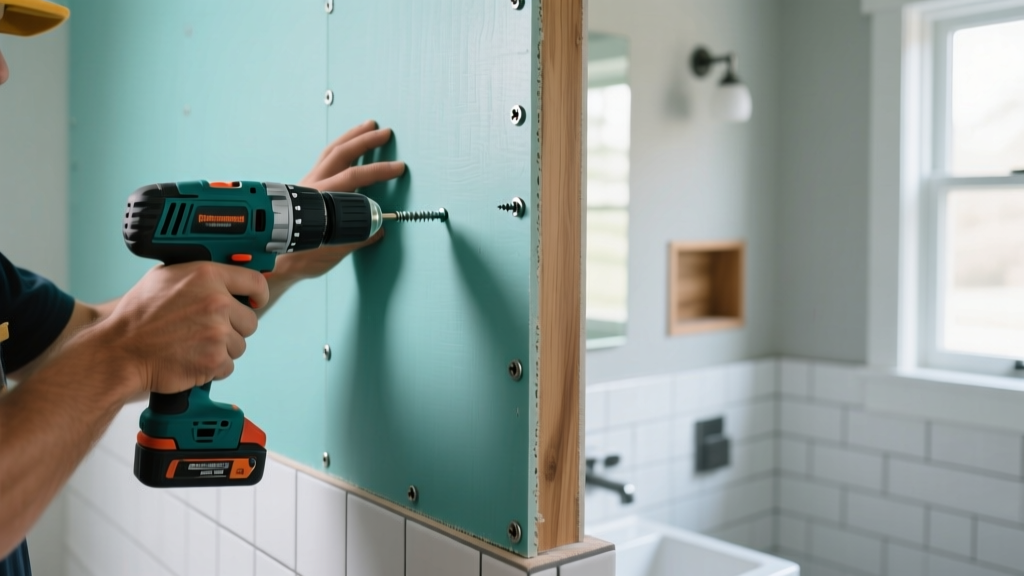
Step-by-Step Fastening and Hanging Protocol
The physical attachment of mold and moisture resistant gypsum board requires specific fasteners and clearances to prevent wicking and corrosion.
1. Fastener Selection
Standard zinc-plated drywall screws will rust when exposed to the high humidity of a bathroom or kitchen. Rust bleed will stain the finished surface and compromise the holding power of the screw. You must use hot-dipped galvanized or stainless-steel Type S (for steel studs) or Type W (for wood studs) screws. Ceramic-coated exterior screws are also acceptable if they meet the 1-1/4 inch length requirement for 1/2-inch panels.
2. Spacing and Edge Clearances
- Ceiling Fasteners: Space screws a maximum of 8 inches on center (OC) along the framing members.
- Wall Fasteners: Space screws a maximum of 12 inches OC on intermediate studs and 8 inches OC on perimeter edges.
- Tub and Shower Flanges: Maintain a strict 1/4-inch gap between the bottom edge of the gypsum board and the top of the tub flange or shower pan. Do not let the board rest directly on the flange; capillary action will wick standing water up into the gypsum core.
- Floor Clearances: Maintain a 1/2-inch gap from the finished floor level to prevent wicking from wet mopping or minor flooding. This gap will be covered by baseboards and sealed with caulk.
Critical Joint Treatment and Sealing
The joints and fastener heads are the most vulnerable points in any drywall installation. Standard pre-mixed joint compound (drying-type) relies on evaporation to cure. In high-humidity environments, drying times are significantly extended, and the organic binders in standard compound can harbor mold before the material fully cures.
Choosing the Right Compound and Tape
For the taping and first coat, exclusively use a setting-type joint compound (e.g., USG Durabond® 90 or Sheetrock® Easy Sand™ 45). Setting compounds cure via a chemical reaction rather than evaporation, making them impervious to ambient humidity during the curing process. They also offer superior shear strength and moisture resistance.
If you are installing fiberglass-faced boards like DensArmor Plus, standard paper tape can delaminate if moisture penetrates the joint. Use an alkali-resistant fiberglass mesh tape (such as FibaTape®) embedded in a setting-type compound for the first coat, followed by a moisture-resistant ready-mixed topping compound for the final skim coat.
Priming and Vapor Permeability
Once sanded and finished, the mold and moisture resistant gypsum board must be sealed. Do not use standard PVA drywall primers, which are water-soluble and re-emulsify under high humidity. Apply a dedicated mold-inhibiting, moisture-vapor permeable primer (such as Zinsser Perma-White® or KILZ® Mold & Mildew). These primers create a hydrophobic barrier on the surface while still allowing the wall cavity to breathe, preventing trapped vapor from condensing inside the wall.
Common Installation Failure Modes and Edge Cases
Even with the correct materials, specific installation errors can lead to catastrophic moisture failures. Understanding these edge cases is vital for long-term durability.
The Vapor Retarder Trap
In cold climates, building codes often require a Class I or II vapor retarder on the warm-in-winter side of the wall (typically behind the drywall). However, in air-conditioned commercial buildings in hot, humid climates (like Florida or Texas), placing a polyethylene vapor barrier behind the interior drywall can trap exterior moisture inside the wall cavity when the AC cools the interior panels. Always consult local building codes regarding vapor retarder placement. According to the Gypsum Association's application guidelines, vapor retarders should never be installed on both sides of a wall assembly, as this creates a double-vapor barrier that traps moisture indefinitely.
Tile Backing Limitations
While mold and moisture resistant gypsum board is excellent for damp areas (bathroom walls outside the shower, kitchen backsplashes), it is not a substitute for cement board or foam-core tile backer boards in direct wet areas (inside shower enclosures or tub surrounds). The EPA's guidelines on moisture control emphasize that porous materials in direct water contact will eventually fail. If tile is being applied over moisture-resistant drywall in a shower, a liquid-applied waterproofing membrane (such as RedGard® or Hydro Ban®) must be troweled or rolled over the finished drywall and taped seams before setting the tile.
Summary of Best Practices
- Verify framing moisture content is below 19% before hanging.
- Use only hot-dipped galvanized or stainless-steel fasteners.
- Maintain a 1/4-inch gap above tub flanges and a 1/2-inch gap above finished floors.
- Embed tape in chemical-setting joint compounds, not air-drying pre-mixed compounds.
- Seal the finished surface with a hydrophobic, mold-inhibiting primer.
For further technical specifications on specific panel limitations and fire-rating assemblies involving moisture-resistant boards, refer to the USG Sheetrock Mold Tough technical data sheets. Proper execution of these techniques ensures the wall assembly performs as engineered, protecting both the structural integrity and the indoor air quality of the building.
Written by
Elena RodriguezElena Rodriguez is a civil engineer and technical writer specializing in concrete technology, masonry systems, and ASTM/ACI compliance. She earned her B.S. in Civil Engineering from Texas A&M University and spent a decade at a materials testing laboratory, performing over 2,000 concrete compressive strength tests and masonry prism evaluations. Elena is an ACI-certified Field Testing Technician (Grade I) and a member of ASTM Committee C12 on Natural Building Stone. She currently consults on forensic engineering cases involving concrete failures and moisture intrusion. Based in San Antonio, TX, Elena is a proud member of the Society of Women Engineers (SWE) and coaches her daughter's FIRST Robotics team.
More from Elena Rodriguez
View all
Walls & Panels
Cost Analysis: Light Gauge Steel Framing Advantages and Disadvantages
Evaluate light gauge steel framing advantages and disadvantages through a strict cost analysis lens, comparing material, labor, and lifecycle expenses.
Aug 4, 2026

Walls & Panels
Gypsum Board Types: Exact Specifications, Thickness & Dimensions
Compare standard, Type X, and moisture-resistant gypsum board types. Get exact specifications, thicknesses, dimensions, and ASTM standards for your project.
Aug 4, 2026

Fire Resistance
Best Fire-Resistant Outdoor Decking Materials: 2026 Buyer Guide
Discover the best fire-resistant outdoor decking materials for 2026. Compare Class A PVC, aluminum, and hardwood options for WUI compliance and safety.
Aug 4, 2026