How to Troubleshoot and Repair USG Gypsum Board Cracks and Seams
Diagnose and fix USG gypsum board failures. Expert repair protocols for Sheetrock nail pops, recurring joint cracks, and moisture damage.

Diagnostic Matrix: Identifying USG Gypsum Board Failures
United States Gypsum (USG) pioneered modern drywall, and their Sheetrock brand remains the industry benchmark. However, environmental shifts, structural settling, and improper installation can compromise even premium USG panels. Effective repair requires diagnosing the exact failure mode before applying compound. Use the matrix below to identify the root cause of your drywall defects.
| Symptom | Root Cause | USG Product & Repair Context |
|---|---|---|
| Protruding fastener heads (Nail/Screw Pops) | Lumber shrinkage or improper dimpling depth during installation. | Requires USG Type W or S screws and setting-type compound to prevent recurrence. |
| Recurring hairline cracks at tapered seams | Structural movement or using pre-mixed compound for the bedding coat. | Switch to USG Durabond setting-type compound for high-tensile strength at the joint. |
| Blistering or peeling paper facing | Moisture intrusion or applying paint before compound fully cured. | Assess core integrity of USG Mold Tough panels; encapsulate or replace based on moisture readings. |
| Ridging at butt joints | Thermal expansion pushing square edges together. | Requires routing out the joint and filling with USG Easy Sand setting compound. |
Troubleshooting Nail Pops and Screw Pops in Sheetrock
Nail pops are rarely caused by the fastener backing out on its own. In wood framing, the joist or stud shrinks as it dries, pulling away from the gypsum core. The drywall shifts, and the fastener head pushes through the paper facing. If you are repairing an older installation that used smooth-shank drywall nails, you must introduce modern fasteners to stabilize the panel.
The Double-Screw Stabilization Protocol
- Locate the Framing: Use a stud finder to confirm the exact center of the wood or steel framing behind the pop.
- Drive Securing Screws: Drive one USG Drywall Screw (Type W for wood, Type S for steel) exactly 1.5 inches above the pop, and a second screw 1.5 inches below it.
- Control the Dimple: The screw head must break the paper facing and sit exactly 1/32-inch deep into the gypsum core. If it is flush, it lacks holding power; if it is too deep, it blows out the core.
- Extract or Set the Old Fastener: If the original fastener is a nail, pull it with a pry bar. If it is a screw, drive it slightly deeper into the stud.
- Apply Compound: Fill the three dimples with USG Sheetrock Brand Easy Sand 45 setting-type compound. Avoid pre-mixed all-purpose compound for the first coat, as its high shrinkage rate will cause the repair to sink and crack.
Repairing Recurring Joint Cracks on USG Tapered Edges
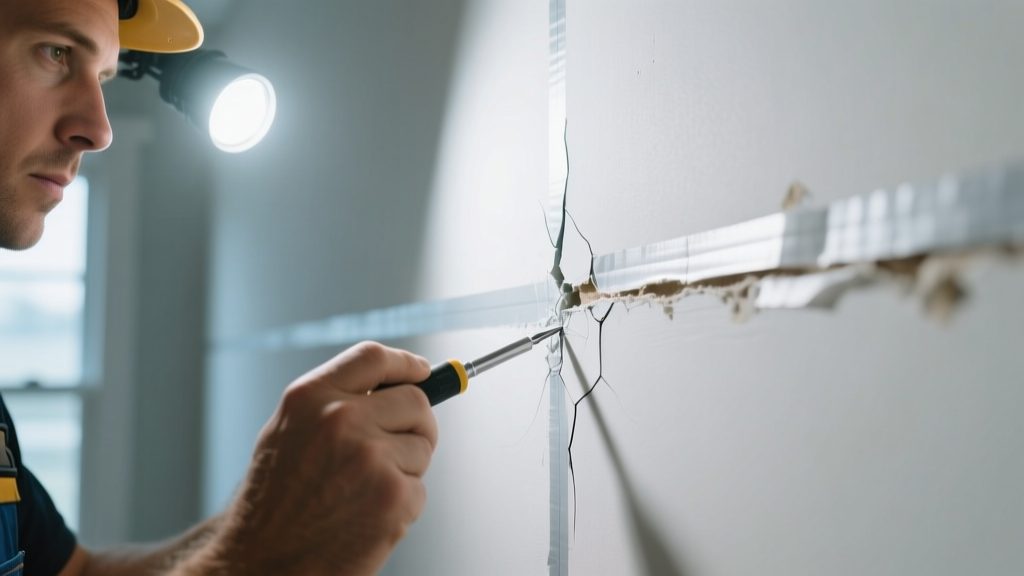
USG Sheetrock panels feature precision-tapered longitudinal edges designed to hide the thickness of joint tape and compound. When a taped seam cracks repeatedly, it indicates that the joint treatment lacks the tensile strength to resist structural micro-movements.
Compound and Tape Selection for High-Stress Seams
The most common error in drywall repair is using pre-mixed joint compound (like USG Ultra Lightweight) for the bedding coat. Pre-mixed compounds dry by evaporation, shrinking significantly as water leaves the mixture. This shrinkage pulls the tape away from the tapered edge.
For a permanent repair on a recurring crack, route out the existing crack with a utility knife to create a shallow V-groove. Fill the groove and embed USG Sheetrock Brand Paper Tape using USG Durabond 90 Setting-Type Joint Compound. Durabond cures via a chemical reaction, resulting in zero shrinkage and a compressive strength that rivals the gypsum core itself. Once cured, apply a final skim coat with USG Ultra Lightweight for easy sanding.
Assessing Moisture and Mold Damage in USG Mold Tough Panels
USG manufactures specialized moisture-resistant products, including Mold Tough Gypsum Panels and Fiberock Aqua-Tough. When these panels are exposed to leaks or high humidity, the repair strategy depends entirely on the integrity of the gypsum core, not just the appearance of the facing paper.
According to the USG Gypsum Construction Handbook, water-resistant gypsum panels are designed to withstand intermittent moisture exposure, but they are not waterproof. Prolonged saturation will compromise the structural integrity of the core regardless of the facing material.
The Moisture Meter Threshold Test
Before attempting to patch a water-stained ceiling or wall, use a pin-type moisture meter on the gypsum core. If the reading exceeds 15%, the core has lost its cohesive strength and must be cut out and replaced. If the reading is below 12% and the core feels rock-hard when pressed with a thumb, the panel is salvageable. Seal the stain with an oil-based or shellac-based primer (like Zinsser B-I-N) to prevent tannin bleed-through, then skim coat with USG Sheetrock Brand Topping Compound.
Step-by-Step Patching Protocol for Medium Impacts (4x4 to 8x8 inches)
For holes too large for a simple compound fill but too small to require cutting back to the studs, a backing-strip repair provides the most durable, invisible finish on USG standard and lightweight panels.
- Step 1: Square the Hole. Use a drywall saw to cut the damaged area into a perfect square or rectangle. This ensures your patch piece will have uniform seams.
- Step 2: Prepare Backing Strips. Cut two strips of 1x3 pine or spare USG drywall 3 inches longer than the height of the hole.
- Step 3: Secure the Strips. Insert the strips into the hole, holding them tight against the back of the existing drywall. Drive drywall screws through the face of the existing wall into the strips, spacing them 4 inches apart.
- Step 4: Cut and Install the Patch. Cut a new piece of USG Sheetrock to the exact dimensions of the hole. Screw it into the exposed center of your backing strips.
- Step 5: Tape and Bed. Apply USG paper tape over all four seams, embedding it in a thick layer of Easy Sand 45 setting compound. Force the compound deep into the gaps.
- Step 6: Top and Sand. After the setting compound hardens (approx. 45 minutes), apply two thin, wide coats of USG Ultra Lightweight compound, feathering the edges out 12 inches in all directions to hide the patch.
Expert FAQ on USG Drywall Repair
Can I use USG Durabond for the final skim coat over a patch?
No. Durabond is incredibly hard and virtually impossible to sand smooth without specialized equipment and aggressive abrasives. Use Durabond strictly for the bedding and taping coats where structural strength is required. Always transition to a pre-mixed topping compound (like USG Ultra Lightweight) for the final skim coat, as it sands effortlessly to a Level 4 or Level 5 finish.
Why is my USG Sheetrock ceiling sagging between the joists?
Ceiling sag is typically caused by installing 1/2-inch standard panels on joists spaced 24 inches on-center, or by exposing the panels to high humidity before the roof is sealed. According to ASTM C1396 standards for gypsum board specifications, if you are repairing a sagging ceiling, you must either replace it with 5/8-inch USG Sheetrock, or use 1/2-inch USG Ultralight Ceiling Board, which is specifically engineered with a reinforced fiberglass mesh core to resist sagging on 24-inch framing.
How do I fix a torn paper facing where a wallpaper removal pulled the drywall paper off?
Do not apply joint compound directly over exposed, torn gypsum paper; the moisture in the compound will cause the loose paper to blister and bubble. First, peel away any loosely attached paper. Seal the exposed brown core and torn edges with an oil-based sealer or a dedicated drywall sealer like Gardz. Once the sealer dries, you can safely apply USG Easy Sand setting compound to level the surface without triggering moisture blisters.
Written by
Sarah WhitfieldSarah Whitfield is a chartered quantity surveyor (MRICS) and construction cost analyst with 15 years of experience in material pricing, procurement strategy, and project budgeting. She earned her degree in Construction Management from the University of Reading (UK) and has worked on projects ranging from $2M custom homes to $180M mixed-use developments across North America and Europe. Sarah currently leads cost estimating for BuildMat Insight, maintaining a proprietary database of 4,000+ material price points updated quarterly. She is a frequent contributor to RSMeans cost data panels and has presented at the International Cost Engineering Council (ICEC) congress. Based in Denver, CO, Sarah is an avid trail runner and volunteer mentor for Women in Construction.
More from Sarah Whitfield
View all
Wood & Lumber
What Are the Different Types of Wood? A Builder's Guide
Compare structural softwoods, finish hardwoods, and engineered lumber. Analyze Janka ratings, MOE values, and 2026 pricing for construction.
Aug 4, 2026

Walls & Panels
Steel Framing vs Wood Framing: Corrosion and Moisture Defense
Compare steel framing vs wood framing for moisture resistance. Learn about galvanized coatings, condensation risks, and corrosion protection strategies.
Jul 21, 2026

Stone & Masonry
How to Cut Stone Veneer: Wet Saw vs Grinder Comparison
Compare the best tools for cutting stone veneer. We review wet saws, angle grinders, and chop saws to help you achieve clean, chip-free cuts.
Jul 21, 2026