Steel Stud Framing: How to Build Interior Partition Walls
Learn steel stud framing how to techniques for interior walls. Step-by-step guide covering layout, track installation, deflection, and drywall prep.

Core Principles of Light-Gauge Steel Framing
Framing interior partition walls with cold-formed steel (CFS) requires a fundamentally different approach than traditional wood framing. While wood relies on friction, nail shear strength, and organic flexibility, steel stud framing depends on precise mechanical fastening, rigid track alignment, and specialized deflection detailing. When researching steel stud framing how to methodologies, many guides fail to distinguish between load-bearing structural steel and non-load-bearing interior partitions. This guide focuses strictly on the latter, utilizing light-gauge (25-gauge to 20-gauge) CFS for commercial and high-end residential interior walls.
Quick Decision Matrix: Wood vs. Steel Studs
| Criteria | Wood Studs (2x4) | Steel Studs (3-5/8" 25ga) |
|---|---|---|
| Dimensional Stability | Prone to warping, twisting, and shrinking | 100% straight, zero shrinkage |
| Fire Resistance | Combustible (requires fire-retardant treatment) | Non-combustible (inherently fire-rated) |
| Weight | Heavy (approx. 1.5 lbs/linear ft) | Lightweight (approx. 0.6 lbs/linear ft) |
| Acoustic Performance | High mass transfers low-frequency sound | Flexible flange dampens sound transmission |
Phase 1: Material Sourcing and Tooling
The success of a steel-framed wall hinges on selecting the correct gauge and utilizing specialized fastening tools. According to standards published by the Steel Framing Industry Association, interior non-load-bearing partitions typically utilize 25-gauge (15 mil) or 20-gauge (33 mil) studs. For walls exceeding 10 feet in height or requiring heavy wall-mounted loads (like commercial cabinetry), upgrade to 20-gauge or 18-gauge studs.
Essential Tool Loadout
- Screw Gun: Must feature an adjustable clutch and a minimum speed of 2,500 RPM. A drywall dimpler attachment is critical for the finishing phase.
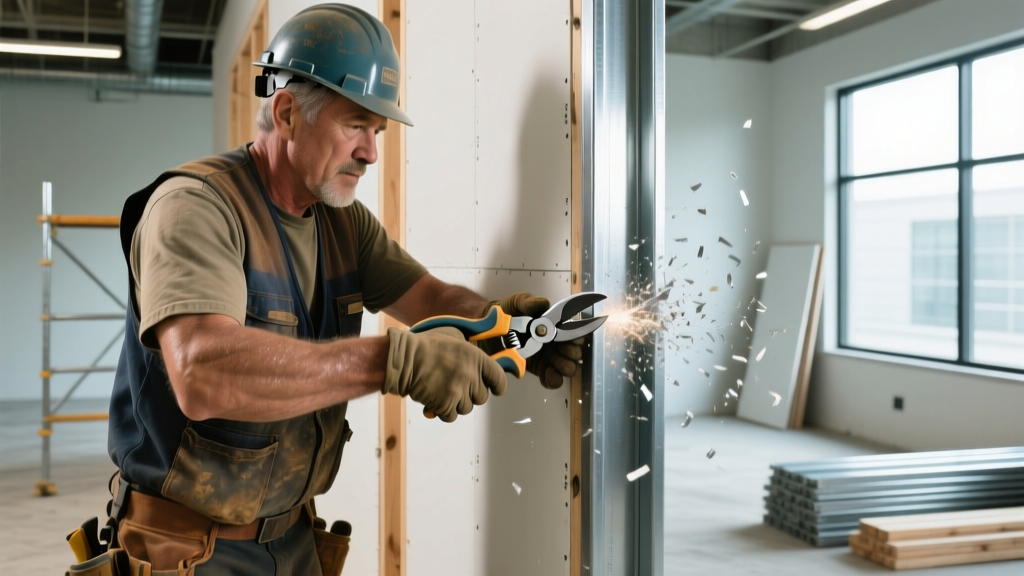
- Aviation Snips: Left-cut, right-cut, and straight-cut snips for modifying stud lengths and cutting utility punchouts.
- Locking C-Clamps (Vise-Grips): Essential for holding tracks and studs in place while driving self-drilling screws. Standard hand pressure is insufficient for steel alignment.
- Fasteners: Use #7 x 7/16-inch wafer-head self-drilling screws (often branded as TEK screws) for 25-gauge steel-to-steel connections. For securing the bottom track to a concrete slab, use 1-1/4-inch powder-actuated pins or 3/16-inch x 1-1/4-inch concrete wedge anchors.
Phase 2: Track Layout and Anchoring
The track system forms the structural boundary of your partition. Improper track installation guarantees crooked studs and drywall seam failures.
- Acoustical Sealant Application: Before laying the bottom track, run a continuous 3/8-inch bead of acoustical sealant along the floor where the track will sit. This prevents sound flanking and minor moisture migration.
- Track Fastening: Secure the bottom track to the concrete subfloor using pins or anchors spaced a maximum of 24 inches on center (O.C.), and within 2 inches of every track splice or corner.
- Laser Alignment: Project a plumb laser line from the bottom track to the ceiling structure to mark the top track. Do not rely on a plumb bob or standard level for commercial ceiling heights.
- Deflection Track Installation: If the partition extends to the underside of a concrete floor deck above, you must install a deflection track (slip track) rather than a standard top track. This allows the building structure to deflect under live loads without crushing the wall or cracking the drywall. Leave a 1/2-inch to 3/4-inch gap between the top of the studs and the top track web.
Phase 3: Hanging and Securing the Studs
Steel studs are asymmetrical; they have a solid web with punched utility holes and flanges that face a specific direction. Proper orientation is critical for utility rough-ins and structural rigidity.
Always orient the studs so the utility punchouts (knockouts) face the same direction and are aligned at the exact same height. If studs are flipped randomly, electricians and plumbers will be forced to drill new holes through the steel web, compromising the structural integrity of the stud and violating fire-stamping codes.
Insert the bottom flange of the stud into the bottom track, then angle the stud up into the top track (or deflection track). For standard deflection tracks, use slide clips or bypass clips to secure the stud to the track web while maintaining the vertical deflection gap. Space studs at 16 inches or 24 inches O.C., depending on the drywall thickness and fire-rating requirements specified by the Gypsum Association.
Blocking and Bracing Requirements
Unlike wood, steel studs cannot easily be toe-nailed for blocking. You must fabricate or purchase specific steel blocking components:
- Fire Blocking: Required in concealed spaces at 10-foot vertical intervals. Use flat strap steel (minimum 1-1/2 inches wide, 33 mil thick) screwed horizontally across the stud webs.
- Cabinet Backing: For heavy wall-mounted fixtures, install 1/2-inch CDX plywood sandwiched between two steel studs, or use specialized heavy-duty steel backing plates manufactured by companies like ClarkDietrich.
- Mid-wall Bracing: For walls taller than 8 feet, install flat strap bridging at mid-height to prevent stud flange bowing under lateral pressure.
Phase 4: Drywall Attachment and Finishing Prep
Attaching gypsum board to steel requires fine-thread Type S screws. Using coarse-thread screws (designed for wood) will strip the thin steel flange and result in failed holding power.
- Screw Length: Use 1-inch screws for 1/2-inch drywall, and 1-1/4-inch screws for 5/8-inch drywall.
- Spacing: Fasten drywall to the studs at a maximum of 12 inches O.C. along the edges and 16 inches O.C. in the field.
- Clutch Calibration: This is the most common failure point. If the screw gun clutch is set too high, the screw will overdrive, breaking the paper face of the drywall and destroying the holding power. If set too low, the screw head will protrude, making taping impossible. Calibrate your clutch on a scrap piece of steel and drywall before starting the main wall.
2026 Cost Estimation for Steel Framing
Material costs for light-gauge steel have stabilized following the supply chain fluctuations of the early 2020s. Below is a current cost breakdown for a standard 100-linear-foot interior partition wall (assuming 10-foot height, 3-5/8" 25-gauge studs at 16" O.C.).
| Component | Unit Cost | Total (100 LF Wall) |
|---|---|---|
| 3-5/8" 25ga Studs (10ft) | $6.50 / ea | $487.50 (75 studs) |
| Top and Bottom Track | $4.20 / LF | $840.00 (200 LF) |
| Fasteners & Sealant | Lump Sum | $115.00 |
| Labor (Prevailing Commercial) | $8.50 / SF | $8,500.00 (1000 SF) |
| Total Estimated Cost | $9.94 / SF | $9,942.50 |
*Note: Costs reflect national averages for commercial union labor and wholesale material pricing. Residential or non-union labor rates may reduce the labor component by 20-30%.
Final Inspection Checklist
Before scheduling the drywall crew, verify the following critical framing milestones to ensure compliance with Association of the Wall and Ceiling Industry (AWCI) standards:
- Verify all bottom tracks are sealed with acoustical caulk.
- Confirm top deflection gaps are maintained and slide clips are properly fastened.
- Check that no stud flanges are bowed inward more than 1/8-inch (indicates improper screw seating or damaged material).
- Ensure all electrical wires passing through steel punchouts are protected by plastic grommets to prevent the sharp steel edges from slicing the wire insulation over time.
- Verify heavy-load blocking is securely tied to a minimum of two adjacent studs.
Written by
Sarah WhitfieldSarah Whitfield is a chartered quantity surveyor (MRICS) and construction cost analyst with 15 years of experience in material pricing, procurement strategy, and project budgeting. She earned her degree in Construction Management from the University of Reading (UK) and has worked on projects ranging from $2M custom homes to $180M mixed-use developments across North America and Europe. Sarah currently leads cost estimating for BuildMat Insight, maintaining a proprietary database of 4,000+ material price points updated quarterly. She is a frequent contributor to RSMeans cost data panels and has presented at the International Cost Engineering Council (ICEC) congress. Based in Denver, CO, Sarah is an avid trail runner and volunteer mentor for Women in Construction.
More from Sarah Whitfield
View all
Wood & Lumber
What Are the Different Types of Wood? A Builder's Guide
Compare structural softwoods, finish hardwoods, and engineered lumber. Analyze Janka ratings, MOE values, and 2026 pricing for construction.
Aug 4, 2026

Walls & Panels
Steel Framing vs Wood Framing: Corrosion and Moisture Defense
Compare steel framing vs wood framing for moisture resistance. Learn about galvanized coatings, condensation risks, and corrosion protection strategies.
Jul 21, 2026

Stone & Masonry
How to Cut Stone Veneer: Wet Saw vs Grinder Comparison
Compare the best tools for cutting stone veneer. We review wet saws, angle grinders, and chop saws to help you achieve clean, chip-free cuts.
Jul 21, 2026