Cost Analysis of Different Types of Wood Joints in Construction
Compare the cost, labor time, and structural value of different types of wood joints for residential framing and fine woodworking projects.

The Economics of Wood Joinery: Labor vs. Material
When evaluating the different types of wood joints for construction and woodworking, the material cost of the fastener or glue is almost negligible compared to the labor required to execute the connection. A structural timber joint might require zero metal fasteners, but the skilled labor to cut a blind mortise and tenon can push the cost of a single connection past $250. Conversely, a modern butt joint reinforced with engineered steel connectors costs less than $5 in materials and takes a framer roughly three minutes to install. Understanding this labor-to-material ratio is critical for accurate project estimating and value engineering in 2026.
Structural Framing Joints: Cost & Load-Bearing Value
Modern light-frame and heavy timber construction rely heavily on standardized connections governed by the American Wood Council's National Design Specification (NDS). The choice of joint here dictates not just the budget, but the lateral and gravity load paths of the entire structure.
Butt Joints with Metal Connectors (Light-Frame)
The standard butt joint—where the end grain of one member meets the face or edge of another—has virtually no inherent structural strength. It relies entirely on mechanical fasteners. In 2026, the industry standard for high-wind and seismic zones is the use of hot-dip galvanized or stainless steel connectors, such as the Simpson Strong-Tie H2.5A hurricane tie or LUS210 joist hangers. According to the Simpson Strong-Tie Connector Catalog, these connectors provide engineered withdrawal and shear capacities that far exceed traditional toenailing.
- Material Cost: $0.85 to $4.50 per connector (plus $0.15 per 10d common nail or structural screw).
- Labor Time: 2 to 4 minutes per joint for an experienced framer using a pneumatic nailer.
- Best Application: Truss-to-plate connections, joist-to-beam bearing, and shear wall boundary nailing.
Mortise and Tenon (Heavy Timber Framing)
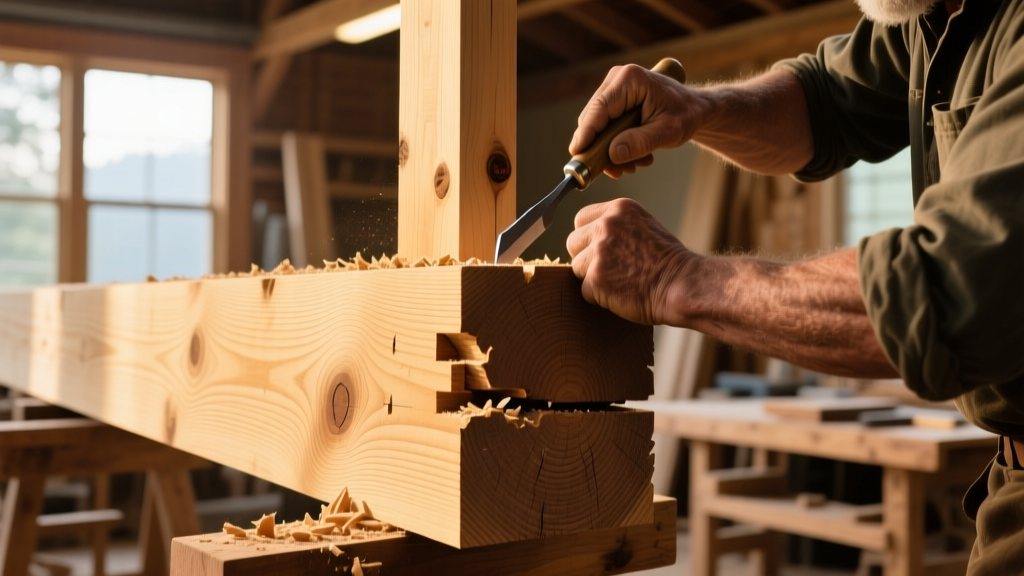
For heavy timber and post-and-beam architecture, the traditional mortise and tenon joint remains the gold standard for aesthetic and structural integrity. This joint transfers compressive loads directly through wood-to-wood bearing surfaces, often secured with hardwood drawpegs rather than steel. The USDA Forest Products Laboratory Wood Handbook notes that properly fitted timber joints distribute stress more evenly across the grain, reducing localized crushing that can occur around steel bolt holes.
- Material Cost: $2.00 to $5.00 for hardwood pegs (e.g., white oak or locust); negligible glue costs.
- Labor Time: 45 to 90 minutes per joint for a skilled timber framer using a chain mortiser and hand chisels.
- Best Application: Exposed architectural beams, king post trusses, and historic restoration.
Comparative Cost Matrix: Structural Joints
| Joint Type | Material Cost | Labor Time | Total Cost (at $110/hr) | Shear Capacity |
|---|---|---|---|---|
| Toenailed Butt Joint (3x 16d) | $0.45 | 1.5 mins | $3.20 | Low (approx. 140 lbs/nail) |
| Engineered Joist Hanger (LUS210) | $3.85 | 3.0 mins | $9.35 | High (up to 2,400 lbs) |
| Lapped Splice (Bolted) | $6.50 | 12.0 mins | $28.50 | Very High (dependent on bolt grade) |
| Blind Mortise & Tenon (Timber) | $3.00 | 75.0 mins | $140.50 | Extreme (wood bearing limit) |
Fine Woodworking & Cabinetry: ROI on Aesthetics and Durability
When transitioning from structural framing to interior millwork, the evaluation of different types of wood joints shifts from pure load-bearing metrics to drawer-box longevity, visual appeal, and resistance to seasonal wood movement.
Dovetail vs. Box (Finger) Joints
The through-dovetail is widely considered the hallmark of premium cabinetry. Its flared pin-and-tail geometry provides immense mechanical tensile strength, preventing drawer fronts from pulling away from the sides even if the adhesive fails. However, the cost disparity between hand-cut, router-cut, and CNC-cut dovetails is massive.
Expert Insight: For production cabinet shops in 2026, hand-cutting dovetails is financially unviable for standard lines. A 5-axis CNC router can mill a perfect 1:8 ratio dovetail in 3 minutes, amortizing the $85,000 machine cost over thousands of units. Hand-cutting the same joint takes a master craftsman 40 minutes, adding roughly $75 in labor per drawer box.
The Dado and Rabbet: The Workhorses of Casework
For shelving and cabinet carcasses, the dado (a trench cut across the grain) and rabbet (a step cut at the edge) offer the best balance of cost and structural value. A 1/4-inch deep dado cut on a sliding table saw provides a massive glue surface area and mechanical registration for cabinet bottoms and fixed shelves. Using a compression spiral router bit prevents tear-out on melamine and plywood veneers, ensuring a clean joint that requires minimal edge-banding or touch-up.
Pocket Hole Joinery: Speed vs. Long-Term Value
Pocket hole joinery, popularized by brands like Kreg Tool, drives a coarse-threaded steel screw at a 15-degree angle through one board into the end grain of another. It is exceptionally fast and requires minimal clamping. However, it offers poor resistance to racking (lateral twisting) compared to a mortise and tenon or dowel joint. In high-use applications like kitchen island bases or heavy dining tables, pocket screws can eventually wallow out their pilot holes under cyclic loading, leading to joint failure. They are best reserved for face frames, light-duty utility shelving, and temporary jigs.
Hidden Costs: Failure Modes and Edge Cases
Selecting a joint based solely on initial fabrication cost often leads to expensive callbacks. Wood is a hygroscopic, anisotropic material, meaning it moves differently along different axes as moisture content (MC) fluctuates. Ignoring these physical realities results in catastrophic joint failures.
Never design a rigid, glued joint that restricts cross-grain wood movement. For example, gluing a solid wood tabletop directly into a rigid apron using a standard mortise and tenon will result in the panel splitting down the center when it expands in high summer humidity. Always use figure-8 fasteners, Z-clips, or slotted screw holes to allow the panel to float and expand perpendicular to the grain.
Moisture Content Mismatch
Joining wood with disparate moisture levels guarantees future gaps or splits. If you join a kiln-dried hardwood rail (6% MC) to an air-dried stile (14% MC) using a tight-fitting dowel joint, the stile will shrink as it acclimates to the interior environment, crushing the dowels and breaking the glue line. Always acclimate all components to the final installation environment (typically 35-45% relative humidity) for a minimum of 14 days before cutting joints.
End-Grain Gluing Limitations
Polyvinyl acetate (PVA) wood glues and polyurethanes rely on long-grain fiber penetration for strength. End-grain acts like a bundle of microscopic straws, wicking glue away from the joint interface and resulting in a bond that is often weaker than the wood itself. To value-engineer an end-grain joint, apply a 'sizing' coat of glue thinned with 10% water, let it cure to seal the pores, and then apply the standard glue layer for the final assembly.
Decision Framework: Which Joint to Specify?
Use the following practical framework to specify the most cost-effective and structurally sound joint for your specific application.
Project Specification Flowchart
- Is the joint hidden and bearing heavy vertical shear loads (e.g., floor joists)?
Specify: Butt joint with engineered steel joist hangers. (Maximizes speed and code compliance). - Is the joint exposed and bearing heavy compressive loads (e.g., timber pergola)?
Specify: Mortise and tenon with hardwood drawpegs. (Maximizes aesthetics and eliminates steel corrosion risks). - Is the joint for a high-use drawer box in premium cabinetry?
Specify: CNC-milled 1:8 ratio dovetails in 1/2-inch Baltic birch plywood. (Balances premium optics with production efficiency). - Is the joint for a solid wood panel requiring seasonal expansion?
Specify: Frame-and-panel construction with floating panel in a 1/4-inch deep rabbet/dado groove. (Prevents panel splitting).
By aligning the mechanical requirements of the structure with the economic realities of modern fabrication, builders and woodworkers can optimize their budgets without sacrificing the longevity or integrity of the final product. The true value of any wood joint lies not in its historical prestige, but in its appropriate application relative to the forces it must withstand and the environment it will inhabit.
Written by
Sarah WhitfieldSarah Whitfield is a chartered quantity surveyor (MRICS) and construction cost analyst with 15 years of experience in material pricing, procurement strategy, and project budgeting. She earned her degree in Construction Management from the University of Reading (UK) and has worked on projects ranging from $2M custom homes to $180M mixed-use developments across North America and Europe. Sarah currently leads cost estimating for BuildMat Insight, maintaining a proprietary database of 4,000+ material price points updated quarterly. She is a frequent contributor to RSMeans cost data panels and has presented at the International Cost Engineering Council (ICEC) congress. Based in Denver, CO, Sarah is an avid trail runner and volunteer mentor for Women in Construction.
More from Sarah Whitfield
View all
Wood & Lumber
What Are the Different Types of Wood? A Builder's Guide
Compare structural softwoods, finish hardwoods, and engineered lumber. Analyze Janka ratings, MOE values, and 2026 pricing for construction.
Aug 4, 2026

Walls & Panels
Steel Framing vs Wood Framing: Corrosion and Moisture Defense
Compare steel framing vs wood framing for moisture resistance. Learn about galvanized coatings, condensation risks, and corrosion protection strategies.
Jul 21, 2026

Stone & Masonry
How to Cut Stone Veneer: Wet Saw vs Grinder Comparison
Compare the best tools for cutting stone veneer. We review wet saws, angle grinders, and chop saws to help you achieve clean, chip-free cuts.
Jul 21, 2026