Types of Wood Pictures: Visual ID Guide for Lumber Treatment
Learn how to analyze types of wood pictures to identify grain, pores, and species for accurate chemical treatment and exterior preservation.

The Critical Role of Visual Identification in Wood Preservation
When sourcing lumber for exterior, ground-contact, or high-moisture applications, relying solely on supplier tags or mill stamps is a significant liability. Visual verification using high-resolution types of wood pictures allows contractors, architects, and preservationists to confirm species, grain orientation, and heartwood-to-sapwood ratios before applying chemical treatments. The anatomical structure of wood—visible through macro photography and end-grain analysis—dictates its permeability, which directly determines how effectively preservatives like Alkaline Copper Quaternary (ACQ) or borates can penetrate the cellular matrix.
Misidentifying a wood species can lead to catastrophic treatment failures. For instance, attempting to pressure-treat impermeable heartwood with waterborne preservatives results in superficial shell-treatment, leaving the core vulnerable to decay fungi and formosan subterranean termites. By cross-referencing job-site lumber with authoritative visual databases, such as The Wood Database, professionals can make data-driven decisions regarding the correct American Wood Protection Association (AWPA) retention levels and application methods.
The Science of Wood Permeability and Visual Grain Analysis
Wood permeability is governed by the size, distribution, and connectivity of its vascular elements. When analyzing pictures of wood types, preservationists look for specific anatomical markers that indicate how a chemical will flow through the timber.
Sapwood, the living outer layer of the tree, is highly permeable and readily accepts preservative treatments. Heartwood, the inactive structural core, is often clogged with extractives, resins, or tyloses, making it highly resistant to chemical penetration. In high-resolution wood pictures, sapwood typically appears significantly lighter in color than heartwood. When field-treating cut ends or drilled holes, identifying the boundary between these two zones is critical for selecting the appropriate solvent-based or water-based carrier.
Decoding Types of Wood Pictures: Key Species for Exterior Use
Different species require vastly different treatment protocols. Below is an analysis of common exterior lumber species, focusing on the visual cues found in reference pictures and their corresponding preservation requirements.
Southern Yellow Pine (SYP)
Visual Cues: SYP exhibits a stark, high-contrast transition between light-colored earlywood (spring growth) and dense, dark latewood (summer growth). End-grain pictures reveal large, abundant resin canals.
Treatment Profile: The sapwood of SYP is highly permeable and is the primary species used for industrial pressure treating with Micronized Copper Azole (MCA) or Copper Azole (CA-C). However, the dense latewood bands can restrict lateral penetration. For field treatment of cut ends, a minimum of two coats of copper naphthenate (2% copper metal) is required per AWPA Standard M4.
Western Red Cedar
Visual Cues: Pictures of Western Red Cedar show a remarkably uniform, straight grain with a fine, even texture and a lack of visible resin canals. The heartwood ranges from pinkish-brown to deep reddish-brown.
Treatment Profile: The heartwood contains natural extractives called thujaplicins, which provide inherent decay resistance (Class 1 durability). However, the narrow sapwood band is completely susceptible to rot. If cedar is to be used in ground contact, the sapwood must be treated with borate preservatives, which penetrate well but require protection from liquid water leaching.
White Oak vs. Red Oak
Visual Cues: Differentiating these species in pictures requires examining the end-grain and ray flake patterns. Red oak features large, open earlywood pores. White oak pores are plugged with cellular growths called tyloses, which are visible under 10x macro magnification. White oak also displays longer, more prominent ray flecks on quarter-sawn surfaces.
Treatment Profile: This visual distinction is a matter of structural survival. Red oak is highly permeable and treats easily, but it is entirely unsuitable for exterior ground contact due to rapid moisture wicking through its open vessels. White oak is virtually impermeable to water and liquid preservatives. Attempting to pressure-treat white oak with standard waterborne chemicals will fail; it must be used untreated (relying on natural durability) or treated via specialized thermal modification processes.
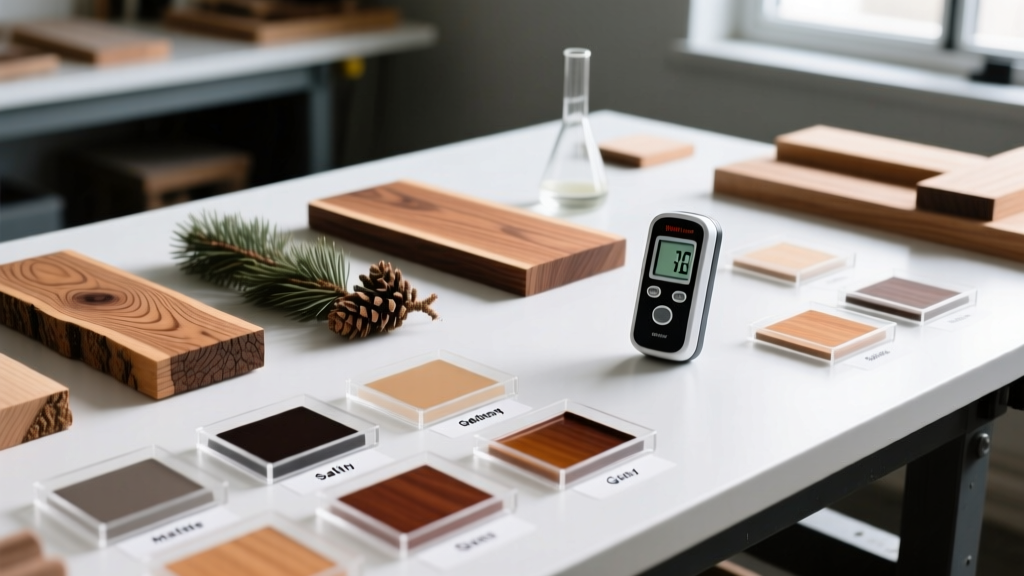
Visual Identification Matrix: Grain, Pores, and Treatment Penetration
The following matrix correlates visual characteristics observable in macro wood pictures with standardized treatment parameters.
| Species | Visual End-Grain Cue | Pore Structure | AWPA Retention (pcf) for Ground Contact | Recommended Field Treatment |
|---|---|---|---|---|
| Southern Yellow Pine | High contrast early/latewood; resin canals | Moderate to High | 0.28 (MCA-C) | Copper Naphthenate (Solvent) |
| Douglas Fir | Narrow latewood bands; traumatic resin canals | Low (Refractory) | 0.28 (MCA-C) | Borate Glycol Gel (Incising required) |
| Western Red Cedar | Uniform texture; no resin canals | Low | N/A (Naturally durable heartwood) | Tim-bor / Bora-Care (Sapwood only) |
| Red Oak | Large, open earlywood vessels | Very High | Not recommended for exterior | N/A (Interior use only) |
Field Identification: Using Visual Databases for On-Site Verification
Contractors frequently encounter unlabeled or mislabeled lumber bundles on active job sites. Before applying expensive field-applied preservatives or water-repellent finishes, follow this visual verification protocol:
- Prepare the End-Grain: Use a block plane or a sharp utility knife to shave a 1-inch section of the board's end-grain. Sanding clogs the pores with dust, obscuring the anatomical features necessary for visual ID.
- Capture Macro Imagery: Use a smartphone equipped with a clip-on 10x or 15x macro lens. Ensure adequate lighting to highlight the cellular cavities.
- Cross-Reference Visual Databases: Compare your captured images against verified types of wood pictures and end-grain anatomical charts. Look specifically for the presence, size, and arrangement of vessels and rays.
- Perform the Straw Test (For Oaks): If visual ID suggests an oak species, cut a small piece of end-grain, submerge one end in water, and blow through the other end like a straw. Air bubbles indicate open vessels (Red Oak); no bubbles indicate plugged tyloses (White Oak).
- Verify Moisture Content: Before applying any field treatment, use a pin-type moisture meter. Wood must be below 19% moisture content for solvent-based preservatives to penetrate effectively without trapping water inside the cellular structure.
Common Misidentifications and Treatment Failures
A frequent error occurs when contractors misidentify dense, refractory species like Douglas Fir or White Oak as standard pine, subsequently applying film-forming polyurethanes or solid acrylic stains. Because these woods have low permeability, moisture that enters through micro-checks becomes trapped behind the impermeable film finish. This leads to sub-surface fungal colonization, severe peeling, and accelerated structural degradation. Always verify the species visually and opt for penetrating oil-based finishes (like raw linseed oil mixed with copper preservatives) for low-permeability exterior woods.
Accurate preservation begins with accurate identification. By leveraging detailed types of wood pictures and understanding the underlying cellular anatomy of timber, building professionals can align their chemical treatments with the biological realities of the wood. This prevents premature rot, ensures compliance with AWPA standards, and maximizes the lifecycle ROI of exterior wood structures. For comprehensive guidelines on chemical retention levels and species-specific treatment mandates, always consult the latest American Wood Protection Association (AWPA) Book of Standards.
Written by
Elena RodriguezElena Rodriguez is a civil engineer and technical writer specializing in concrete technology, masonry systems, and ASTM/ACI compliance. She earned her B.S. in Civil Engineering from Texas A&M University and spent a decade at a materials testing laboratory, performing over 2,000 concrete compressive strength tests and masonry prism evaluations. Elena is an ACI-certified Field Testing Technician (Grade I) and a member of ASTM Committee C12 on Natural Building Stone. She currently consults on forensic engineering cases involving concrete failures and moisture intrusion. Based in San Antonio, TX, Elena is a proud member of the Society of Women Engineers (SWE) and coaches her daughter's FIRST Robotics team.
More from Elena Rodriguez
View all
Walls & Panels
Cost Analysis: Light Gauge Steel Framing Advantages and Disadvantages
Evaluate light gauge steel framing advantages and disadvantages through a strict cost analysis lens, comparing material, labor, and lifecycle expenses.
Aug 4, 2026

Walls & Panels
Gypsum Board Types: Exact Specifications, Thickness & Dimensions
Compare standard, Type X, and moisture-resistant gypsum board types. Get exact specifications, thicknesses, dimensions, and ASTM standards for your project.
Aug 4, 2026

Fire Resistance
Best Fire-Resistant Outdoor Decking Materials: 2026 Buyer Guide
Discover the best fire-resistant outdoor decking materials for 2026. Compare Class A PVC, aluminum, and hardwood options for WUI compliance and safety.
Aug 4, 2026