Evaluating Wood Floor Options: Installation Best Practices
Compare top wood floor options and master installation best practices. Learn moisture acclimation, subfloor prep, and fastening techniques for lasting results.

Selecting Between Primary Wood Floor Options
Choosing the correct flooring material dictates the entire installation methodology. The structural composition of the wood determines its dimensional stability, fastening requirements, and environmental tolerances. Before unrolling vapor barriers or setting nailers, installers must align the material properties with the site conditions.
| Wood Floor Option | Dimensional Stability | Grade Suitability | Fastening Methods | Refinishing Cycles |
|---|---|---|---|---|
| Solid Hardwood (3/4") | Low (Expands/contracts significantly across the grain) | Above Grade & On Grade only | Nail, Staple, Blind-cleat | 5 to 8 cycles |
| Engineered Hardwood (Plywood Core) | High (Cross-laminated layers restrict lateral movement) | Above, On, and Below Grade | Glue-down, Float, Nail/Staple | 1 to 4 cycles (depends on wear layer) |
| Structural Composite Lumber | Very High (Minimal hygroscopic movement) | All Grades (with proper moisture barriers) | Glue-down, Mechanical hidden clips | 0 (Color is throughout; cannot be sanded) |
For planks exceeding 5 inches in width, solid hardwood becomes highly susceptible to seasonal cupping. In these scenarios, engineered wood floor options with a minimum 4mm sawn veneer and a multi-ply Baltic birch core are strongly recommended to maintain structural integrity across seasonal humidity swings.
The Moisture Imperative: Acclimation and Testing
Moisture-related failures account for over 80% of hardwood flooring callbacks. Wood is hygroscopic; it continuously exchanges moisture with the surrounding air until it reaches Equilibrium Moisture Content (EMC). Installation must only occur when the wood, the subfloor, and the interior environment are in equilibrium.
Acclimation Protocols
Acclimation is not merely a waiting period; it is an active conditioning process. Delivering wood to a site and leaving it in unopened boxes for a week is a critical failure point.
- Unbox and Cross-Stack: Remove all plastic packaging. Cross-stack the bundles with 1/2" spacers between layers to allow air circulation on all four sides of every plank.
- Climate Control: The building's permanent HVAC system must be operational and maintaining normal living conditions (typically 60-80°F and 30-50% relative humidity) for at least 5 days prior to delivery.
- Timeframe: Solid 3/4" oak typically requires 7 to 14 days to acclimate. Exotic species with high density (e.g., Ipe, Brazilian Walnut) may require 14 to 21 days due to slower moisture transfer rates.
Quantitative Moisture Testing
Visual inspection is insufficient. Installers must use calibrated moisture meters to verify readiness.
- Subfloor Limits: Plywood subfloors must read below 12% Moisture Content (MC). OSB must read below 10% MC. Concrete slabs must be tested via in-situ relative humidity probes (ASTM F2170), yielding results below 75% RH.
- Differentials: For solid 3/4" hardwood, the MC difference between the flooring and the wood subfloor must not exceed 2% to 4% (depending on plank width). For engineered wood, the differential must be within 1% to 2% of the manufacturer's specification.
Subfloor Flatness and Structural Integrity
Even the highest-grade wood floor options will fail if installed over an improperly prepared subfloor. Flatness deviations cause hollow spots, squeaks, and eventual fastener fatigue.
- For 3/4" Solid Nail-Down: Subfloor must be flat to within 3/16" over a 10-foot radius, or 1/8" over a 6-foot radius.
- For Glue-Down Engineered: Tolerances are stricter. Subfloor must be flat to within 1/8" over a 10-foot radius, or 1/16" over a 2-foot radius.
Correction Methods: Low spots in wood subfloors should be built up using layers of 15-lb roofing felt or structural shims. High spots must be sanded down using a heavy-duty floor edger. For concrete slabs, use a Portland cement-based self-leveling underlayment (SLU) with a minimum compressive strength of 4,000 psi. Never use gypsum-based levelers under wood flooring, as they degrade when exposed to moisture or wood adhesives.
Fastening and Adhesive Protocols
The mechanical connection between the flooring and the subfloor dictates the long-term acoustic and structural performance of the floor.
Mechanical Fastening (Nail and Staple)
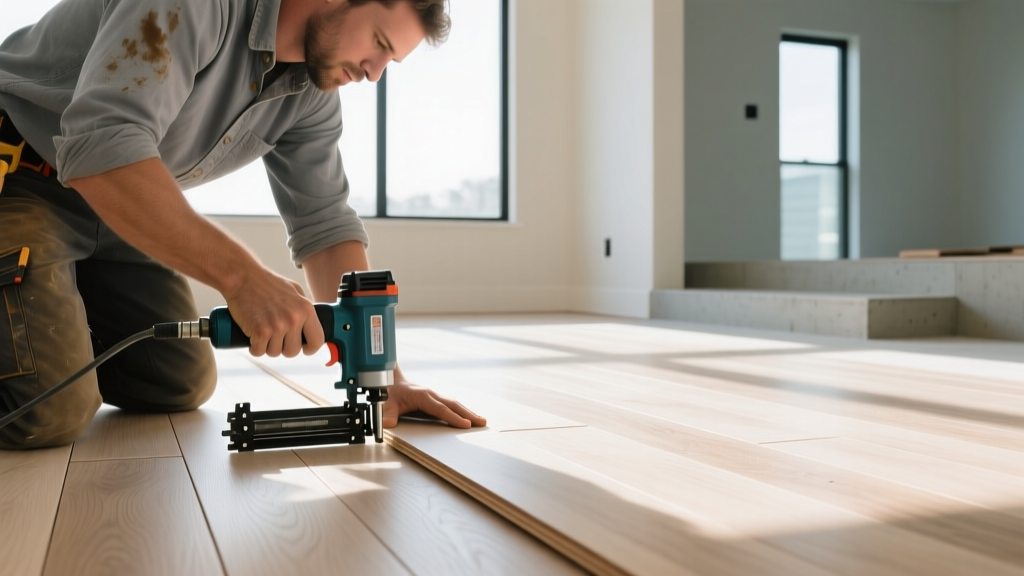
For 3/4" solid wood floor options, blind-nailing or stapling through the tongue is the standard. Use a pneumatic flooring nailer (e.g., Powernail 50P for 18-gauge cleats or 200P for 16-gauge cleats).
- Cleats vs. Staples: While staples offer higher initial withdrawal resistance, cleats allow for slightly more lateral wood movement during seasonal expansion, reducing the risk of the tongue splitting. For wide planks (over 4"), 18-gauge or 16-gauge L-cleats are preferred.
- Spacing: Fasteners should be placed every 8 to 10 inches along the board length, and no more than 3 inches from the ends of the boards to prevent end-lifting.
- Pilot Holes: When hand-nailing the first three rows near the wall where the pneumatic nailer cannot fit, always pre-drill pilot holes to prevent the brittle tongue from fracturing.
Glue-Down Methodologies
Glue-down installation is mandatory for engineered wood over concrete and highly recommended for wide-plank engineered wood over plywood to eliminate deflection.
Modern installation relies heavily on Silane-Modified Polymer (SMP) or advanced urethane adhesives (such as Bona Quantum T or Sika Bond). These adhesives remain permanently elastomeric, allowing the wood to expand and contract without breaking the adhesive bond.
- Trowel Selection: Strictly follow the adhesive manufacturer's trowel notch specifications. A common requirement for engineered wood is a 1/8" x 1/8" x 1/8" U-notch or V-notch. Using a notch that is too small results in inadequate coverage (minimum 80% coverage is required); a notch that is too large causes adhesive to squeeze up between the joints, ruining the finish.
- Working Time: SMP adhesives typically have a working time of 45 to 60 minutes. Only spread adhesive over an area you can cover within that window to prevent skinning.
When installing solid wood over a crawlspace, a Class II vapor retarder (such as Aquabar or 15-lb asphalt-saturated felt) must be placed between the subfloor and the hardwood. Never use a 6-mil polyethylene sheet (Class I vapor barrier) over a wood subfloor, as it can trap moisture within the subfloor assembly, leading to severe rot and mold.
Troubleshooting Moisture Failures
Even with meticulous preparation, environmental shifts can cause physical deformation. Identifying the failure mode is the first step in remediation.
Cupping vs. Crowning
- Cupping (Edges higher than the center): This indicates a moisture imbalance where the bottom of the board is wetter than the top. In crawlspaces, this is often caused by missing ground vapor barriers or inadequate cross-ventilation. The fix involves addressing the moisture source from below and allowing the floor to dry slowly with dehumidifiers. Never sand a cupped floor until moisture readings confirm equilibrium, or it will crown when it finally dries.
- Crowning (Center higher than the edges): This occurs when the top of the board is wetter than the bottom, often due to a surface spill, a leaking appliance, or high ambient humidity combined with a sealed surface finish. It can also result from sanding a previously cupped floor before it fully dried.
Expansion Gaps and Perimeter Detailing
All wood floor options require physical space to accommodate dimensional expansion. Failing to provide adequate expansion gaps will result in compressive buckling, where the floor literally lifts off the subfloor.
- Perimeter Gaps: Maintain a minimum 1/2" to 3/4" expansion gap at all vertical obstructions, including walls, pipes, and cabinetry. This gap must remain completely clear of debris, drywall compound, and wedged spacers during the final installation phase.
- Field Expansion Breaks: For solid hardwood installations exceeding 30 feet in width or 40 feet in length, incorporate a T-molding transition or a concealed expansion break to segment the floor and relieve cumulative lateral pressure.
Authoritative Standards and Resources
Adhering to established industry standards protects both the installer and the homeowner. For comprehensive, up-to-date technical data, consult the following authoritative resources:
- USDA Forest Products Laboratory Wood Handbook: The definitive guide on wood as an engineering material, including exhaustive data on hygroscopic movement, species-specific shrinkage coefficients, and structural load capacities.
- National Wood Flooring Association (NWFA) Technical Guidelines: The industry standard for installation protocols, moisture testing methodologies, and acclimation requirements across all North American climate zones.
- Wood Floor Business Installation Archives: A premier trade publication offering real-world case studies, advanced troubleshooting techniques, and reviews of the latest adhesives and fastening tools.
Mastering the installation of wood flooring requires moving beyond basic carpentry into the realm of building science. By rigorously controlling moisture, respecting subfloor tolerances, and selecting the correct fastening or adhesive chemistry for the specific wood floor options in play, installers ensure a structurally sound and aesthetically flawless result that will endure for decades.
Written by
Sarah WhitfieldSarah Whitfield is a chartered quantity surveyor (MRICS) and construction cost analyst with 15 years of experience in material pricing, procurement strategy, and project budgeting. She earned her degree in Construction Management from the University of Reading (UK) and has worked on projects ranging from $2M custom homes to $180M mixed-use developments across North America and Europe. Sarah currently leads cost estimating for BuildMat Insight, maintaining a proprietary database of 4,000+ material price points updated quarterly. She is a frequent contributor to RSMeans cost data panels and has presented at the International Cost Engineering Council (ICEC) congress. Based in Denver, CO, Sarah is an avid trail runner and volunteer mentor for Women in Construction.
More from Sarah Whitfield
View all
Wood & Lumber
What Are the Different Types of Wood? A Builder's Guide
Compare structural softwoods, finish hardwoods, and engineered lumber. Analyze Janka ratings, MOE values, and 2026 pricing for construction.
Aug 4, 2026

Walls & Panels
Steel Framing vs Wood Framing: Corrosion and Moisture Defense
Compare steel framing vs wood framing for moisture resistance. Learn about galvanized coatings, condensation risks, and corrosion protection strategies.
Jul 21, 2026

Stone & Masonry
How to Cut Stone Veneer: Wet Saw vs Grinder Comparison
Compare the best tools for cutting stone veneer. We review wet saws, angle grinders, and chop saws to help you achieve clean, chip-free cuts.
Jul 21, 2026